
Introduction
Painting Projects | A fresh coat of paint can do much more than change the color of a wall. It can make a dark room feel brighter, give old furniture a second life, define an architectural feature, or completely change the personality of a space. The challenge is knowing which painting projects are worth doing, what materials to use, and how to get a clean result without wasting paint, time, or money.
That’s where thoughtful planning makes a difference.
Whether you want to refresh one wall, transform an old dresser, create a colorful ceiling, or experiment with decorative techniques, painting gives you one of the most flexible ways to update a home. You can keep the project simple or use more advanced techniques once you become comfortable with preparation and application.
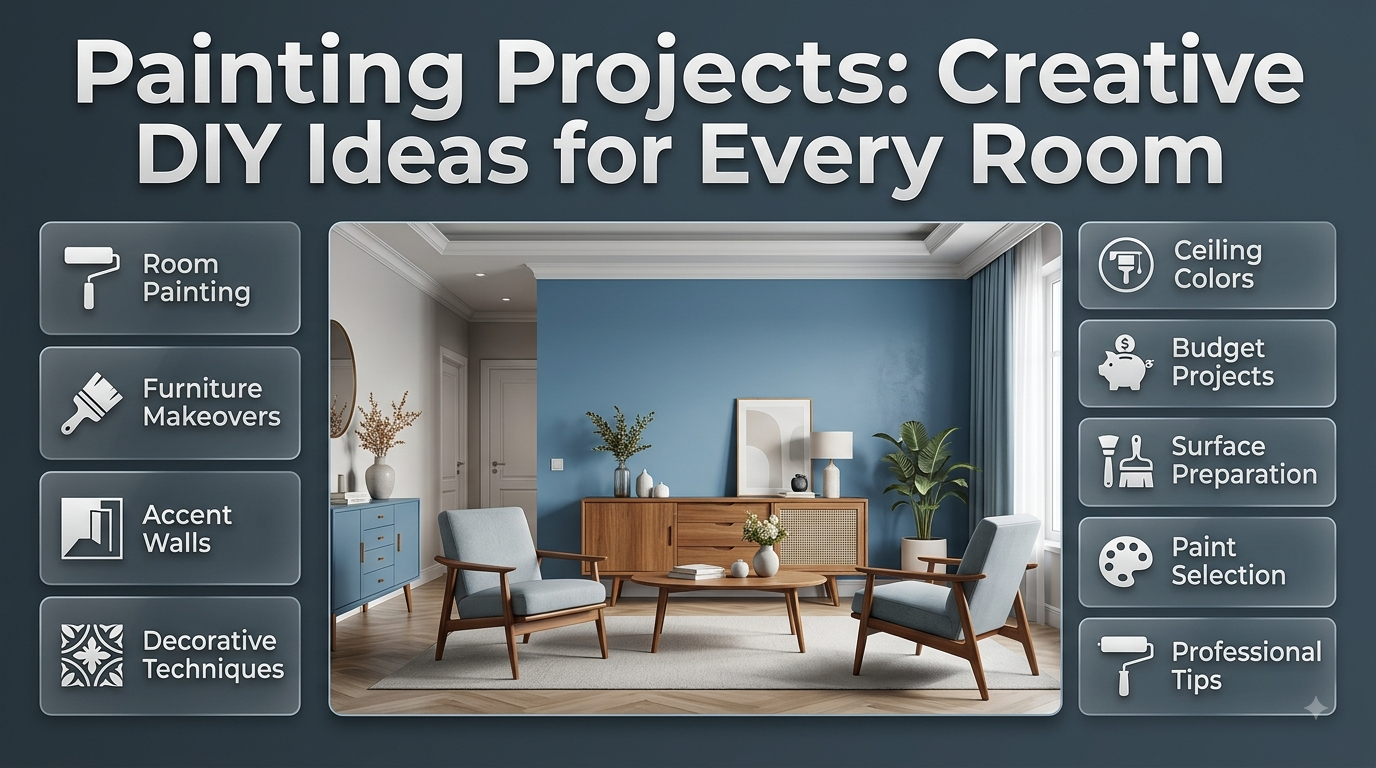
This guide covers practical painting projects for beginners and experienced DIYers, including room painting ideas, furniture makeovers, accent walls, decorative techniques, ceiling colors, small-budget projects, preparation methods, paint selection, common mistakes, and professional tips.
If you’re planning a broader home transformation, DesignMode24 Interior Design can also help you explore ideas that connect paint with furniture, layouts, colors, and overall interior styling.
What Are Painting Projects?
Painting projects are home improvement or decorative tasks that use paint to refresh, transform, protect, or personalize a surface. They can range from simple wall painting to furniture restoration, decorative patterns, painted ceilings, doors, trim, cabinets, artwork, and small home accessories.
The best project depends on the surface, your skill level, the room’s purpose, and the result you want.
For example, painting an accent wall may take only a few hours, while repainting a wooden cabinet can require several days because of cleaning, sanding, priming, painting, and curing.
The important point is that painting isn’t limited to walls. Almost any suitable, properly prepared surface can become part of a design.
Why Are Painting Projects So Popular?
Painting remains one of the most accessible ways to change an interior because it offers a strong visual impact without requiring major construction.
A new paint color can:
- Change the mood of a room
- Make a small space feel more open
- Add depth to a plain interior
- Highlight architectural features
- Refresh outdated furniture
- Create a focal point
- Coordinate mismatched elements
- Give inexpensive objects a custom appearance
- Protect certain surfaces
- Support a particular interior design style
Another advantage is flexibility. If you don’t like the result, paint can usually be changed much more easily than flooring, cabinetry, or built-in construction.
However, easy doesn’t mean careless.
The quality of the final result depends heavily on preparation. A beautiful color applied over dust, grease, loose paint, or an unsuitable surface can still look poor.
What Are the Best Painting Projects for Beginners?
The best beginner painting projects are small enough to manage but useful enough to teach fundamental skills. A good first project should allow you to practice cleaning, preparation, brush control, rolling, edging, and applying multiple coats.
Here are some of the easiest options.
1. Paint an Accent Wall
An accent wall is one of the simplest ways to make a noticeable change.
Choose a wall that naturally deserves attention, such as the wall behind:
- A bed
- Sofa
- Dining table
- Television
- Fireplace
- Desk
- Entryway console
Instead of repainting the entire room, you can create a strong focal point with one carefully selected color.
A deep green can add richness. Warm terracotta can create an earthy atmosphere. Navy can provide depth. A muted beige can add subtle contrast without overwhelming the room.
For more color inspiration, explore the Paint Color collection.
Professional approach: Don’t select an accent color in isolation. Compare it with the flooring, furniture, curtains, artwork, wood tones, and natural light already present in the room.
2. Refresh an Interior Door
Doors are often overlooked even though they’re large visible surfaces.
Painting an interior door in charcoal, navy, deep green, warm brown, or another carefully selected shade can make an ordinary room feel more designed.
Before painting, remove or protect the hardware, clean the door thoroughly, repair imperfections, and lightly sand glossy areas when necessary.
Apply thin coats rather than trying to achieve full coverage in one pass.
3. Paint Picture Frames
Old frames are excellent beginner projects.
You can repaint several mismatched frames in the same color to create a coordinated gallery wall. Alternatively, use contrasting shades for a more eclectic appearance.
Because frames are relatively small, they’re also useful for testing techniques before applying them to larger surfaces.
4. Update a Small Side Table
A basic side table can become a completely different piece with preparation and paint.
Clean the surface, repair damage, sand appropriately, prime when needed, and apply thin coats.
For a more sophisticated result, choose a color that connects the table with another element in the room rather than simply choosing your favorite color.
5. Create Simple Wall Art
You don’t need advanced artistic skills to make attractive painted artwork.
Try:
- Abstract blocks
- Simple arches
- Organic shapes
- Minimal lines
- Geometric patterns
- Two-tone designs
- Textured brushwork
A handmade canvas can introduce color without committing to an entire painted wall.
For more hands-on inspiration, explore DIY Home Projects.
How Should You Prepare for a Painting Project?
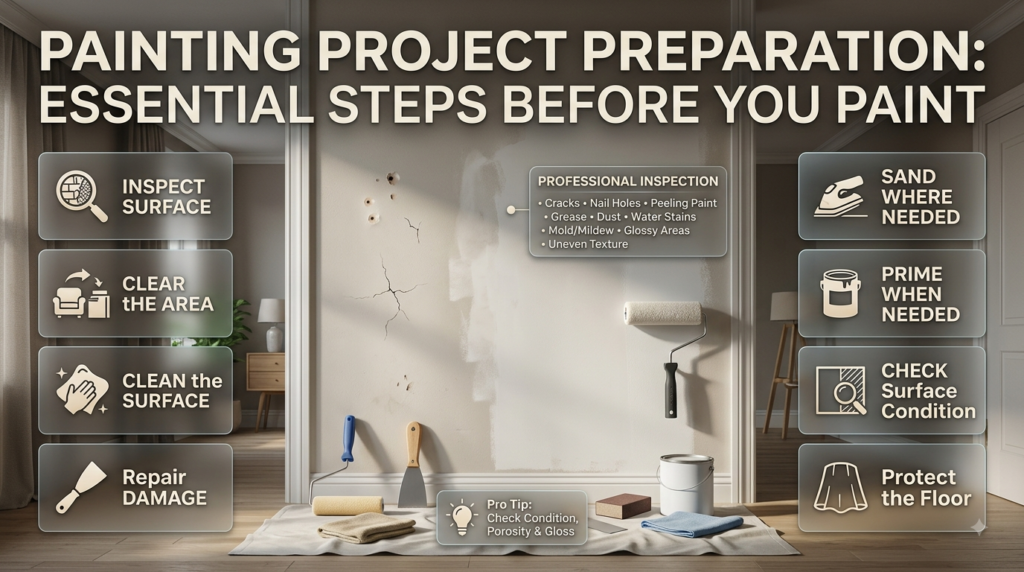
Preparation is the part many beginners want to skip, but it’s also one of the biggest factors in the final result.
Before opening a paint can, inspect the surface carefully.
Look for:
- Cracks
- Nail holes
- Peeling paint
- Grease
- Dust
- Water stains
- Mold or mildew
- Glossy areas
- Uneven texture
- Loose material
The surface needs to be stable and appropriately clean before painting.
Step 1: Clear the Area
Remove small furniture and decorations.
For larger furniture that can’t be moved, move it away from the walls and cover it properly.
Protect the floor with drop cloths rather than relying only on old sheets. Paint can travel farther than expected.
Step 2: Clean the Surface
Walls may collect dust, cooking residue, fingerprints, and other contaminants.
Furniture can contain even more residue because of polish, wax, oils, or cleaning products.
Cleaning is especially important in kitchens and high-touch areas.
Step 3: Repair Damage
Fill holes and cracks with an appropriate filler.
Allow repairs to dry before sanding them smooth.
Don’t expect paint to hide deep dents or uneven patches. Paint often makes surface defects more noticeable, especially with satin or glossier finishes.
Step 4: Sand Where Necessary
Sanding can:
- Smooth rough areas
- Remove loose material
- Reduce gloss
- Improve adhesion
- Blend repaired areas
You don’t always need to strip a surface completely. The amount of sanding depends on the existing finish and the condition of the surface.
Step 5: Prime When Needed
Primer is particularly useful when:
- Painting bare wood
- Covering stains
- Painting over a strong color
- Working with a glossy surface
- Painting repaired areas
- Preparing certain difficult materials
Always follow the paint manufacturer’s recommendations.
💡 Pro Tip: If you’re unsure whether primer is necessary, don’t make the decision based only on the color. Consider the condition, porosity, gloss level, and material of the existing surface.
How Do You Choose the Right Paint?
The right paint depends on both the surface and the environment.
A wall in a quiet bedroom doesn’t experience the same conditions as a kitchen cabinet or busy hallway.
Consider:
- Surface material
- Room function
- Moisture exposure
- Cleaning frequency
- Traffic level
- Desired appearance
- Existing coating
- Manufacturer recommendations
Interior Walls
Interior wall paint is designed for vertical surfaces and comes in different levels of durability and sheen.
Bedrooms usually don’t require the same level of washability as hallways or family rooms.
Kitchens
Kitchen walls and surfaces face grease, moisture, heat, and frequent cleaning.
Choose a coating appropriate for those conditions and prepare the surface thoroughly.
Bathrooms
Bathrooms experience humidity and moisture, so ventilation and suitable paint selection matter.
Painting alone doesn’t solve moisture problems. If there is persistent water intrusion or poor ventilation, address the underlying issue first.
Furniture
Furniture requires strong adhesion and a finish appropriate for repeated handling.
Existing wax, polish, varnish, or glossy coatings may interfere with adhesion.
That’s why furniture preparation can be more demanding than wall painting.
Which Paint Finish Should You Choose?
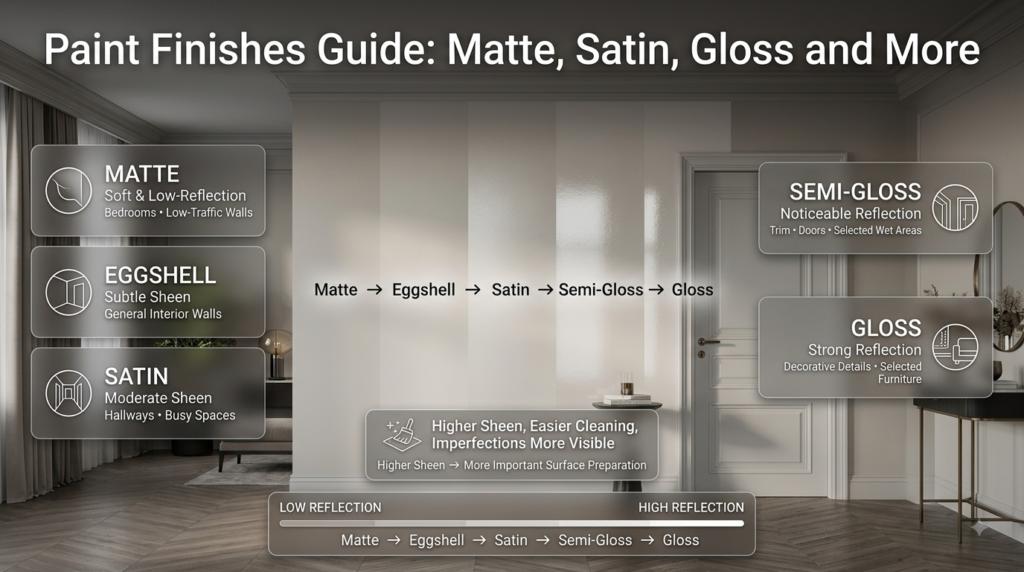
Paint finish affects both appearance and practicality.
| Finish | Visual Effect | Common Uses |
|---|---|---|
| Matte | Soft and low-reflection | Bedrooms, low-traffic walls |
| Eggshell | Subtle sheen | General interior walls |
| Satin | Smooth moderate sheen | Hallways and busy spaces |
| Semi-gloss | Noticeable reflection | Trim, doors, selected wet areas |
| Gloss | Strong reflection | Decorative details and selected furniture |
A higher sheen can make cleaning easier, but it may also reveal dents and surface imperfections.
This is why surface preparation becomes increasingly important as sheen increases.
For more information about choosing the appearance of painted surfaces, explore Paint Finishes.
What Are the Best Room Painting Projects?
Different rooms create different opportunities.
Living Room Painting Projects
The living room is often the most visible space in a home, so paint choices should work with furniture and natural light.
Ideas include:
- One accent wall
- Soft neutral walls
- Dark feature wall
- Painted architectural niche
- Contrasting trim
- Two-tone wall treatment
- Painted fireplace surround where appropriate
- Color-blocked reading corner
If your living room follows a particular style, coordinate paint with the design rather than treating color as a separate decision.
For broader inspiration, explore Home Styling.
Bedroom Painting Projects
Bedrooms benefit from colors that support relaxation.
Popular directions include:
- Warm neutrals
- Muted greens
- Dusty blues
- Soft taupes
- Warm whites
- Earthy browns
A painted wall behind the bed can create a focal point without making every wall visually heavy.
Kitchen Painting Projects
Painting can update a kitchen without replacing every cabinet.
Possible projects include:
- Cabinet repainting
- Island color changes
- Pantry door refresh
- Accent wall
- Breakfast nook color
- Trim refresh
Cabinet painting requires more preparation than standard wall painting, especially because of grease and frequent handling.
Home Office Painting Projects
A home office can benefit from a color that creates visual separation from the rest of the house.
You could paint:
- The wall behind your desk
- A small work zone
- Shelving
- Door
- Lower half of a wall
- Built-in cabinetry
The goal isn’t simply to choose a trendy color. Choose something that works with your lighting and helps the room feel intentional.
Entryway Painting Projects
The entryway offers an opportunity to make a strong first impression.
Try:
- A darker entry wall
- Painted trim
- A contrasting door
- A geometric feature
- A painted arch
- A color-blocked console area
Because entryways are often small, stronger colors can work without overwhelming the entire home.
How Can You Use Color Blocking in Painting Projects?
Color blocking uses separate colors or shapes to create visual structure.
You can use it to define areas without installing physical partitions.
For example, a painted rectangle behind a desk can visually establish a workspace.
A painted arch behind a console can create a decorative focal point.
A horizontal color division can make a wall feel more architectural.
Before painting, mark the design carefully.
Use a level, measuring tape, pencil, and quality painter’s tape where appropriate.
⚠ Common Mistake: Starting with tape before planning the full design. Even small measurement inconsistencies become obvious when geometric shapes are involved.
How Do You Create a Painted Arch?
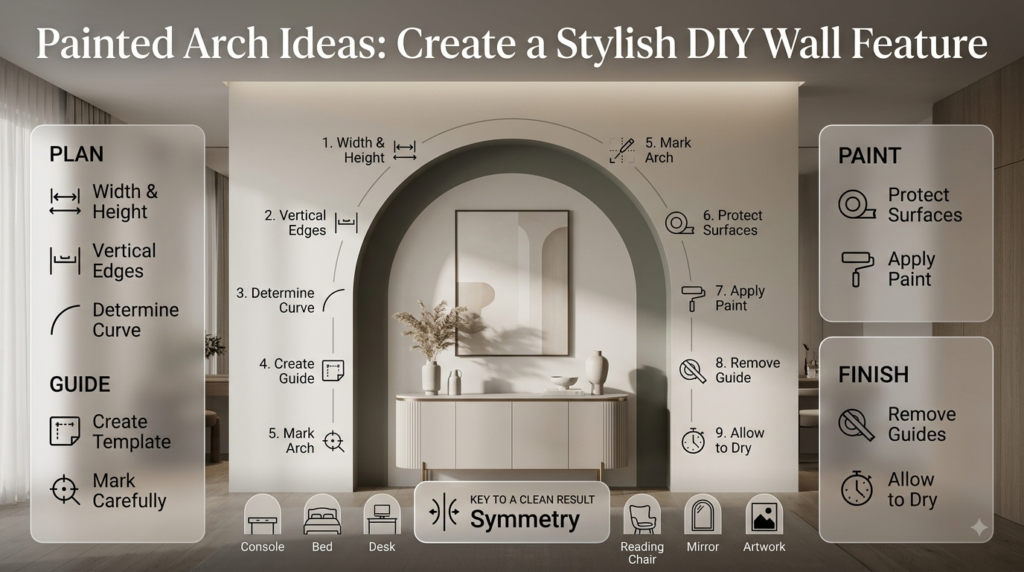
Painted arches are popular because they add architectural interest without construction.
A basic approach is:
- Decide the width and height.
- Mark the vertical edges.
- Determine the curve.
- Create a template or guide.
- Mark the arch carefully.
- Protect surrounding surfaces.
- Apply the paint.
- Remove tape or guides carefully.
- Allow the paint to dry properly.
A painted arch can frame:
- A console
- Bed
- Desk
- Reading chair
- Mirror
- Artwork
The most important part is symmetry.
What Are the Best Furniture Painting Projects?
Furniture painting is particularly useful when a piece is structurally sound but visually outdated.
Consider transforming:
- Dressers
- Bedside tables
- Bookcases
- Chairs
- Cabinets
- Console tables
- Benches
- Small stools
- Storage units
Why Paint Furniture?
Painting can:
- Extend the useful life of a piece
- Change its style
- Coordinate it with a new room
- Hide minor cosmetic imperfections
- Create a custom finish
- Reduce the need for replacement
However, don’t paint furniture that has serious structural problems without addressing those problems first.
A loose joint or damaged frame needs repair before cosmetic treatment.
How Do You Paint Furniture Properly?
Step 1: Inspect
Check the piece for:
- Loose joints
- Cracks
- Water damage
- Peeling finish
- Missing hardware
- Broken components
Step 2: Clean
Remove dirt, grease, wax, and polish.
Step 3: Repair
Fix structural or cosmetic damage.
Step 4: Sand
Sand according to the existing finish and the coating system you’re using.
Step 5: Prime
Prime where appropriate, especially when adhesion or stain blocking is required.
Step 6: Paint
Use controlled, thin coats.
Avoid repeatedly brushing an area once the paint begins to set.
Step 7: Cure
Allow adequate time before heavy use.
This final step is often overlooked.
Paint that feels dry isn’t necessarily fully hardened.
For more furniture transformation ideas, visit Furniture Makeovers.
What Are the Best Decorative Painting Techniques?
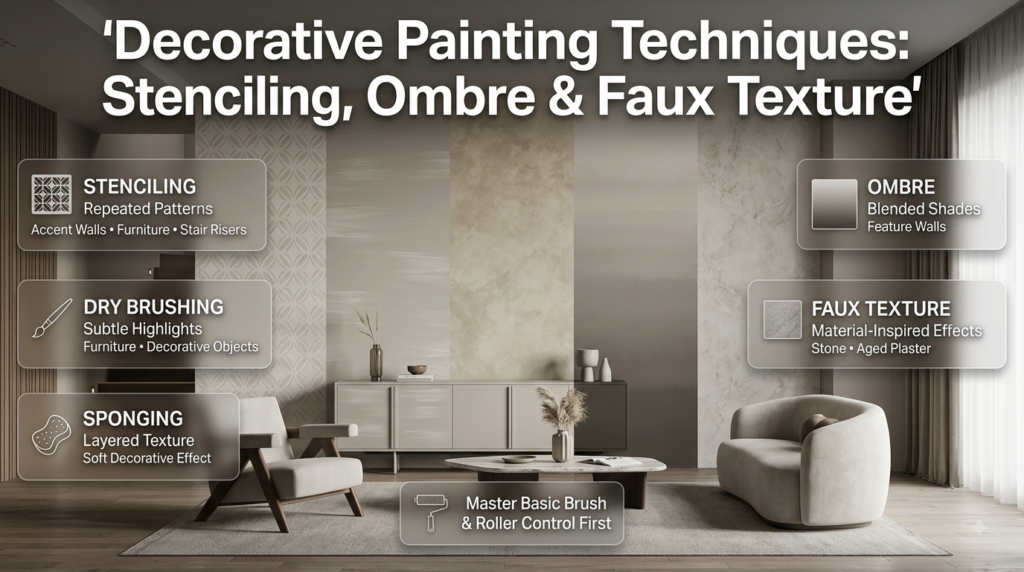
Once you’ve mastered basic painting, decorative techniques can add personality.
Stenciling
Stencils create repeated patterns without requiring advanced drawing skills.
They’re useful for:
- Accent walls
- Furniture
- Stair risers
- Small decorative pieces
Use minimal paint to reduce bleeding underneath the stencil.
Dry Brushing
Dry brushing uses a small amount of paint to create subtle highlights.
It’s particularly useful for furniture and decorative objects.
Sponging
Sponging creates a textured, layered appearance.
It’s useful when you want a softer decorative effect rather than a perfectly uniform surface.
Ombre
Ombre transitions between shades.
It can create a striking feature wall but requires more control because colors need to blend while the paint remains workable.
Faux Texture
Some decorative techniques imitate materials such as stone, aged plaster, or other textured surfaces.
These techniques are best attempted after learning basic brush and roller control.
For additional ideas, see Decorative Finishes.
How Can Painting Support Different Interior Design Styles?
Paint should reinforce the room’s design language.
Minimalist Painting Projects
Minimalist interiors usually benefit from:
- Restrained color palettes
- Clean transitions
- Soft neutrals
- Subtle contrast
- Simple architectural emphasis
A single carefully chosen color often works better than many competing shades.
For more ideas, explore Minimalist Interior Design.
Contemporary Painting Projects
Contemporary interiors can handle stronger contrast and more dramatic color decisions.
Consider:
- Charcoal
- Deep green
- Navy
- Warm beige
- Muted terracotta
- Sculptural color blocks
The goal is balance rather than simply using bold colors.
Explore Contemporary Interior Design for complementary ideas.
Japandi Painting Projects
Japandi design often works with calm, earthy colors.
Suitable directions include:
- Warm beige
- Soft greige
- Muted green
- Clay
- Warm white
- Soft brown
The paint should complement natural wood, simple furniture, and restrained decoration.
See Japandi Interior Design for more inspiration.
Scandinavian Painting Projects
Scandinavian interiors often use light colors to work with natural light and wood.
Soft whites, pale greys, muted blues, and warm neutrals can work particularly well.
Explore Scandinavian Interior Design for ideas that connect paint with Scandinavian materials and furnishings.
How Can You Paint a Ceiling?
A painted ceiling can dramatically change a room.
White is practical and timeless, but it’s not the only option.
A warm neutral ceiling can make a room feel more cohesive.
A pale color can create subtle visual interest.
A dark ceiling can produce a dramatic, intimate effect when the room has suitable proportions and lighting.
Before choosing a ceiling color, consider:
- Ceiling height
- Natural light
- Wall color
- Flooring
- Lighting fixtures
- Room size
- Desired mood
If the ceiling has visible imperfections, remember that reflective finishes can make them more noticeable.
How Can You Make Small Rooms Look Larger With Paint?
Paint cannot increase physical dimensions, but it can change visual perception.
Light colors often make boundaries feel less heavy.
You can also create a more continuous appearance by coordinating walls, trim, and ceiling colors.
Useful approaches include:
- Light wall colors
- Low visual contrast
- Consistent trim colors
- Strategic accent walls
- Reflective but controlled finishes
- Colors that work well with natural light
However, don’t assume that every small room must be white.
A carefully chosen darker color can make a compact room feel intentional and cozy rather than simply small.
For color-focused inspiration, explore Home Design Ideas.
How Do You Make DIY Painting Look Professional?
A professional-looking finish usually comes down to consistency.
Start with a clean, properly prepared surface.
Use the right applicator.
Don’t overload the brush or roller.
Maintain a wet edge when rolling large surfaces.
Avoid repeatedly touching paint that has begun to dry.
Apply coats evenly.
Allow proper drying and recoat time.
Inspect the result under good lighting.
Most importantly, don’t rush.
⭐ Expert Tip: Many DIY painters focus heavily on the paint brand but overlook surface preparation. A mid-range paint applied to a well-prepared surface can look far better than expensive paint applied over a poorly prepared wall.
What Tools Do You Need for Painting Projects?
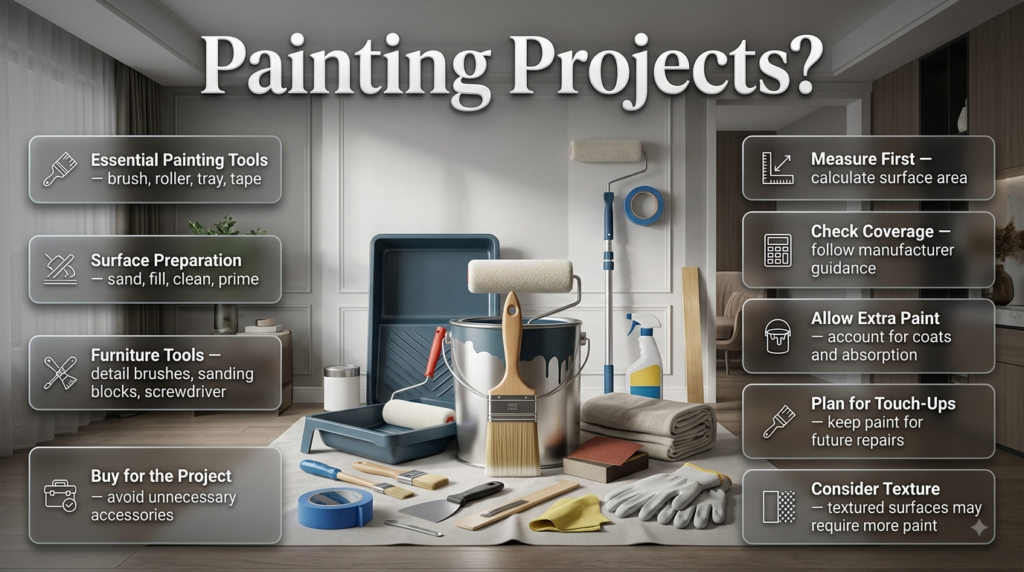
You don’t need a professional workshop for most home projects.
Basic supplies include:
- Quality paint brushes
- Appropriate roller
- Roller frame
- Paint tray
- Extension pole
- Painter’s tape
- Drop cloths
- Sandpaper
- Filler
- Putty knife
- Cleaning cloths
- Protective gloves
- Suitable primer
- Paint stirrer
For furniture projects, you may also need:
- Sanding blocks
- Small detail brushes
- Screwdriver
- Degreaser
- Protective topcoat where appropriate
Buy tools based on the project rather than purchasing every possible accessory.
How Much Paint Do You Need?
Paint quantity depends on the surface area, number of coats, texture, and product coverage.
Measure the walls or surfaces first.
For a room, calculate the total wall area and subtract large openings such as doors and windows when appropriate.
Then compare the result with the coverage information supplied by the paint manufacturer.
Always allow some margin for:
- Additional coats
- Absorption
- Texture
- Touch-ups
- Future repairs
📌 Quick Tip: Buying exactly the calculated minimum can create problems if you later need to touch up a wall and the paint has been discontinued.
What Are the Most Common Painting Mistakes?
Mistake 1: Skipping Surface Preparation
This is probably the most common problem.
Dust, grease, loose paint, and damaged surfaces can cause poor adhesion and uneven appearance.
Solution: Clean, repair, sand, and prime where necessary.
Mistake 2: Choosing Color From a Screen
Digital colors can vary significantly depending on display settings and lighting.
Solution: Test physical samples in your actual room.
Mistake 3: Applying Paint Too Thickly
Heavy application can create drips, slow drying, and uneven texture.
Solution: Use controlled coats.
Mistake 4: Ignoring Drying Time
Touch-dry doesn’t always mean ready for another coat.
Solution: Follow product instructions.
Mistake 5: Using the Same Roller for Everything
Different surfaces need different tools.
Solution: Match roller nap and brush type to the surface and coating.
Mistake 6: Poor Edge Work
Uneven cutting-in can make an otherwise good wall look amateur.
Solution: Work slowly around corners, trim, and ceilings.
Mistake 7: Painting Over Moisture Problems
Paint isn’t a substitute for repairing leaks, condensation, or water intrusion.
Solution: Fix the underlying issue first.
Mistake 8: Rushing Furniture Painting
Furniture often needs more preparation than walls.
Solution: Give cleaning, sanding, priming, and curing the attention they require.
Mistake 9: Ignoring the Room’s Existing Materials
A beautiful color can still clash with flooring, cabinetry, or upholstery.
Solution: Evaluate the whole room before selecting the final shade.
Mistake 10: Stopping Too Early
A project can look unfinished because small details were ignored.
Check:
- Corners
- Trim
- Edges
- Behind furniture
- Door frames
- Hardware
- Touch-up areas
How Can You Plan a Painting Project on a Small Budget?
Painting can be affordable when you focus on high-impact surfaces.
Instead of repainting an entire home, consider:
- One accent wall
- A single door
- A furniture piece
- Trim
- A small hallway
- A painted niche
- A ceiling
- Decorative artwork
- Shelves
- Frames
The smartest budget projects are usually those that solve a visible design problem.
For example, if a room feels plain, an accent wall may provide more value than repainting every surface.
If the furniture looks outdated, painting one cabinet may be more effective than buying replacement furniture.
For additional budget-friendly creative ideas, explore DIY Home Decor Crafts.
How Can Painting Work With Natural Wood?
Paint doesn’t have to cover every wooden surface.
Natural wood and painted surfaces can work together beautifully.
For example:
- Paint the lower cabinets and keep wood shelving natural.
- Use a painted wall behind wooden furniture.
- Pair warm neutral walls with oak furniture.
- Use muted green with natural timber.
- Create contrast between painted cabinetry and wood flooring.
This approach prevents the room from feeling overly flat or overly colorful.
The Natural Wood Interior guide can provide additional ideas for balancing painted surfaces with timber.
How Can Painting Support a Sustainable Home?
A thoughtful painting project can support a more sustainable approach when you prioritize reuse and responsible material choices.
Instead of replacing structurally sound furniture, consider refinishing it.
Instead of replacing decorative objects, repaint them.
Instead of discarding mismatched frames, create a coordinated collection with paint.
You can also reduce waste by estimating paint quantities accurately and storing usable leftovers properly.
Sustainability isn’t only about the paint product itself. Extending the useful life of furniture and reducing unnecessary replacement can also be valuable.
For broader ideas, explore Energy-Efficient Homes.
How Can Painting Create a Statement Interior?
A statement interior doesn’t necessarily require expensive furniture or elaborate decoration.
A carefully chosen paint treatment can become the statement.
Examples include:
- A dramatic dining room wall
- A deep-color bedroom
- A painted ceiling
- A bold entryway
- A color-blocked workspace
- A saturated reading corner
- A painted architectural niche
The key is restraint.
If the wall is highly dramatic, let furniture and accessories support rather than compete with it.
For more inspiration, explore Statement Interiors.
How Can You Combine Painting With Other Home Design Projects?
Painting becomes more effective when considered as part of the complete room.
For example, a wall color can coordinate with:
- Furniture
- Flooring
- Curtains
- Rugs
- Artwork
- Lighting
- Wood
- Metal finishes
- Decorative accessories
This is why painting should not always be treated as an isolated DIY task.
If you’re developing a complete interior, explore Interior Design and Interior Design Styles to understand how color can support the wider visual direction.
What Are the Best Painting Projects for Different Skill Levels?
| Skill Level | Recommended Projects | Main Skills |
| Beginner | Frames, pots, small walls | Basic application |
| Beginner | Accent wall | Cutting in and rolling |
| Beginner | Small table | Cleaning and basic preparation |
| Intermediate | Doors | Detailed preparation |
| Intermediate | Furniture | Sanding, priming, multiple coats |
| Intermediate | Color blocking | Measuring and precision |
| Advanced | Ombre wall | Blending |
| Advanced | Decorative finishes | Technique and control |
| Advanced | Detailed furniture effects | Layering and finishing |
Don’t choose an advanced technique simply because it looks impressive online.
A simpler project executed well will almost always look better than a complicated project executed poorly.
What are the best painting projects for beginners?
The best beginner painting projects are small, manageable, and forgiving. An accent wall, small side table, picture frame, interior door, shelf, or simple piece of décor is usually a better starting point than an entire house or complicated furniture restoration. These projects let you learn the fundamentals—surface preparation, cutting in, rolling, sanding, and applying even coats—without creating a huge amount of work.
A small project also gives you an opportunity to understand how your chosen paint behaves before committing to a larger surface. For example, you can learn how quickly it dries, how much coverage you get, whether your roller leaves texture, and how the color changes under your home’s lighting.
Useful beginner projects include:
Accent walls
Small furniture pieces
Picture frames
Interior doors
Shelves
Plant pots
Simple geometric wall designs
Small decorative artwork
Professional advice: Don’t choose your first project based only on how impressive it looks online. Choose something you can prepare properly and finish carefully. A simple project with excellent preparation will teach you more than a complicated project that becomes frustrating halfway through.
How do you prepare a surface before starting a painting project?
Proper preparation means making the surface clean, stable, smooth enough for the desired finish, and suitable for the new coating. This is one of the most important stages of any painting project because paint cannot compensate for dirt, grease, peeling material, or serious surface damage.
Start by inspecting the surface for cracks, holes, peeling paint, stains, dust, grease, and glossy areas. Clean it appropriately, repair damaged sections, and sand where necessary. Depending on the surface and existing coating, primer may also be required.
For furniture, preparation can be particularly important because old pieces may contain wax, polish, oils, varnish, or several layers of previous finishes. Current furniture-painting guidance also emphasizes cleaning, repairs, sanding, and appropriate priming before applying new paint.
A practical preparation checklist:
Clean dirt and grease
Remove loose or peeling paint
Fill holes and cracks
Sand rough or glossy areas when appropriate
Remove sanding dust
Prime when the surface requires it
Protect nearby floors and furniture
Test the paint before covering the entire surface
Expert tip: If you have limited time, don’t sacrifice preparation just to start painting sooner. The few extra minutes spent preparing the surface can save hours of fixing adhesion problems, uneven coverage, and visible imperfections later.
What type of paint and finish is best for different painting projects?
There isn’t one universally best paint. The right product depends on what you’re painting, how heavily the surface will be used, the room’s conditions, and the appearance you want.
For interior walls, a low- to moderate-sheen finish is often practical. Matte finishes can help minimize the appearance of minor wall imperfections, while eggshell or soft-sheen finishes provide a little more durability and cleanability. Higher-sheen products can be useful for trim, doors, and other surfaces that need greater resistance to handling and cleaning. Dulux Pakistan similarly distinguishes between matte, gloss, and other finishes according to appearance and use.
Furniture requires a different decision. A table, chair, or cabinet needs a coating that can tolerate regular handling, while a decorative frame may not require the same level of durability.
Think about the project this way:
Project
Main Consideration
Bedroom wall
Appearance and low-to-moderate traffic
Hallway
Durability and cleanability
Ceiling
Low reflection and smooth appearance
Interior door
Durability and frequent handling
Furniture
Adhesion, durability, and finish
Kitchen surface
Cleaning and moisture exposure
Decorative object
Appearance and material compatibility
Professional advice: Choose the paint after identifying the surface, not before. A beautiful product is still the wrong choice if it isn’t designed to adhere properly or withstand the conditions of the project.
How can you make DIY painting projects look professional?
A professional-looking painting project comes from good preparation, controlled application, appropriate tools, and patience, rather than simply buying the most expensive paint.
Start by preparing the surface properly. Use a brush suited to detailed areas and a roller appropriate for the surface texture. Avoid loading too much paint onto your applicator because heavy application can produce drips, uneven texture, and longer drying times.
When painting walls, work in manageable sections and maintain a wet edge so adjoining areas blend consistently. Don’t repeatedly brush or roll an area once the paint has started to set. For larger rooms, an extension pole can also make rolling more efficient and help maintain a consistent application; recent professional painting advice has highlighted this as a practical time-saving technique.
For a cleaner professional finish:
Prepare before opening the paint
Use quality brushes and rollers
Don’t overload your applicator
Apply controlled coats
Maintain a consistent technique
Allow proper recoat time
Inspect the surface under good lighting
Fix problems rather than repeatedly painting over them
Give the finished surface adequate curing time
One important rule: Don’t try to correct drying paint by continuously brushing it. If an area starts looking uneven, excessive reworking can make the problem worse. Let the coating reach the appropriate stage, then correct it properly.
What are the biggest mistakes to avoid in painting projects?
The biggest painting mistakes usually happen before or during application, not because someone chose the wrong color. Skipping preparation, applying thick coats, ignoring drying times, using unsuitable tools, and failing to test a color can all reduce the quality of the final result.
One of the most common mistakes is assuming that paint will hide surface problems. It won’t. In fact, certain finishes can make dents, patches, and uneven textures more noticeable. Another common mistake is choosing a color from a tiny sample or screen image without testing it in the actual room.
Furniture projects have their own problems. Painting directly over grease, wax, or a glossy finish can cause adhesion issues, while applying thick coats can create brush marks and an uneven surface. Practical furniture guidance consistently recommends cleaning, preparing, sanding where appropriate, and using thin coats rather than trying to complete the finish in one heavy application.
Avoid these common mistakes:
Skipping surface cleaning
Painting over peeling material
Ignoring repairs
Choosing paint without considering the surface
Applying excessively thick coats
Using the same tool for every surface
Rushing between coats
Choosing colors only from digital images
Ignoring existing furniture and flooring
Using paint to cover unresolved moisture problems
Professional takeaway: The fastest way to finish a painting project isn’t necessarily to paint faster. It’s to avoid mistakes that force you to redo the work. Good preparation, correct materials, and controlled application usually produce a better result with less wasted time and paint.
Conclusion
Painting projects are one of the simplest ways to give a home a fresh, personal, and more finished appearance without taking on a major renovation. Whether you’re updating an accent wall, refreshing old furniture, changing a ceiling color, repainting doors, or experimenting with a decorative technique, the right approach can make a noticeable difference.
The most important lesson is that successful painting starts before the paint goes on the surface. Proper cleaning, repairs, sanding, priming when necessary, choosing the right finish, and testing your color can prevent many of the problems that make DIY projects look unfinished.
You also don’t need to start with a complicated transformation. A small side table, picture frame, single wall, or interior door can be enough to build your confidence and develop better painting skills. As your experience grows, you can move toward furniture makeovers, color blocking, painted ceilings, decorative finishes, and larger room transformations.
Most importantly, choose paint based on the surface, room conditions, existing materials, and overall design, rather than following a trend blindly. Take your time, use the right tools, respect drying and curing times, and focus on preparation as much as application.
A well-planned painting project isn’t simply about adding a new color. It’s an opportunity to improve how a space looks, feels, and functions—and with thoughtful choices and careful execution, even a modest DIY project can create a surprisingly polished result.
Leave a Reply