
Introduction
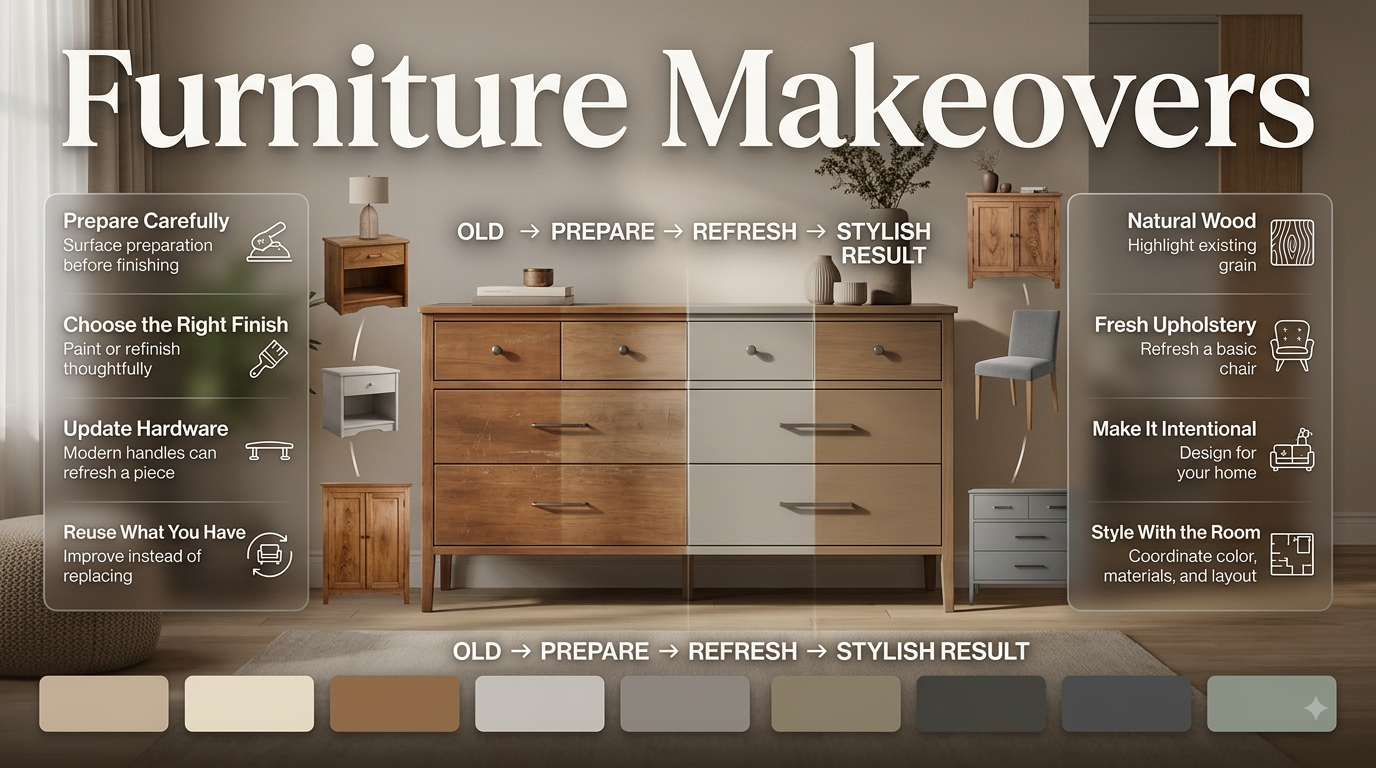
Furniture Makeovers | That old wooden dresser sitting in the corner may look outdated, scratched, or completely out of place, but replacing it isn’t always the smartest solution. A solid piece of furniture can have plenty of life left in it. With careful preparation, the right finish, updated hardware, and a little creativity, you can turn an ordinary or tired-looking piece into something that feels intentionally designed for your home.
That’s the real appeal of Furniture Makeovers.
Instead of buying new furniture every time your style changes, you can improve what you already have. A dated bedside table can become a clean contemporary accent. An old wooden cabinet can be refinished to highlight its natural grain. A basic chair can receive new upholstery, while a plain dresser can become a statement piece with a carefully chosen color and modern handles.
For broader home inspiration, explore DesignMode24 Interior Design and see how furniture can work together with color, materials, layout, and overall interior style.
This guide explains how to plan a furniture makeover, which pieces are worth transforming, what tools you actually need, whether you should paint or refinish, how to make inexpensive furniture look more sophisticated, and which mistakes commonly ruin otherwise good projects.
What Are Furniture Makeovers?
Furniture makeovers are the process of improving an existing furniture piece instead of replacing it. The transformation may involve cleaning, repairing, sanding, painting, staining, refinishing, replacing hardware, changing upholstery, adding decorative details, or combining several techniques.
A makeover can be as simple as replacing old cabinet handles or as extensive as stripping a damaged finish, repairing the wood, repainting the entire piece, and adding new hardware.
The important point is that a makeover should solve a real problem.
Maybe the furniture is structurally good but visually dated. Perhaps the color no longer works with your room. Maybe the upholstery is worn while the frame is still strong. Or the piece may simply lack the character you want.
A successful makeover addresses that problem without creating unnecessary work.
Why Are Furniture Makeovers So Popular?
Furniture makeovers have become popular because they combine affordability, creativity, sustainability, and personalization.
Buying new furniture can be expensive, especially when you’re looking for solid construction or a particular style. An existing piece may already have the size, proportions, and storage capacity you need.
The problem may only be its finish.
For example, a sturdy wooden chest with an outdated orange stain doesn’t necessarily need to go to the landfill. A carefully planned refinishing project can completely change its appearance while preserving the useful structure.
Furniture makeovers also allow homeowners to create something that isn’t identical to what everyone else owns.
You can select:
- Your preferred paint color
- Your preferred wood finish
- Custom hardware
- Upholstery fabric
- Decorative details
- Surface texture
- Overall design style
That level of customization is difficult to achieve with inexpensive mass-produced furniture.
What Problems Can a Furniture Makeover Solve?
A makeover can address several common furniture problems:
- Outdated color
- Scratched surfaces
- Worn finishes
- Dated hardware
- Minor dents
- Small holes
- Faded upholstery
- Mismatched furniture
- Poor coordination with the room
- Lack of personality
- Surface discoloration
However, cosmetic improvement has limits.
If the furniture has serious structural damage, severe water damage, extensive rot, or dangerous instability, painting it won’t solve the underlying problem.
The first rule of furniture makeovers is simple: improve the piece, don’t disguise a serious defect.
Which Furniture Is Worth Making Over?
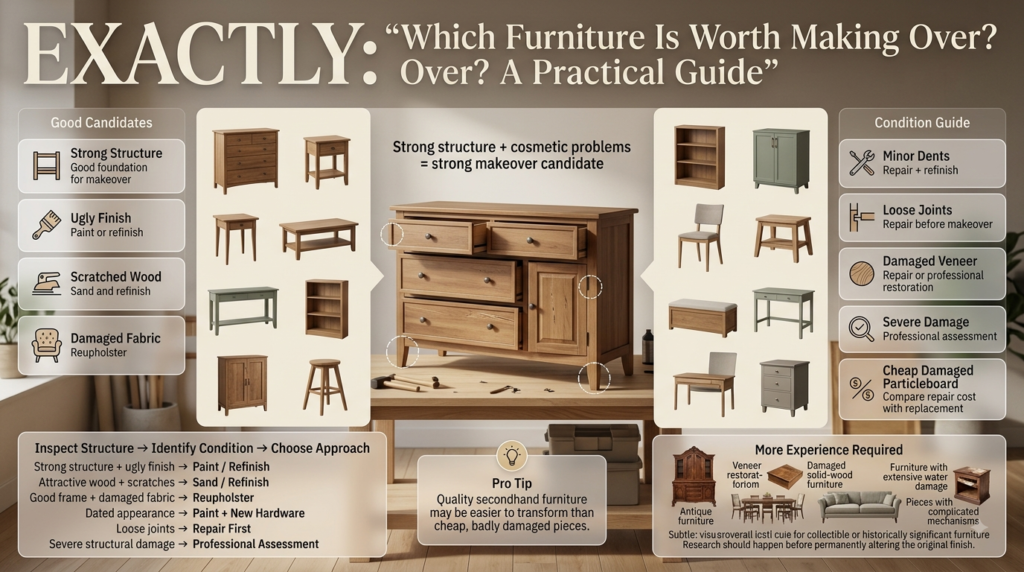
Not every piece is a good makeover candidate. The best projects usually begin with furniture that has a strong structure but needs cosmetic improvement.
Look closely at the furniture before buying supplies.
Check the legs, joints, drawers, doors, shelves, back panels, and underside. Sit on chairs to test their stability. Open every drawer. Make sure cabinet doors aren’t badly warped.
Good Candidates for Furniture Makeovers
Some of the easiest and most rewarding pieces include:
- Wooden dressers
- Nightstands
- Side tables
- Coffee tables
- Console tables
- Bookshelves
- Cabinets
- Dining chairs
- Wooden stools
- Storage benches
- Small desks
- Bedside cabinets
Furniture That Requires More Experience
Some projects are possible but may require additional skills:
- Antique furniture
- Veneer restoration
- Damaged solid-wood furniture
- Large dining sets
- Upholstered sofas
- Furniture with extensive water damage
- Pieces with complicated mechanisms
- Collectible or historically significant furniture
If the furniture could have antique or collectible value, research it before painting or permanently altering the original finish.
A Simple Furniture Makeover Decision Table
| Furniture condition | Best approach |
|---|---|
| Strong structure, ugly finish | Paint or refinish |
| Attractive wood with scratches | Sand and refinish |
| Good frame, damaged fabric | Reupholster |
| Dated appearance | Paint + new hardware |
| Minor dents | Repair + refinish |
| Loose joints | Repair before makeover |
| Damaged veneer | Repair or consider professional restoration |
| Severe structural damage | Professional assessment |
| Cheap, badly damaged particleboard | Compare repair cost with replacement |
💡 Pro Tip: Don’t automatically choose the cheapest furniture you can find. A higher-quality secondhand piece may be easier and cheaper to transform because its construction is stronger and its materials are more durable.
How Should You Plan a Furniture Makeover?
Before opening a paint can, decide what you want the furniture to look like when finished.
This sounds obvious, but many unsuccessful projects begin with a color choice rather than a design plan.
Start by considering the room.
Ask:
- Where will the furniture go?
- What function does it serve?
- What style is the room?
- What colors already exist?
- How much daily use will the piece receive?
- Do you want the wood grain visible?
- Should the furniture blend in or stand out?
- How much time are you willing to spend?
A small decorative table has different requirements from a kitchen cabinet or dining chair.
A decorative table may tolerate a delicate finish. A dining chair needs a finish and upholstery that can survive frequent use.
This is why furniture should be considered as part of the larger interior rather than as an isolated DIY object.
For a broader understanding of how furniture works within a room, explore Home Design Ideas.
How Do You Choose a Furniture Makeover Style?
The furniture’s shape should influence the makeover.
A highly detailed vintage dresser may look beautiful with a restrained finish because its existing details already provide visual interest.
A simple flat-front cabinet, on the other hand, may benefit from stronger color or distinctive hardware.
Popular approaches include:
- Modern
- Contemporary
- Minimalist
- Scandinavian
- Japandi
- Rustic
- Traditional
- Vintage
- Industrial
- Eclectic
- Statement furniture
Don’t force a furniture style that fights the original proportions.
For example, a heavily ornate cabinet may not suddenly become convincingly minimalist simply because it has been painted white. The shape still communicates something.
For a deeper look at different approaches, explore Interior Design Styles.
What Tools Do You Need for Furniture Makeovers?
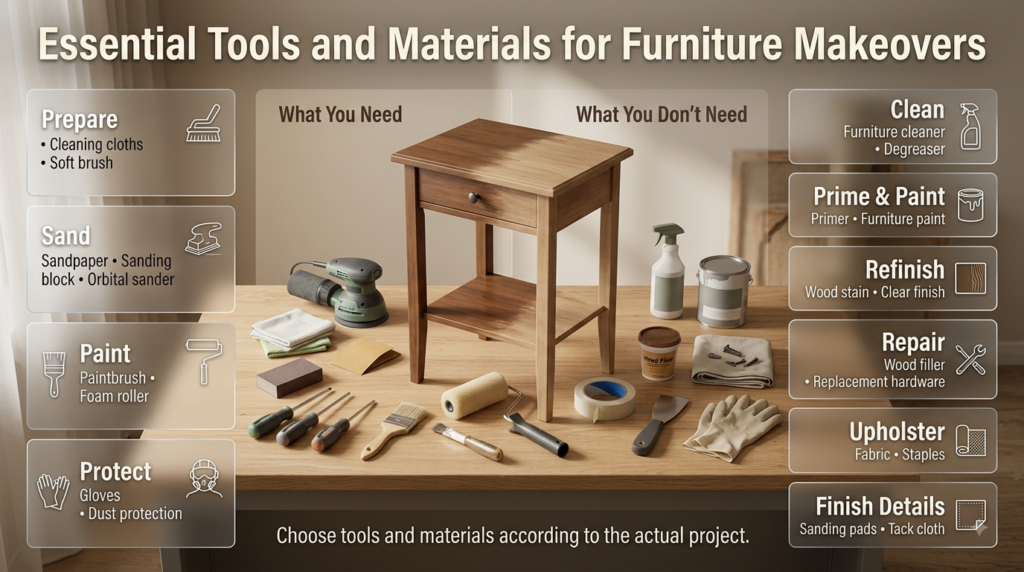
You don’t need a professional workshop to complete most beginner furniture projects.
A basic setup can include:
Essential Tools
- Screwdrivers
- Sandpaper
- Sanding block
- Orbital sander, if needed
- Cleaning cloths
- Soft brush
- Paintbrush
- Foam roller
- Painter’s tape
- Putty knife
- Wood filler
- Drop cloth
- Gloves
- Appropriate dust protection
Materials
Depending on the project, you may need:
- Furniture cleaner
- Degreaser
- Primer
- Furniture paint
- Wood stain
- Clear finish
- Wood filler
- Replacement hardware
- Upholstery fabric
- Staples
- Sanding pads
- Tack cloth
The goal isn’t to buy the largest possible collection of products.
Buy according to the actual furniture and finish you’re creating.
For example, a small side table may not justify buying several specialty products that you’ll never use again.
How Do You Prepare Furniture Before Painting?
Preparation is probably the most important part of a successful furniture makeover.
Many beginners want to start painting immediately because that’s the visually exciting part.
Professionals generally spend much more attention on what happens before the first coat.
Step 1: Inspect the Furniture
Examine the entire piece.
Look for:
- Loose joints
- Missing screws
- Cracks
- Damaged veneer
- Water stains
- Peeling finish
- Wobbly legs
- Broken drawer slides
- Warped doors
- Deep scratches
Fix structural problems first.
Why it matters: Paint can’t stabilize loose furniture.
Professional advice: Photograph the furniture before disassembling it. This makes reassembly much easier.
Common mistake: Painting over loose joints and expecting the finished piece to become stronger.
Step 2: Remove Hardware
Take off handles, knobs, pulls, and removable hardware whenever possible.
This produces cleaner edges and prevents paint buildup around the hardware.
Keep screws and components organized in labeled bags.
Step 3: Clean Everything
Furniture may carry years of:
- Dust
- Grease
- Fingerprints
- Wax
- Furniture polish
- Cooking residue
- Smoke residue
Even if the surface looks clean, contaminants may remain.
Clean the piece thoroughly and allow it to dry.
⚠ Common Mistake: Sanding before removing grease and polish. This can spread contaminants across the surface rather than actually preparing it.
Step 4: Repair Small Damage
Use an appropriate wood filler for small dents, holes, or imperfections.
Once dry, sand the repair so it becomes visually integrated with the surrounding surface.
For veneer, be especially careful.
Veneer is a thin layer of wood, so aggressive sanding can expose the substrate underneath.
Step 5: Sand According to the Finish
Not every project requires complete stripping.
If the existing coating is stable and you’re applying a compatible finish, light scuffing may be enough.
If you want to expose natural wood for staining, more extensive preparation may be necessary.
The correct sanding process depends on:
- Existing finish
- Surface condition
- Desired final finish
- Furniture material
Step 6: Remove Dust
After sanding, remove dust thoroughly.
Dust left on the furniture can become trapped under primer or paint, creating an uneven surface.
A clean final preparation stage can make a surprisingly large difference to the finished result.
Should You Paint or Refinish Furniture?
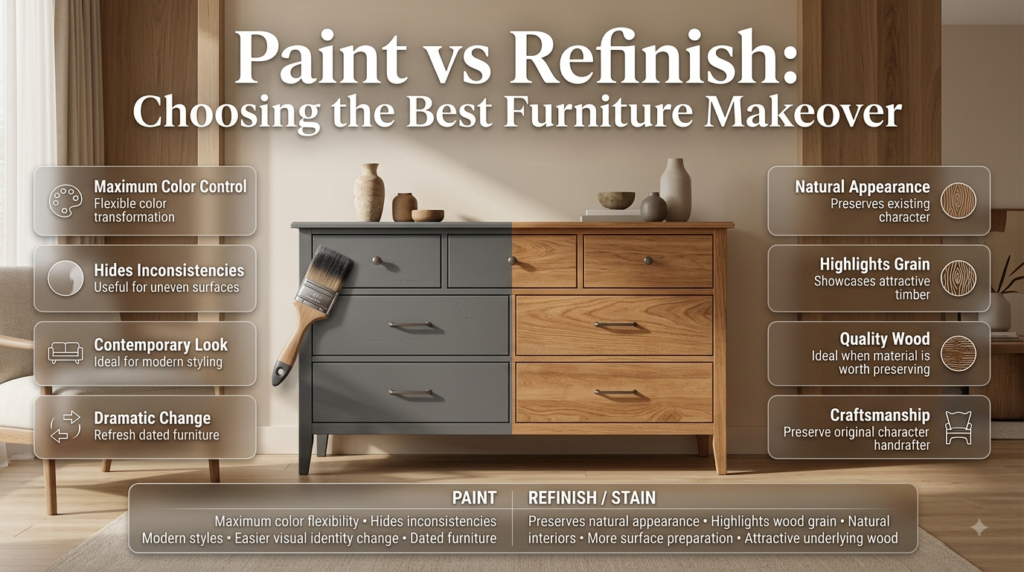
This is one of the biggest decisions in any furniture makeover.
Paint gives you maximum control over color and can hide inconsistent surfaces.
Refinishing preserves and highlights the existing material.
Choose Paint When:
- The original finish is unattractive
- The wood grain isn’t particularly appealing
- The furniture has mismatched repairs
- You want a dramatic color change
- You want a contemporary appearance
- The surface is visually inconsistent
Choose Stain or Clear Finish When:
- The wood grain is attractive
- The furniture is made from quality wood
- You want a natural appearance
- The original craftsmanship is worth preserving
| Paint | Refinish / Stain |
| Maximum color flexibility | Preserves natural appearance |
| Can hide inconsistencies | Highlights wood grain |
| Great for modern styles | Great for natural interiors |
| Easier to change visual identity | Often requires more surface preparation |
| Works well with dated furniture | Best when underlying wood is attractive |
If your goal is to create a warm, natural room, preserving wood can be particularly effective. See Natural Wood Interior for ideas on using natural timber as a major interior element.
How Do You Paint Furniture Properly?
Once preparation is complete, painting becomes much easier.
Step 1: Select the Correct Paint
Furniture paint should be selected according to the surface and expected use.
Consider:
- Adhesion
- Durability
- Sheen
- Drying time
- Ease of cleaning
- Compatibility with primer
- Final appearance
Wall paint isn’t automatically the best choice for furniture.
Step 2: Prime When Necessary
Primer can improve adhesion and help with difficult surfaces.
It can also help cover strong underlying colors or stains.
Use a primer compatible with both the existing surface and your chosen topcoat.
Step 3: Apply Thin Coats
Thin, controlled coats generally provide better results than one heavy coat.
Heavy application can lead to:
- Drips
- Runs
- Brush marks
- Uneven drying
- Soft surfaces
- Visible ridges
Apply the recommended number of coats and allow adequate drying time.
Step 4: Pay Attention to Edges
Edges and corners are where amateur finishes often become obvious.
Avoid allowing excess paint to collect around:
- Drawer openings
- Corners
- Door edges
- Hardware holes
- Decorative grooves
Step 5: Let the Finish Cure
Dry and cured are not the same thing.
Furniture can feel dry while still being vulnerable to pressure, moisture, scratches, and impact.
Follow the manufacturer’s curing guidance before returning the furniture to heavy use.
⭐ Expert Tip: Don’t rush the final stage. A project that takes an extra day because you’re allowing proper curing can last far longer than one completed too quickly.
What Are the Best Furniture Makeover Ideas?
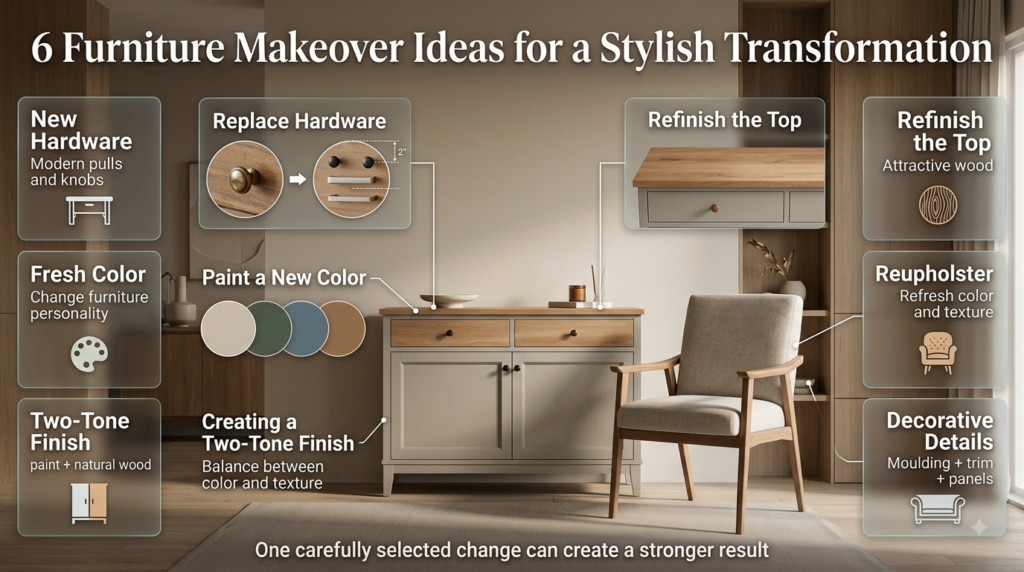
A successful makeover doesn’t always require completely repainting the furniture.
Sometimes one carefully selected change creates a stronger result.
1. Replace the Hardware
This is one of the easiest transformations.
A dated cabinet with old brass-colored knobs may look completely different with simple black, brushed metal, or modern pulls.
Always measure existing hole spacing before ordering replacements.
2. Paint the Furniture a New Color
Color can completely change the personality of furniture.
Soft neutrals can make a piece feel calm and understated.
Dark shades can create depth.
Muted greens and blues can add character without becoming overwhelming.
Warm earthy tones can complement natural materials.
For more color inspiration, explore Paint Color.
3. Create a Two-Tone Finish
A painted base with a natural wood top is a popular approach because it combines color with texture.
You could also use one color on the main body and a slightly different tone on drawers.
The key is maintaining visual balance.
4. Refinish the Top
If the top has attractive wood but the rest of the furniture looks dated, focus your effort where it matters most.
A natural wood top combined with a painted body can create a polished, contemporary appearance.
5. Reupholster a Chair
A chair with a solid frame doesn’t necessarily need replacement simply because the fabric is tired.
New upholstery can change:
- Color
- Texture
- Comfort
- Visual style
Choose fabric based on actual usage rather than appearance alone.
6. Add Simple Decorative Details
Moulding, trim, panel details, or other decorative elements can give plain furniture more character.
But restraint matters.
Decorative additions should respect the furniture’s proportions.
For more ideas about surface treatments, see Decorative Finishes.
How Can You Make Cheap Furniture Look Expensive?
The appearance of quality usually comes from execution rather than the original price.
A cheap furniture piece can look surprisingly sophisticated when the finish is clean and the details are intentional.
Focus on:
- Smooth preparation
- Clean edges
- Consistent color
- Proper hardware alignment
- Quality-looking handles
- Appropriate proportions
- Durable finishing
- Simple styling
Avoid trying to make inexpensive furniture look expensive through excessive decoration.
In many cases, restraint creates a more premium appearance.
📌 Quick Tip: If you’re working with a limited budget, spend more effort on preparation and hardware rather than buying numerous decorative accessories.
How Do Minimalist Furniture Makeovers Work?
Minimalist makeovers depend on simplicity.
The goal isn’t to remove every detail. It’s to reduce visual noise and make the useful elements of the furniture more noticeable.
Consider:
- Simple colors
- Straightforward hardware
- Smooth surfaces
- Natural textures
- Limited decorative elements
A plain wooden nightstand might need nothing more than careful refinishing and one understated handle style.
For broader inspiration, see Minimalist Interior Design.
How Do Contemporary Furniture Makeovers Work?
Contemporary furniture makeovers often combine clean lines with practical materials and restrained color.
A dated cabinet can become more contemporary through:
- Matte or low-sheen color
- Simple metal hardware
- Natural wood accents
- Cleaner visual lines
- Removal of unnecessary decorative elements
The furniture should still feel appropriate to the room.
A contemporary makeover isn’t simply about painting something black or white.
Can Furniture Makeovers Work With Japandi Design?
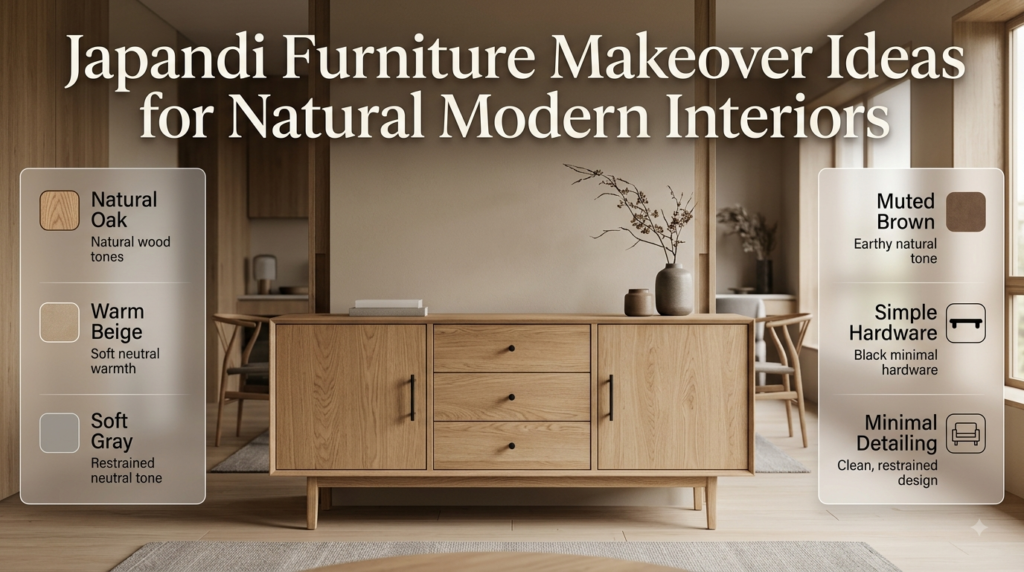
Yes. Japandi-inspired furniture benefits from simplicity, craftsmanship, natural textures, and restrained colors.
Suitable approaches include:
- Natural oak tones
- Warm beige
- Soft gray
- Muted brown
- Simple black hardware
- Minimal detailing
Avoid excessive distressing or overly decorative finishes.
Explore Japandi Interior Design for broader principles that can guide your furniture choices.
Can Furniture Makeovers Work With Scandinavian Interiors?
Scandinavian-inspired spaces often benefit from furniture that feels light, practical, and uncluttered.
Consider:
- Pale wood
- Soft white
- Warm neutrals
- Simple silhouettes
- Functional hardware
The objective is to make the furniture feel useful and comfortable rather than overly decorative.
For additional inspiration, see Scandinavian Interior Design.
When Should Furniture Become a Statement Piece?
Not every furniture item needs to blend into the background.
Sometimes the furniture should become the room’s visual anchor.
A statement piece might be:
- A bold dresser
- A dramatic cabinet
- A colorful sideboard
- A sculptural chair
- A heavily textured bench
- An unusual vintage table
The trick is giving the statement piece enough surrounding space.
If every item is visually dramatic, nothing feels special.
See Statement Interiors for ideas on creating focal points without making an entire room feel chaotic.
What Are the Biggest Furniture Makeover Mistakes?
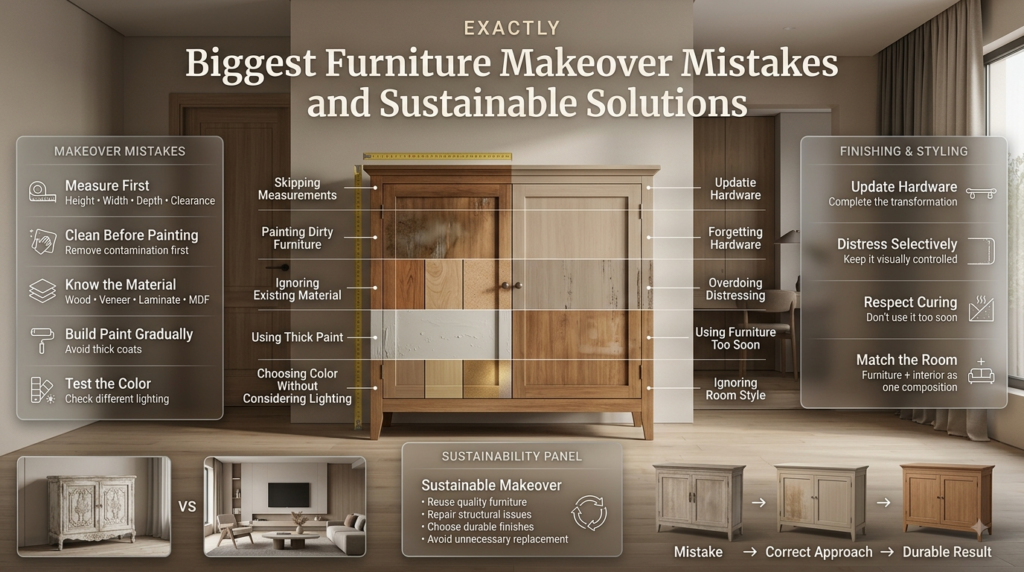
Mistake 1: Skipping Measurements
A furniture makeover isn’t only about appearance.
Measure the piece and the space where it will be placed.
A beautifully refinished cabinet is still a problem if it blocks a doorway or overwhelms a small room.
How to avoid it: Measure height, width, depth, door clearance, and surrounding circulation.
Mistake 2: Painting Dirty Furniture
Paint doesn’t magically remove grease.
Why it happens: Beginners are eager to start the transformation.
Why it’s harmful: Contamination can reduce adhesion and create uneven results.
Solution: Clean first.
Mistake 3: Ignoring the Existing Material
Solid wood, veneer, laminate, MDF, and particleboard don’t behave identically.
Solution: Identify the material before choosing preparation and finishing products.
Mistake 4: Using Thick Paint
Thick coats may seem faster but often produce poor results.
Solution: Build coverage gradually.
Mistake 5: Choosing Color Without Considering Lighting
A color can appear different in morning daylight, afternoon light, and artificial lighting.
Solution: Test your color before committing.
Mistake 6: Forgetting Hardware
Old hardware can undermine an otherwise excellent makeover.
Solution: Consider whether new handles or knobs would complete the transformation.
Mistake 7: Overdoing Distressing
Artificially distressed furniture can look convincing when subtle but can quickly become visually messy when overdone.
Solution: Distress selectively and only where it supports the intended style.
Mistake 8: Using the Furniture Too Soon
The surface may feel dry but remain vulnerable.
Solution: Respect curing time.
Mistake 9: Ignoring Room Style
A furniture makeover should support the room.
For example, an ornate distressed cabinet may feel disconnected inside an otherwise highly contemporary space.
Solution: Consider furniture and room as one composition.
How Can You Make a Furniture Makeover More Sustainable?
One of the strongest advantages of furniture restoration and makeovers is reuse.
Instead of discarding a usable piece, you extend its life.
But sustainable furniture makeovers should focus on durability rather than simply creating a temporary visual trend.
Choose finishes that suit the expected use.
Repair structural issues rather than hiding them.
Avoid replacing quality furniture unnecessarily.
If you’re building a broader sustainable interior, explore Energy-Efficient Homes for additional ways to make home improvements more responsible and efficient.
When Should You Repair Instead of Replace Furniture?
Repair is often sensible when the furniture has:
- Solid construction
- Good proportions
- Quality wood
- Sentimental value
- Functional storage
- Minor cosmetic problems
Replacement may make more sense when:
- Structural damage is extensive
- Repair costs exceed replacement value
- Materials are severely deteriorated
- The furniture doesn’t suit the space
- Safety cannot be guaranteed
Don’t judge furniture only by its appearance.
A scratched solid-wood dresser may be a much better makeover candidate than a visually attractive but poorly constructed flat-pack piece.
What Does Bespoke Furniture Mean in a Makeover Context?
A furniture makeover can sometimes achieve a bespoke appearance without commissioning an entirely new piece.
Bespoke design generally means something created specifically around particular requirements rather than simply selected from a standard range.
You can introduce a more customized feeling through:
- Special hardware
- Custom colors
- Specific dimensions
- Unique upholstery
- Added storage
- Decorative details
- Personalized finishes
For more context, explore Bespoke Design.
How Can Furniture Makeovers Improve Home Styling?
Furniture doesn’t exist separately from décor.
A refinished sideboard can become the foundation for a styled wall.
A painted console can connect two colors used elsewhere in the room.
A wooden cabinet can introduce warmth into an otherwise cool palette.
A reupholstered chair can repeat a color from curtains or cushions.
This is why furniture makeovers can be particularly powerful when combined with thoughtful Home Styling.
Instead of asking only, “How should I makeover this table?” ask:
“What role should this table play in the room?”
That question usually leads to better decisions.
How Can DIY Furniture Projects Fit Into a Larger Home Project?
Furniture makeovers can be part of a larger DIY strategy.
For example, you might:
- Refresh an old cabinet.
- Create complementary wall décor.
- Update the surrounding color palette.
- Improve lighting.
- Restyle nearby accessories.
- Rearrange furniture for better circulation.
This approach creates a more coherent result than transforming individual objects without considering the room.
For related creative projects, explore DIY Home Projects and DIY Home Decor Crafts.
How Do You Choose Furniture Colors for Different Rooms?
Living Room
Living-room furniture can support the dominant palette or create a controlled focal point.
Neutral furniture is versatile, while a darker or richer color can anchor a large room.
Bedroom
Bedrooms usually benefit from calmer tones.
Soft neutrals, muted greens, warm woods, and understated finishes can support a more restful environment.
Dining Room
Dining furniture needs durability.
Choose finishes that can tolerate regular cleaning and handling.
Entryway
An entryway piece can have more personality because it creates an immediate impression.
A painted console or distinctive cabinet can work well here.
Home Office
Prioritize function.
A beautiful desk that lacks useful storage or has an uncomfortable working height isn’t a successful makeover.
How Do You Make Furniture Look Modern Without Painting It?
Painting isn’t the only option.
Try:
- Replacing hardware
- Refinishing the top
- Removing outdated decorative elements
- Replacing upholstery
- Changing legs
- Adding simple trim
- Cleaning and polishing natural wood
- Improving drawer functionality
- Using modern accessories around the piece
Sometimes the original material is actually the most attractive part.
This is especially true for quality timber furniture.
What Are the Most Important Professional Tips?
Professionals tend to focus on fundamentals rather than shortcuts.
Tip 1: Don’t Fight the Furniture
Work with its proportions.
Tip 2: Prepare More Than You Think You Need
Most finish failures begin before painting.
Tip 3: Test Everything
Test unfamiliar products and colors in an inconspicuous area.
Tip 4: Think About Use
A decorative finish isn’t automatically suitable for heavy daily use.
Tip 5: Keep Hardware Consistent
Hardware can make a piece feel cohesive or improvised.
Tip 6: Don’t Rush Curing
A beautiful finish needs time to become durable.
Tip 7: Stop When It’s Good
You don’t always need another decorative layer.
⭐ Expert Tip: One of the strongest signs of good furniture design is knowing when to stop. If the proportions, color, texture, and hardware already work together, additional decoration may weaken the result.
What Furniture Makeover Should a Beginner Start With?
A beginner should choose a small, structurally sound piece.
Good first projects include:
- Side table
- Nightstand
- Small stool
- Simple bookshelf
- Small cabinet
- Basic wooden chair
Avoid starting with expensive antiques or complicated restoration work.
Your first project should teach you the process without creating unnecessary financial pressure.
A simple first project can teach you:
- Surface cleaning
- Sanding
- Repair
- Primer application
- Paint control
- Hardware removal
- Finishing
- Curing
Those skills transfer to larger furniture later.
What Is the Best Way to Make Over Old Furniture?
The best furniture makeover starts with the condition of the piece rather than the finish you want to use. First check whether the furniture is structurally sound, then clean it thoroughly, repair damage, prepare the surface, and choose a finish that suits both the material and how the furniture will be used. A solid-wood dresser may benefit from refinishing, while a dated laminate cabinet is often better suited to painting.
The most reliable process is:
Inspect joints, drawers, doors, and legs
Clean away grease, wax, and old residue
Repair dents, cracks, or loose components
Prepare the existing surface correctly
Choose paint, stain, or another suitable finish
Apply thin, controlled coats
Replace outdated hardware when appropriate
Allow sufficient drying and curing time
The biggest difference between an average DIY makeover and a professional-looking one is usually surface preparation. Rushing into painting can leave you with peeling, uneven coverage, visible brush marks, or a finish that doesn’t hold up to everyday use. Professional furniture-painting guidance consistently emphasizes cleaning, surface preparation, suitable primers, and controlled application.
Is It Better to Paint or Refinish Old Furniture?
Painting and refinishing solve different problems, so neither option is automatically better. Paint is generally the stronger choice when the original surface is unattractive, badly mismatched, heavily repaired, or simply doesn’t suit your room. Refinishing makes more sense when the furniture has attractive natural wood that deserves to remain visible.
Consider painting when you want:
A completely different color
A contemporary appearance
To hide inconsistent repairs
To refresh dated furniture
Greater freedom with the room’s color palette
Choose refinishing or staining when:
The wood grain is attractive
The furniture is solid wood
You want a natural finish
The original craftsmanship is worth preserving
There is also a practical consideration: laminate isn’t the same as natural wood. Laminate can generally be painted with appropriate preparation, but it isn’t something you simply stain like solid wood. Benjamin Moore specifically notes that laminate should be painted rather than stained, while manufacturers and professional guides emphasize cleaning, careful sanding or surface preparation, and bonding primer for better adhesion.
Professional rule: Don’t choose the finish based only on what’s trending. Look at what is underneath first. If the material itself is beautiful, preserve it. If the surface is unattractive or inconsistent, a well-executed paint finish may produce the better result.
Can You Paint Laminate Furniture and Make It Last?
Yes, laminate furniture can be successfully painted, but it requires more attention to preparation than many people expect. Laminate has a smooth, manufactured surface that doesn’t naturally provide the same adhesion as unfinished wood. Cleaning, careful surface preparation, and a compatible bonding primer are therefore particularly important.
A dependable approach is:
Remove hardware and residue.
Clean the furniture thoroughly with an appropriate cleaner or degreaser.
Lightly scuff the surface when the coating system calls for sanding.
Remove all sanding dust.
Apply a suitable bonding primer.
Apply thin, even coats of furniture-appropriate paint.
Allow each coat to dry according to the product instructions.
Add a compatible protective finish when appropriate for the furniture and coating system.
Sherwin-Williams recommends cleaning, sanding laminate to reduce its smooth sheen, removing dust, and applying a high-quality bonding primer before the topcoat. Benjamin Moore similarly recommends cleaning, careful sanding, and bonding primer, while warning against oversanding because laminate’s decorative layer can be thin.
One important point is that “no-sand” doesn’t mean “no preparation.” Some products and systems allow you to minimize traditional sanding, but the surface still needs to be clean and suitable for the chosen coating. Homes & Gardens notes that appropriate cleaning and bonding primer can make no-sanding approaches possible in some situations, but preparation remains essential.
If you want laminate furniture to stay attractive, don’t treat preparation as an optional step. Most adhesion problems begin before the paint is even applied.
How Can You Make Cheap Furniture Look Expensive After a Makeover?
The secret isn’t adding more decoration. It is improving the details that make the furniture look intentional.
A relatively inexpensive cabinet can look much more refined when it has a smooth surface, clean edges, carefully selected hardware, consistent color, and a finish appropriate for its use. In many cases, spending extra time on preparation produces a bigger visual improvement than buying expensive decorative products.
Focus on these details:
Repair dents before painting
Remove old residue completely
Create a smooth, properly prepared surface
Use thin and even coats
Keep edges clean
Choose hardware that fits the furniture’s proportions
Avoid excessive distressing
Use a restrained color palette
Give the finish enough time to cure
Hardware deserves particular attention. Replacing bulky or dated knobs with appropriately sized pulls can make a simple dresser feel considerably more contemporary without changing its structure.
Color is equally important. Current interior design direction is moving toward more personality, warmth, natural materials, and individualized spaces rather than interiors that feel overly generic. That makes a thoughtfully transformed vintage or secondhand piece particularly useful as a character element in a room.
A useful test: Stand several feet away from the finished furniture and look at it as part of the room. If the color, hardware, proportions, and surrounding décor work together, the piece will usually feel more sophisticated than one overloaded with decorative effects.
What Are the Biggest Mistakes to Avoid When Making Over Furniture?
The biggest furniture makeover mistakes usually happen because people focus on the visible transformation and underestimate the preparation underneath it.
The most common problems include:
Painting over dirt, grease, or furniture polish
Skipping appropriate surface preparation
Using incompatible primer and paint
Applying overly thick coats
Sanding laminate too aggressively
Choosing a color without considering the room
Reinstalling hardware before the finish is ready
Using furniture before it has properly cured
Adding too many decorative effects
Ignoring loose joints or structural damage
The most damaging mistake is often poor preparation. If the surface is contaminated or too smooth for the coating system, the paint may scratch or peel regardless of how attractive the color looks.
Another common mistake is assuming every furniture material should be treated like solid wood. Laminate, veneer, MDF, and solid timber have different characteristics and can require different preparation methods. Manufacturer guidance for laminate furniture specifically warns against both skipping preparation and oversanding the thin decorative layer.
Conclusion
Furniture makeovers are one of the smartest ways to give old, outdated, or overlooked pieces a fresh purpose without automatically buying new furniture. A scratched dresser, tired side table, dated cabinet, or worn chair can often become a beautiful part of your home with the right preparation, finish, and attention to detail.
The key is not to rush straight into painting. Start by checking the furniture’s condition, clean it thoroughly, repair structural or surface problems, and choose a finish that works with the material. Paint can completely change the personality of a piece, while staining or refinishing can preserve the natural character of quality wood. New hardware, updated upholstery, or subtle decorative details can provide an equally powerful transformation.
Most importantly, let the furniture guide the makeover. Consider its shape, construction, function, and the style of the room before deciding on colors or finishes. A successful transformation should look intentional, feel durable, and work naturally within the space.
You don’t need expensive tools or professional-level equipment to get started. Choose a manageable piece, take your time with preparation, avoid common shortcuts, and focus on clean execution. With patience and a thoughtful design approach, even an ordinary secondhand piece can become a distinctive feature that adds character, function, and personality to your home.
Leave a Reply