
Introduction
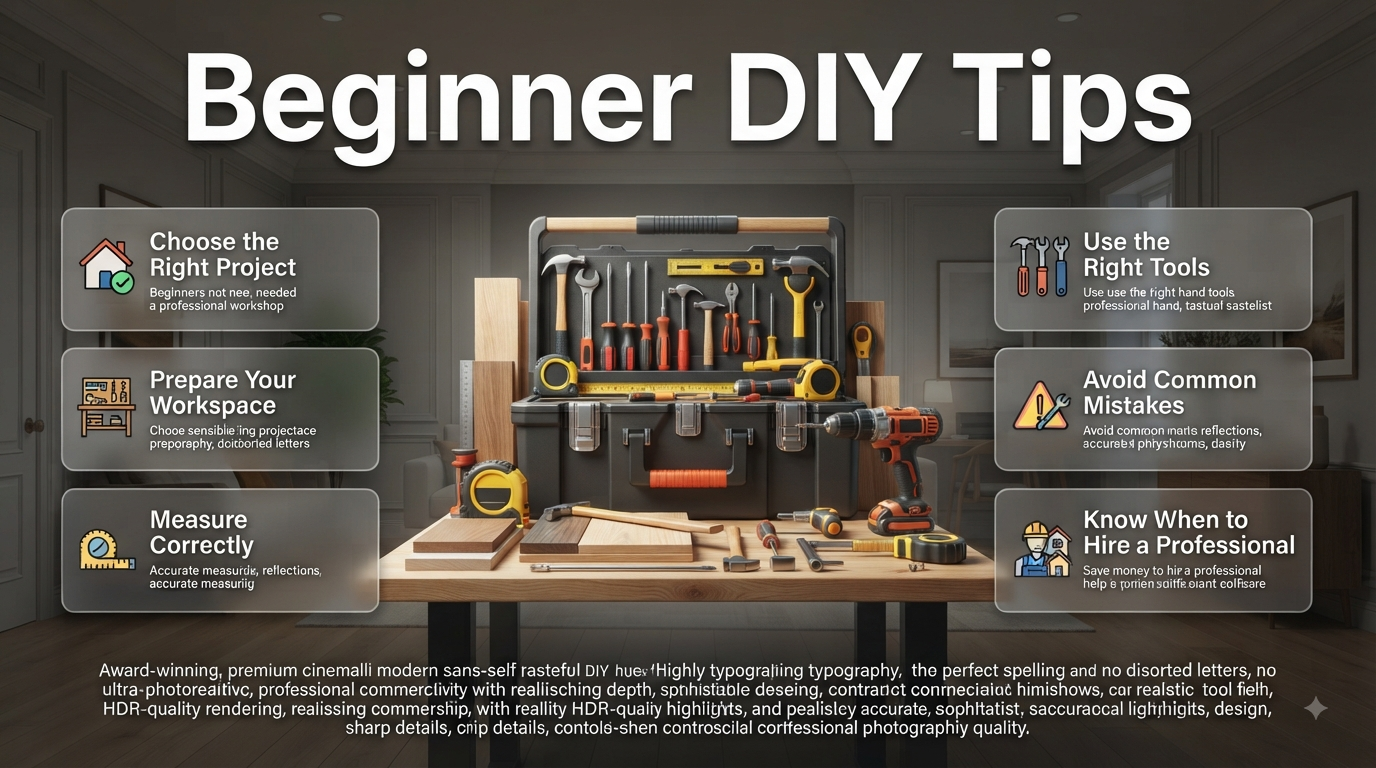
Beginner DIY Tips | You don’t need a professional workshop, years of construction experience, or a garage full of expensive tools to start improving your home. What you do need is a sensible project, a little preparation, and the confidence to learn as you go. Many beginners run into trouble because they start cutting, drilling, painting, or assembling before understanding what the job actually requires.
That’s where practical Beginner DIY Tips can make a real difference. The right approach can help you avoid wasted materials, damaged surfaces, unnecessary expenses, and the frustration of starting a project that turns out to be much harder than expected.
Whether you want to refresh a room, update old furniture, create simple décor, improve storage, or try your first home repair, this guide will show you how to get started safely and intelligently. You’ll learn how to choose the right project, build a useful toolkit, prepare your workspace, measure correctly, work with different materials, avoid common mistakes, save money, and know when a project should be handed over to a professional.
For broader inspiration before choosing a project, DesignMode24 Interior Design can help you connect your DIY plans with the overall style and function of your home.
What Are the Best Beginner DIY Tips?
The best beginner DIY tips are to start with a manageable project, plan before buying materials, measure carefully, use the correct tools, prepare surfaces properly, follow product instructions, work safely, and give yourself enough time. Beginners should build skills gradually instead of immediately attempting complicated electrical, plumbing, structural, or high-risk projects.
DIY is not really about proving that you can do everything yourself. It’s about learning practical skills and using them intelligently.
A simple process works for almost any beginner project:
Choose → Plan → Measure → Prepare → Practice → Complete → Inspect
Following these stages may seem slower at first, but it usually makes the actual work faster because you’re less likely to stop halfway through looking for missing materials or correcting preventable mistakes.
Why Should Beginners Start With Small DIY Projects?
Your first project should be small enough that you can realistically finish it and inexpensive enough that a mistake won’t cause a major financial problem.
A small project also gives you an opportunity to understand how materials and tools behave. You might discover that a certain paint requires more preparation than expected or that drilling into your particular wall requires different hardware.
Good first projects include:
- Painting a small room or wall
- Replacing cabinet handles
- Installing a curtain rod
- Assembling flat-pack furniture
- Creating simple wall décor
- Refinishing a small table
- Installing lightweight shelving
- Replacing old caulk
- Creating a simple accent wall
- Updating a mirror or picture frame
The important thing is not how impressive the finished project looks. The important thing is what you learn while doing it.
💡 Pro Tip: Choose a project that teaches one or two new skills rather than one that requires ten unfamiliar techniques. Confidence comes from successful repetition.
How Do You Choose the Right DIY Project?
Before starting a project, consider your skill level, budget, available tools, time, and the consequences of making a mistake.
Ask yourself:
- What exactly am I trying to improve?
- What will the finished result look like?
- What materials are required?
- Which tools are required?
- How long should the project realistically take?
- Can I complete every step safely?
- What happens if I make an error?
If you can’t answer these questions, don’t rush into the project. Spend a little more time researching and planning.
A useful beginner rule is:
Low risk + low cost + simple tools + manageable time = good first project.
You can also browse Home Improvement for broader project ideas before deciding what type of improvement makes sense for your space.
Which DIY Projects Are Best for Beginners?
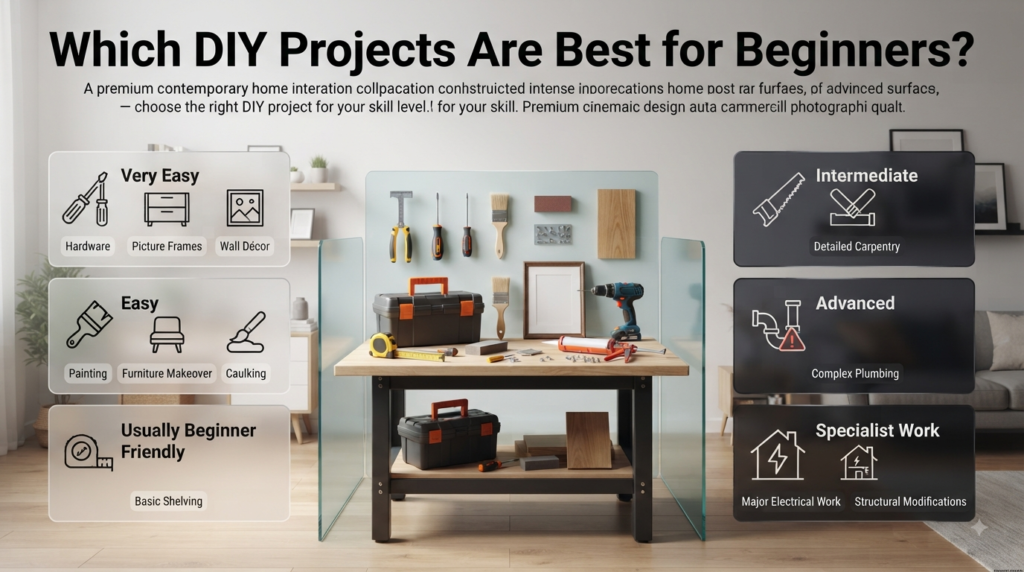
Not every project is equally suitable for someone just starting out.
| Project | Difficulty | Typical Skill | Beginner Friendly |
|---|---|---|---|
| Cabinet hardware replacement | Very easy | Measuring | Yes |
| Small painting project | Easy | Surface preparation | Yes |
| Picture frame makeover | Very easy | Sanding/finishing | Yes |
| Furniture makeover | Easy | Sanding/painting | Yes |
| Simple wall décor | Very easy | Measuring | Yes |
| Basic shelving | Easy | Measuring/drilling | Usually |
| Caulking | Easy | Surface preparation | Usually |
| Detailed carpentry | Intermediate | Cutting/joinery | With practice |
| Complex plumbing | Advanced | Technical knowledge | No |
| Major electrical work | Advanced | Specialist knowledge | No |
| Structural modifications | Advanced | Engineering/safety | No |
A beginner-friendly project should allow you to learn without putting the home, your safety, or a large amount of money at risk.
What Tools Does a Beginner Really Need?
You don’t need to buy an entire professional toolbox.
Start with tools that can be used across many projects:
- Tape measure
- Pencil
- Screwdriver set
- Hammer
- Pliers
- Adjustable wrench
- Utility knife
- Level
- Drill/driver
- Basic drill bits
- Sandpaper
- Clamps
- Safety glasses
- Work gloves when appropriate
- Painter’s tape
- Cleaning cloths
Why Is a Tape Measure So Important?
A tape measure is one of the most valuable tools in a beginner’s toolkit because almost every home project involves dimensions.
You’ll use it for:
- Wall measurements
- Furniture dimensions
- Shelf placement
- Hardware spacing
- Material lengths
- Window measurements
- Storage planning
- Décor positioning
Never rely on memory for important dimensions.
Write them down immediately.
Do Beginners Need Expensive Tools?
No. You need appropriate and dependable tools, not necessarily expensive ones.
The cheapest tool available isn’t always a good choice because poor-quality tools can be uncomfortable, inaccurate, or difficult to control. However, buying professional equipment before you know what you’ll use it for can also waste money.
A better strategy is to buy basic, reliable tools and upgrade them when your projects demand better performance.
⭐ Expert Tip: Tool familiarity is often more important than tool price. Learn how a basic tool behaves before spending money on a more advanced version.
How Can You Build a DIY Toolkit on a Budget?
Build your toolkit according to the projects you actually complete.
If you need a specialized tool for one weekend project, consider borrowing or renting it. If you repeatedly use the same type of tool, buying one may make more sense.
A useful approach is:
Project → Required Tool → Borrow/Rent → Decide Whether to Buy
This prevents your toolbox from filling with equipment that rarely gets used.
You can also buy tools gradually rather than purchasing a complete set immediately.
Your first priority should be versatility. A screwdriver set, measuring tape, level, pliers, hammer, and basic drill can handle many beginner tasks.
How Important Is Measuring in DIY?
Measuring is one of the most important skills a beginner can develop.
A project can fail because a measurement is wrong by only a small amount. Shelves may not fit, hardware can look uneven, furniture components may not align, and materials can be wasted.
Use this simple rule:
Measure → Mark → Recheck → Test → Cut or Drill
Don’t make permanent changes immediately after taking one measurement.
Why Should You Measure More Than Once?
Walls, floors, cabinets, and furniture aren’t always perfectly square or identical.
If you’re installing something between two walls, measure at the top, middle, and bottom.
If the measurements are different, you know the opening isn’t perfectly uniform.
That information should influence your plan.
⚠ Common Mistake: Measuring only once and assuming the entire area is identical is one of the easiest ways to create a fitting problem.
How Should Beginners Prepare a DIY Workspace?
A clean workspace isn’t just more comfortable. It’s safer and more efficient.
Before starting:
- Remove unnecessary objects
- Improve lighting
- Protect floors
- Move furniture away
- Organize tools
- Keep materials within reach
- Prepare a waste area
- Keep children and pets away
- Make sure cords aren’t creating trip hazards
Try to organize your workspace so that you don’t constantly walk across the room to find tools.
A simple arrangement is:
Tools → Materials → Work Area → Safety Equipment → Waste
This reduces interruptions and helps you stay focused.
Why Is Preparation So Important in DIY?
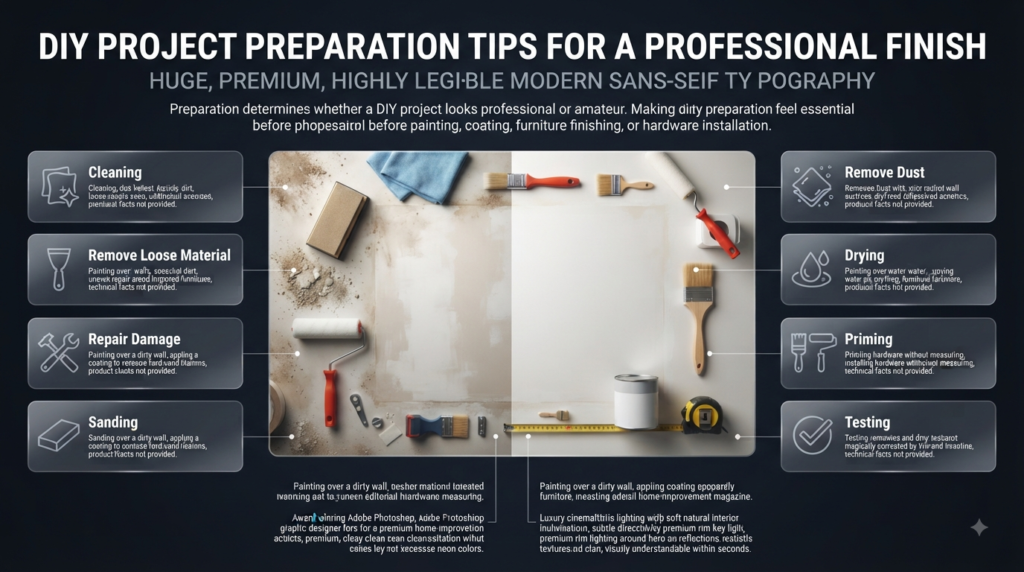
Preparation often determines whether a DIY project looks professional or amateur.
Painting over a dirty wall won’t produce a good finish. Applying a coating to a poorly prepared piece of furniture can cause adhesion problems. Installing hardware without measuring can create uneven spacing.
Depending on the project, preparation may involve:
- Cleaning
- Removing loose material
- Repairing damage
- Sanding
- Removing dust
- Drying
- Priming
- Testing
Never assume preparation is optional because the finished material will cover the surface.
A finish can improve a prepared surface, but it can’t magically correct every underlying problem.
How Can Beginners Get Better Results When Painting?
Painting is one of the most accessible DIY projects, but preparation still matters.
Start by clearing the room or moving furniture away from the working area.
Clean the walls and repair obvious holes, cracks, or damaged areas. Once repairs have dried, sand them smoothly and remove dust.
Use primer when the surface or product instructions indicate that it’s appropriate.
Beginner Painting Process
Step 1: Prepare the Room
Move furniture and protect flooring and surfaces.
Step 2: Prepare the Wall
Clean, repair, sand, and remove dust.
Step 3: Protect Edges
Use painter’s tape where necessary.
Step 4: Prepare the Paint
Follow the manufacturer’s instructions.
Step 5: Apply the First Coat
Work systematically rather than jumping randomly around the room.
Step 6: Allow Proper Drying
Don’t immediately apply another coat simply because the surface feels dry.
Step 7: Apply Additional Coverage if Required
Some colors and surfaces need more than one coat.
Step 8: Inspect the Result
Look carefully in good lighting before returning furniture.
If you’re unsure which direction to take with your color choices, Paint Color provides a useful starting point for exploring different options.
Are Accent Walls Good DIY Projects for Beginners?
Yes. An accent wall is a practical project because you can create a noticeable change without repainting the entire room.
The key is choosing the right wall.
Good candidates may include:
- The wall behind a bed
- The wall behind a sofa
- A fireplace wall
- The end of a hallway
- A dining-area wall
Think about natural light, existing furniture, flooring, and surrounding colors before choosing a strong shade.
An accent wall should create a visual purpose rather than simply making one wall different.
How Can DIY Improve Home Styling?
A DIY project becomes more valuable when it improves both function and appearance.
A shelf can create storage and display space. A furniture makeover can update an outdated piece. A new wall color can change the mood of an entire room.
This is where DIY connects naturally with Home Styling.
Before starting a decorative project, ask:
What problem does this project solve?
Then ask:
Will the finished result work with the rest of the room?
These two questions can prevent unnecessary projects and disconnected décor.
What Are Easy DIY Home Decor Projects?
Decorative projects are often ideal for beginners because they usually require fewer technical skills.
Consider:
- Framed artwork
- Simple gallery walls
- Painted picture frames
- Decorative shelves
- Updated mirrors
- Small storage pieces
- Painted furniture
- Handmade wall décor
- Simple plant stands
If you want more craft-oriented ideas, DIY Home Decor Crafts can provide inspiration for projects that personalize a room without major renovation.
Can Beginners Make Over Old Furniture?
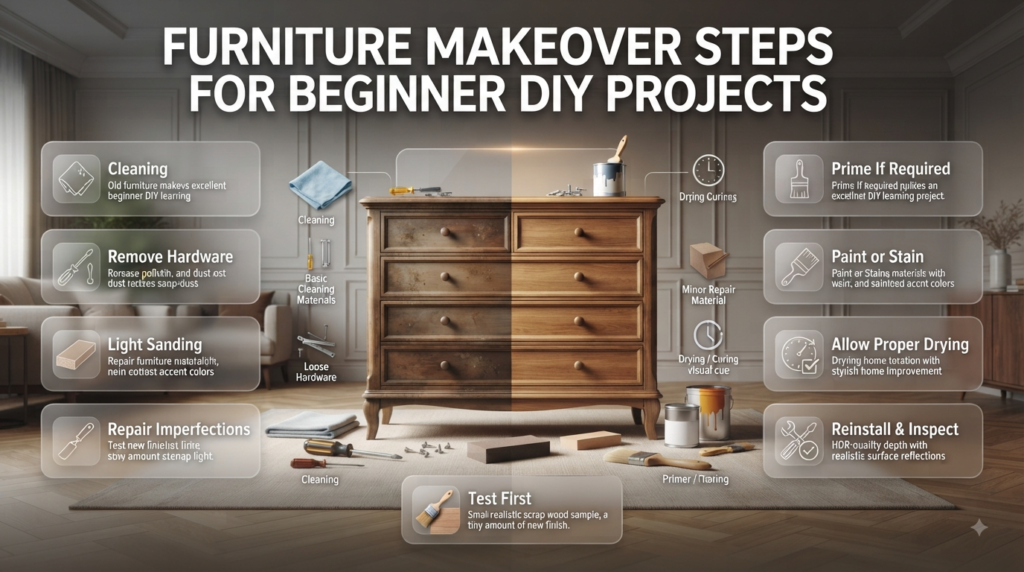
Yes. Furniture makeovers are excellent learning projects because they teach several useful skills without requiring major construction.
A typical makeover may involve:
- Cleaning
- Removing hardware
- Light sanding
- Repairing minor imperfections
- Priming if required
- Painting or staining
- Allowing proper drying
- Reinstalling hardware
- Inspecting the finished piece
Cleaning is especially important. Furniture can contain grease, polish, dust, and other residues that affect new finishes.
For additional ideas, explore Furniture Makeovers.
📌 Quick Tip: If you’re trying a new finish, test it on a hidden area or scrap material first. A five-minute test can prevent a much bigger mistake.
How Can Beginners Install Simple Shelving?
Simple shelving can be a useful first installation project, but you still need to understand the wall and the expected load.
Before drilling, determine:
- Shelf dimensions
- Desired height
- Bracket position
- Wall type
- Suitable fixing hardware
- Expected weight
Use a level to check alignment.
A lightweight decorative shelf and a shelf filled with heavy books don’t place the same demands on the fixing system.
Never assume that one type of screw or wall plug works for every wall.
If you aren’t confident about the wall construction or load requirements, get appropriate advice before proceeding.
What Are the Most Common Beginner DIY Mistakes?
Beginners usually don’t fail because they’re incapable of learning. They fail because they rush.
Starting Without a Plan
You may begin with enthusiasm and discover halfway through that you need another tool or material.
Better approach: Plan the complete project before starting.
Buying Materials Too Early
Without measurements, it’s easy to purchase the wrong size, quantity, or finish.
Better approach: Measure first and create your shopping list afterward.
Using the Wrong Tool
Trying to force an unsuitable tool into a job can damage the material or the tool.
Better approach: Understand what the task requires before starting.
Skipping Surface Preparation
Paint and finishes cannot compensate for every surface problem.
Better approach: Clean, repair, sand, and prepare properly.
Rushing
Fast work isn’t necessarily efficient work.
Better approach: Maintain a controlled pace and check each stage before moving forward.
Ignoring Safety Equipment
A quick task can still create dust, fragments, sharp edges, or other hazards.
Better approach: Make appropriate safety protection part of your normal setup.
Ignoring Drying Time
Materials may feel dry before they’re fully cured.
Better approach: Follow the manufacturer’s recommended drying and curing periods.
Trying to Hide Mistakes
Adding more material or making another cut without understanding the original problem can make things worse.
Better approach: Stop, diagnose, and then repair.
How Can Beginners Save Money on DIY Projects?
DIY can save money, but only when you control waste.
Common sources of unnecessary costs include:
- Buying tools you don’t need
- Purchasing incorrect materials
- Wasting paint
- Cutting incorrectly
- Repeating work
- Buying supplies at the last minute
- Choosing products without understanding their purpose
Before shopping, divide your list into two categories.
Essential
Items required to complete the project.
Optional
Items that improve convenience or appearance but aren’t necessary.
This simple distinction can keep a small project from becoming unnecessarily expensive.
Reusing existing furniture is another effective way to save money. A dated cabinet may need new hardware and a suitable finish rather than complete replacement.
Should Beginners Follow DIY and Interior Design Trends?
Trends can be useful for inspiration, but your home shouldn’t become a collection of trends that don’t work together.
Consider your lifestyle, maintenance needs, available space, and personal preferences first.
If you prefer clean spaces and purposeful furniture, Minimalist Interior Design can provide useful inspiration.
If you prefer a current, polished look with clean forms, Contemporary Interior Design may be more appropriate.
The best DIY project is one that remains useful even after the trend disappears.
How Can Beginners Use Natural Wood in DIY?
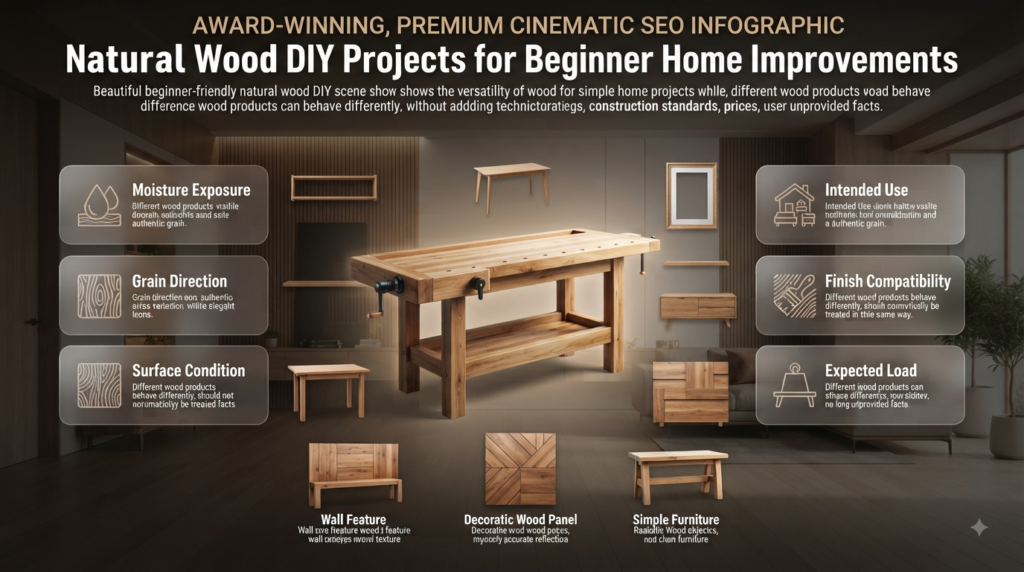
Wood is one of the most useful materials for beginner projects.
It can be used for:
- Shelves
- Small tables
- Frames
- Storage
- Wall features
- Decorative panels
- Simple furniture
However, different wood products behave differently.
Consider:
- Moisture exposure
- Grain direction
- Surface condition
- Intended use
- Finish compatibility
- Expected load
Don’t assume that every piece of wood can be treated in exactly the same way.
For ideas about using wood as part of an interior, Natural Wood Interior offers useful design direction.
Can DIY Help Make a Home More Energy Efficient?
Some beginner-level improvements can contribute to better energy efficiency.
Depending on the home, you might consider:
- Improving suitable drafts
- Using appropriate window coverings
- Choosing efficient lighting
- Reducing unnecessary heat gain
- Improving simple sealing where appropriate
- Using energy-conscious products
However, insulation, electrical modifications, HVAC work, and major building-envelope changes can require professional assessment.
For broader ideas, Energy-Efficient Homes can help you think about efficiency as part of a larger home-improvement strategy.
How Can Beginners Create a More Cohesive Home?
A common DIY problem is treating every project as a separate decoration.
A better approach is to think about the relationship between projects.
You can create consistency through:
- Similar wood tones
- Related hardware
- Repeated colors
- Complementary textures
- Consistent frame styles
- Similar proportions
For more ideas on connecting individual projects with the overall look of a home, explore Home Design Ideas.
The goal isn’t to make every room identical. It’s to make the home feel intentional.
Should Beginners Explore Different Interior Design Styles?
Yes, but learn the basic principles behind a style before copying individual elements.
For example, some styles emphasize simplicity, while others rely on layering, texture, contrast, or traditional details.
Interior Design Styles can help you understand these broader differences before deciding how a DIY project should fit into your home.
Scandinavian-Inspired DIY
Scandinavian-inspired spaces often work well with:
- Light wood
- Simple forms
- Neutral colors
- Functional storage
- Natural textures
- Clean lines
For related inspiration, explore Scandinavian Interior Design.
Japandi-Inspired DIY
Japandi combines elements associated with Japanese and Scandinavian design, often emphasizing simplicity, natural materials, functionality, and warmth.
For projects based on this approach, Japandi Interior Design can provide useful inspiration.
The key is restraint. A simple, well-made project can often fit these styles better than an overly decorated one.
What Are Decorative Finishes and Should Beginners Try Them?
Decorative finishes can add personality to furniture, walls, and other surfaces.
Depending on the project, techniques can include:
- Layered painting
- Stenciling
- Textured finishes
- Distressing
- Pattern work
- Specialty paint effects
Beginners should practice first.
Create a small sample board or use an inexpensive piece before applying an unfamiliar finish to an important surface.
This gives you an opportunity to understand how much product to use, how the tool behaves, and what the finished texture looks like.
For more ideas, Decorative Finishes is a natural resource for exploring decorative techniques.
What Are Statement DIY Projects?
Not every DIY project needs to be subtle.
A statement feature can become the visual focus of a room, but it should still relate to the rest of the space.
Possible ideas include:
- A bold feature wall
- Large-scale wall art
- A distinctive furniture piece
- A dramatic shelving arrangement
- A strong material contrast
- A carefully designed decorative installation
The key is choosing one clear focal point rather than filling the room with competing features.
For inspiration on creating a stronger visual focal point, explore Statement Interiors.
How Can Beginners Make DIY Projects Look More Professional?
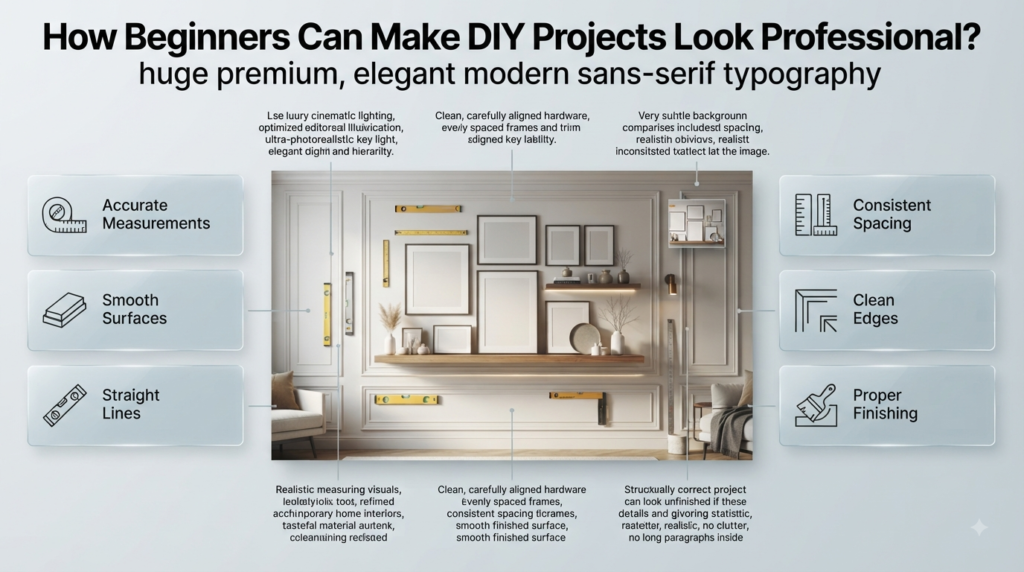
Professional-looking results usually come from preparation and attention to small details rather than expensive materials.
Focus on:
Accurate Measurements
Poor dimensions are visible in almost every installation project.
Smooth Surfaces
Sanding and cleaning can dramatically improve the final finish.
Straight Lines
Use appropriate measuring and leveling tools.
Consistent Spacing
Keep hardware, shelves, frames, and decorative elements aligned.
Clean Edges
Pay extra attention to corners, transitions, and trim.
Proper Finishing
Don’t treat the final stage as an afterthought.
A project can be structurally correct but still look unfinished if the edges, surfaces, or hardware placement are inconsistent.
How Can Beginners Improve Their DIY Skills?
The best way to improve is through deliberate repetition.
Suppose you want to get better at painting.
Instead of painting one wall and moving immediately to a completely unrelated project, use the skill again:
Project 1: Paint a small wall.
Project 2: Paint a piece of furniture.
Project 3: Create an accent wall.
Each project gives you more experience with preparation, coverage, edges, drying, and finishing.
The same principle works with drilling, sanding, measuring, assembling, and installing.
You don’t need to master everything at once.
When Should a DIY Beginner Call a Professional?
Knowing when to stop is an important DIY skill.
Consider professional assistance for:
- Major electrical modifications
- Gas-related work
- Structural changes
- Complex plumbing
- Significant roofing work
- Hazardous materials
- Specialist equipment
- Tasks requiring permits or inspections
- Work where failure could cause serious injury or property damage
There is no shame in hiring a professional.
DIY should help you save money and develop skills where it makes sense. It shouldn’t encourage you to take unnecessary risks.
How Can Beginners Use DIY to Improve Energy, Function, and Style Together?
The strongest home projects often solve more than one problem.
For example, a storage shelf can improve organization while adding visual interest. A furniture makeover can extend the life of an existing piece while changing the room’s appearance. Better window treatments can affect both comfort and aesthetics.
Think in terms of:
Function + Appearance + Durability
If a project succeeds in all three areas, it is usually a worthwhile improvement.
How Should Beginners Plan a Weekend DIY Project?
Don’t assume every project can be completed in a few hours.
Break the work into stages.
Before the Weekend
- Take measurements
- Plan the project
- Purchase materials
- Check tools
- Prepare the workspace
First Working Day
- Complete cleaning and preparation
- Make repairs
- Sand or prime if necessary
- Begin the main work
Second Working Day
- Complete remaining work
- Apply additional coats or finishes
- Install components
- Inspect the result
- Clean the area
Always account for drying and curing time.
A project that looks like a one-day task may actually require two or three days because materials need time between stages.
What Should You Do When a DIY Project Goes Wrong?
Stop before making another change.
Then identify the actual problem.
Ask:
- What happened?
- Why did it happen?
- Can the material be repaired?
- Does the damaged component need replacement?
- Was the wrong tool used?
- Was the measurement incorrect?
- Is it still safe to continue?
For example, if a shelf is crooked, don’t immediately drill another hole. Remove it, check the measurements, inspect the brackets, check the wall, and determine the cause.
⭐ Expert Tip: Treat mistakes like diagnosis problems. Find the cause before choosing the repair.
How Can Beginners Keep Track of Their DIY Projects?
A simple project record can become extremely useful.
Write down:
- Paint colors
- Product names
- Measurements
- Material types
- Hardware sizes
- Project dates
- Problems encountered
- Solutions that worked
Take photos before covering or closing important areas.
This can help with future maintenance and repairs.
Over time, you’ll have your own reference library based on real projects rather than theory.
What DIY Habits Save the Most Time?
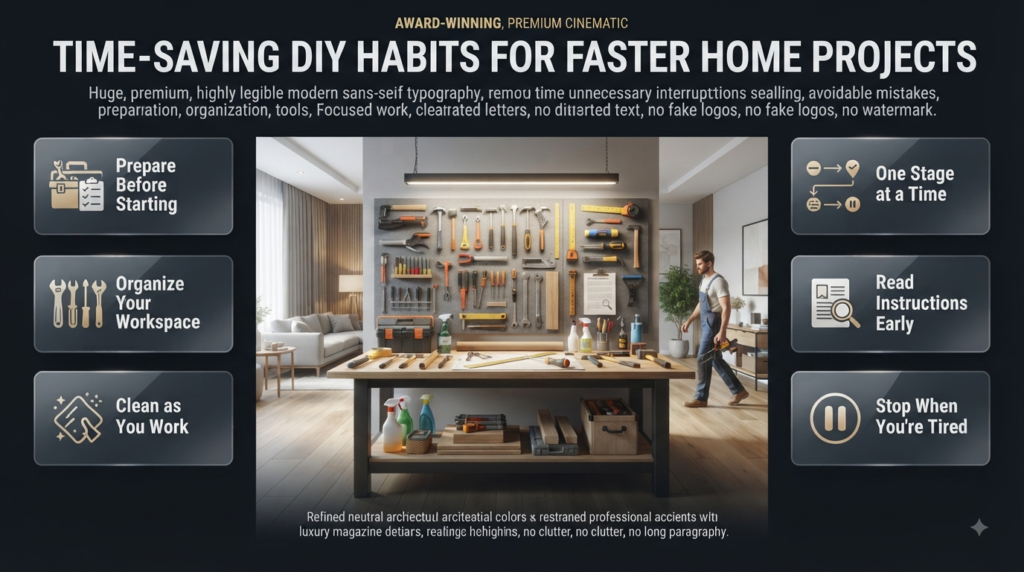
The biggest time-saving habits are surprisingly simple.
Prepare Before Starting
Have tools and materials ready.
Organize Your Workspace
Know where everything is.
Clean as You Work
Don’t allow waste and dust to accumulate.
Complete One Stage at a Time
Avoid jumping randomly between tasks.
Read Instructions Early
Don’t wait until you’re halfway through the project.
Stop When You’re Tired
Fatigue can lead to poor measurements and careless tool handling.
The goal isn’t to rush.
The goal is to remove unnecessary interruptions and avoidable mistakes.
What Are the Best DIY Ideas for a Minimalist Home?
Minimalist spaces benefit from projects that improve function without adding visual clutter.
Good ideas include:
- Simple floating shelves
- Hidden storage
- Clean-lined furniture updates
- Neutral wall colors
- Simple wood details
- Streamlined hardware
- Minimal wall décor
Before adding anything, ask whether the room actually needs it.
Minimalism isn’t simply having an empty room. It’s choosing things intentionally.
What Are Good DIY Ideas for a Contemporary Home?
Contemporary spaces can benefit from projects with clean lines, controlled contrast, and simple materials.
Consider:
- Updating cabinet hardware
- Creating a modern accent wall
- Refinishing furniture
- Building simple storage
- Creating large-scale artwork
- Simplifying clutter
Avoid adding too many unrelated features.
A contemporary room often looks stronger when a few elements are carefully selected rather than when every wall contains a different DIY project.
How Can Beginners Use DIY to Create Better Storage?
Storage projects are especially useful because they solve a practical problem.
Before building or installing storage, consider:
- What will be stored?
- How heavy will it be?
- How frequently will it be accessed?
- How much space is available?
- Does the solution need to be removable?
- How will it affect the appearance of the room?
Simple shelves, hooks, boxes, and furniture modifications can create meaningful improvements.
The best storage solution isn’t necessarily the largest. It’s the one that fits the objects and the way you actually use the room.
What Safety Rules Should Every Beginner Follow?
Safety should always come before speed.
Remember these basic rules:
- Read tool instructions.
- Wear appropriate eye protection.
- Keep the workspace well lit.
- Maintain suitable ventilation.
- Store sharp tools safely.
- Don’t use damaged equipment.
- Keep cords away from cutting paths.
- Use ladders correctly.
- Keep children and pets away from active work.
- Don’t operate unfamiliar equipment without understanding it.
- Stop when a task becomes unsafe or unclear.
If a project involves electricity, gas, structural work, hazardous materials, or significant fall risks, professional assistance may be the better option.
What Are the Best DIY Projects for Complete Beginners?
The best first DIY projects are small, affordable, low-risk, and easy to correct if something goes wrong. Painting a small wall, changing cabinet hardware, assembling furniture, creating simple wall décor, refinishing a small piece of furniture, or installing lightweight storage are good starting points. These projects help you learn measuring, preparation, tool handling, finishing, and patience without immediately taking on complicated construction work. Current beginner guides also recommend starting with simple projects that build confidence before progressing to more demanding work.
A good first project should ideally have:
A limited budget
Simple materials
Basic tools
A manageable time commitment
Low safety risk
An obvious finished result
A reasonable way to fix mistakes
Professional approach: Don’t choose your first DIY project because it looks impressive on social media. Choose it because it teaches you a skill you’ll use again.
For example, painting a small wall teaches surface preparation and finishing. Once you’re comfortable with that, you can move to furniture painting, accent walls, or more detailed decorative work. This gradual progression is much more effective than jumping directly into a major renovation.
What Tools Should a Beginner Buy for DIY Projects?
A beginner doesn’t need a huge professional toolbox. Start with a small collection of versatile tools that can handle everyday projects, then add specialized equipment as your skills develop. A practical starter kit normally includes a tape measure, screwdrivers, hammer, pliers, utility knife, level, pencil, safety glasses, and a basic drill/driver. Recent homeowner tool guides similarly recommend building a toolkit around commonly used hand tools and adding power tools according to actual project needs.
A sensible beginner toolkit includes:
Tape measure
Screwdriver set
Hammer
Pliers
Adjustable wrench
Utility knife
Level
Pencil or marking tool
Drill/driver
Basic drill-bit set
Sandpaper
Clamps
Safety glasses
Appropriate protective equipment
You don’t necessarily need the cheapest tools, but you also don’t need professional-grade equipment for your first few projects.
A useful rule is: buy for the project you’re actually doing, not for the DIYer you hope to become.
If you need an unusual tool for one specific job, borrowing or renting it can make more financial sense than buying something that may sit unused for years.
What Is the Biggest Beginner DIY Mistake to Avoid?
The biggest beginner mistake is starting the work before properly planning and preparing it. People often focus on the exciting part—painting, drilling, assembling, or installing—and underestimate the preparation required beforehand. That can lead to incorrect measurements, damaged surfaces, wasted materials, poor finishes, and unnecessary rework. Safety guidance also stresses that inexperienced DIYers should approach tools and unfamiliar techniques cautiously rather than rushing into the job.
Before starting, take a few minutes to answer:
What exactly am I trying to accomplish?
What measurements do I need?
Which materials are required?
Which tools do I need?
What preparation is necessary?
How long will the project realistically take?
What could go wrong?
Is this actually safe for me to do?
Other common beginner mistakes include:
Measuring only once
Using the wrong tool
Skipping surface preparation
Buying materials before checking dimensions
Applying paint too thickly
Ignoring drying or curing times
Working in poor lighting
Forgetting to protect floors and furniture
Trying to repair a mistake before identifying its cause
Taking on advanced electrical, structural, or hazardous work without the required expertise
Professional advice: If something goes wrong, stop rather than trying to hide the mistake. Diagnose the problem first. A crooked shelf, uneven paint finish, or damaged surface can often be corrected—but making several additional changes without understanding the original problem can make the repair much harder.
How Can Beginners Make DIY Projects Look More Professional?
Professional-looking DIY results usually come from good preparation, accurate measurements, clean execution, and patience, rather than expensive materials. A simple project can look excellent when the surface is properly prepared and the finishing details are handled carefully. Furniture-painting guidance, for example, consistently places preparation before primer and paint because the condition of the surface directly affects the final result.
Before you start, focus on the details that people notice immediately:
Measure accurately
Don’t assume two walls, cabinets, or pieces of furniture are perfectly identical. Measure the actual area you’re working with.
Prepare the surface
Clean away dust, grease, loose material, and other contaminants. Repair imperfections before applying the final finish.
Use the correct tools
A suitable brush, roller, drill bit, fastener, sanding material, or measuring tool can make the job considerably easier.
Don’t rush the finish
Allow paint, adhesive, filler, stain, or other products to dry and cure according to their instructions.
Inspect from different angles
Once the project appears finished, step back and look at it from normal viewing distance. Small alignment or finishing problems are often easier to notice once you’re no longer focused on the work itself.
⭐ Expert Tip: When painting furniture, don’t judge the finish immediately after applying the final coat. Let it dry properly before deciding whether the surface actually needs another coat or correction. Rushing this stage can turn a minor issue into a bigger one.
When Should a Beginner DIYer Hire a Professional?
A beginner should consider professional help when a project involves significant safety risks, structural integrity, gas systems, complex electrical work, hazardous materials, major plumbing, or specialist equipment. DIY is valuable for learning skills and handling appropriate home improvements, but saving money isn’t worth creating a serious safety or property problem.
A useful way to judge a project is to ask:
“If I make a mistake, what is the worst realistic consequence?”
If the answer is a damaged piece of furniture, wasted paint, or a replacement shelf, the risk may be manageable.
If the answer involves:
Electrical shock or fire
Gas leaks
Major water damage
Structural failure
Serious falls
Hazardous exposure
Significant property damage
then professional expertise is usually the smarter choice.
This doesn’t mean beginners should avoid challenging themselves. It means skill development should happen progressively.
Start with painting, furniture updates, basic assembly, simple décor, measuring, sanding, and other manageable work. As your experience grows, you can take on more complex projects where appropriate.
📌 Remember: Knowing when not to DIY is itself an important DIY skill.
Bottom Line
The smartest beginner isn’t the person who tries to do everything alone. It’s the person who chooses the right project, prepares properly, uses the right tools, works safely, learns from mistakes, and knows when professional help is necessary. That approach builds genuine DIY confidence instead of simply creating more work to fix later.
Conclusion
Starting a DIY project doesn’t have to feel complicated or intimidating. The best results usually come from starting small, planning carefully, using the right tools, and giving each step enough time. You don’t need to know everything before picking up your first tool. What matters is choosing a project that matches your current skill level and learning from each experience.
As you gain confidence, simple projects such as painting, furniture makeovers, wall décor, shelving, and basic home improvements can gradually lead to more advanced skills. Always measure before cutting, prepare surfaces before finishing, protect your workspace, and never ignore safety just to save time or money.
Most importantly, don’t judge your progress by how quickly you finish a project. Judge it by how much you learned and how well the finished result solves the original problem. With patience and consistent practice, these Beginner DIY Tips can help you turn small ideas into practical, attractive improvements throughout your home.
Leave a Reply