
Introduction
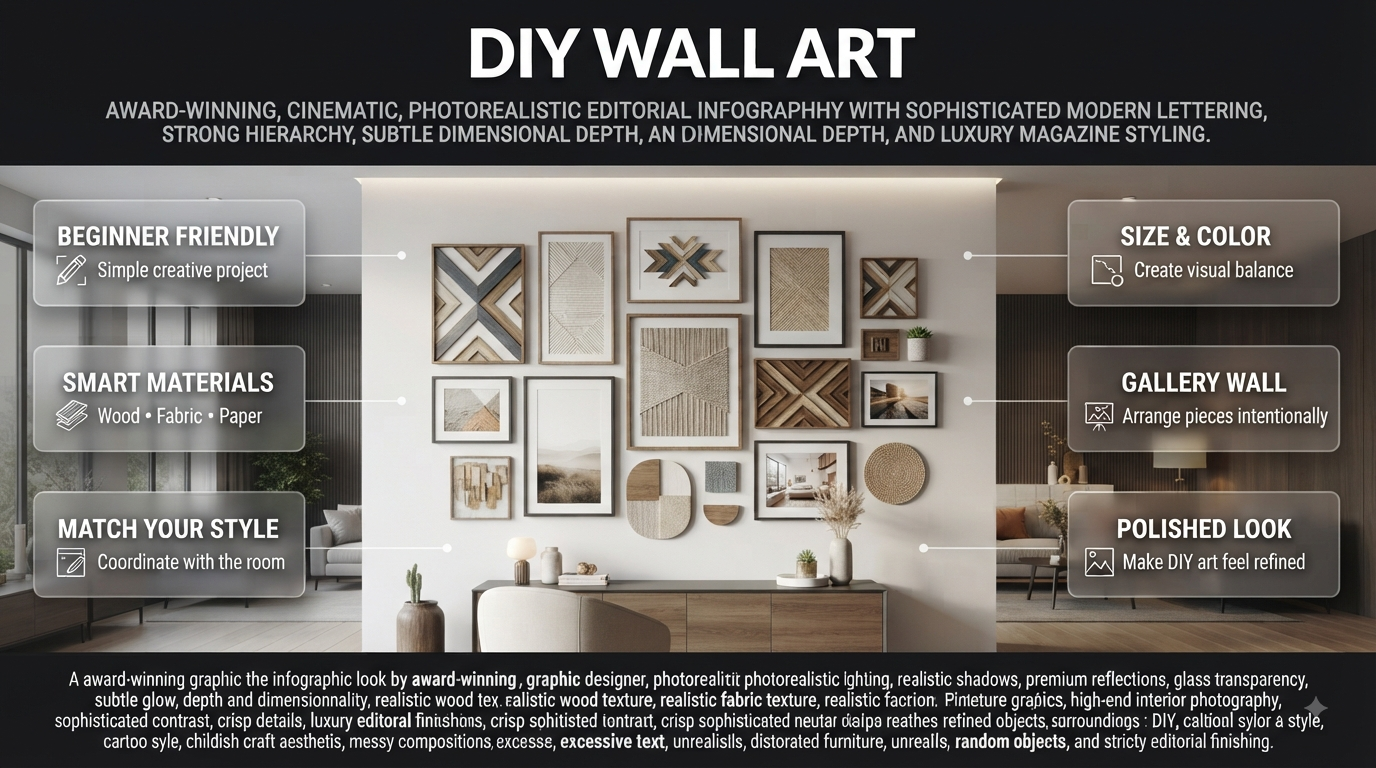
DIY Wall Art | A blank wall can make an otherwise attractive room feel unfinished. You may have the right sofa, rug, lighting, and furniture, yet the room can still feel like something is missing. Buying large artwork can solve the problem, but it can also become expensive, especially when you need a particular size, color, or style.
That’s where DIY Wall Art becomes a practical solution.
Creating your own wall décor lets you control the size, colors, materials, texture, and overall style. You don’t need to be a professional artist, either. Some of the most effective projects involve simple shapes, natural materials, fabric, paper, photographs, wood, or carefully arranged objects.
Whether you’re decorating a living room, bedroom, hallway, dining area, home office, or entryway, this guide will help you choose the right project and make it look intentional rather than homemade.
For broader inspiration before starting your project, visit DesignMode24 Interior Design, where you can explore ideas for creating a more cohesive home.
In this complete guide, you’ll learn:
- What DIY wall art is and why it’s worth making
- The best DIY wall art ideas for beginners
- How to choose artwork based on room size and interior style
- Which materials and tools you actually need
- How to make several wall-art projects step by step
- How to make inexpensive artwork look more expensive
- How to choose colors, sizes, frames, and layouts
- How to create gallery walls
- How to use wood, fabric, paper, and natural materials
- The biggest beginner mistakes and how to avoid them
- Professional tips for making homemade artwork look polished
- Answers to common DIY wall art questions
What Is DIY Wall Art?
DIY wall art is artwork or decorative wall décor that you create, customize, assemble, paint, or repurpose yourself. It can include painted canvases, framed prints, abstract designs, wood panels, textile art, photographs, botanical displays, paper crafts, textured surfaces, and gallery walls.
The main advantage is customization. Instead of searching for artwork that happens to fit your room, you can make a piece specifically for your available wall space, color palette, furniture, and decorating style.
DIY wall art can be:
- Painted
- Printed
- Framed
- Textured
- Sculptural
- Fabric-based
- Wood-based
- Paper-based
- Nature-inspired
- Personalized
- Repurposed from existing materials
A simple piece can be just as effective as an elaborate one. In fact, clean composition, appropriate scale, and a restrained color palette often make simple artwork look more sophisticated.
Why Is DIY Wall Art So Popular?
DIY wall art has become popular because it solves several decorating problems at once. It can be affordable, customizable, creative, and flexible enough to work with almost any interior style.
Unlike mass-produced artwork, a DIY piece can also have a personal story behind it. A photograph from a memorable trip, a child’s drawing, a handmade abstract canvas, or a piece made from reclaimed wood can give a room character that isn’t easily achieved with generic décor.
It Helps Fill Empty Walls
Large blank walls can make furniture arrangements feel incomplete. A carefully sized artwork can visually connect the furniture to the wall and create a clear focal point.
It Allows Complete Color Control
If your room uses beige, cream, olive, and natural wood, you can create artwork using exactly those tones.
This is especially useful when you’re following a specific Paint Color direction and want your wall décor to support the room rather than compete with it.
It Can Reduce Decorating Costs
Many projects can be made using affordable supplies or materials you already have at home. Old frames, leftover fabric, cardboard, wood scraps, photographs, and unused paint can all become part of a wall-art project.
It Adds Personality
Your artwork doesn’t have to represent a particular trend. It can reflect your interests, memories, favorite colors, hobbies, or the atmosphere you want your home to create.
💡 Pro Tip: Don’t start by asking, “What artwork should I make?” Start by asking, “What does this wall need?” The answer might be a large focal point, more color, texture, symmetry, or simply something to balance the furniture.
What Are the Best DIY Wall Art Ideas for Beginners?
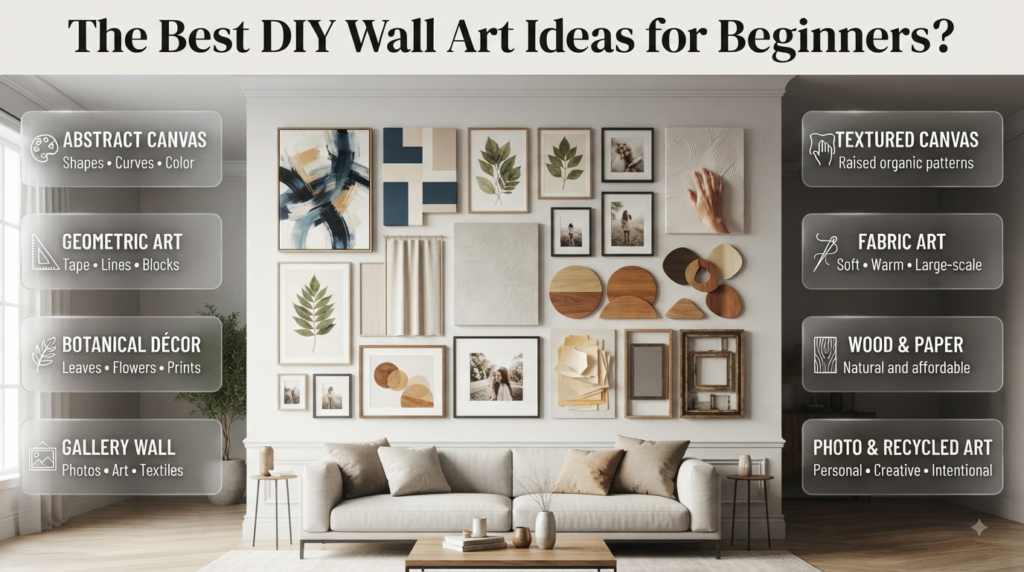
The best beginner DIY wall art projects are inexpensive, forgiving, and easy to modify. Abstract canvas art, geometric paintings, framed botanical designs, fabric panels, paper artwork, simple gallery walls, and wood compositions are excellent starting points.
Here are some of the most practical ideas.
1. Abstract Canvas Art
Abstract art is one of the easiest projects for beginners because it doesn’t require you to reproduce a specific image.
Choose a blank canvas and a small palette of two to four colors. Create large shapes, curves, brushstrokes, or blocks of color. You can layer colors gradually until the composition feels balanced.
The trick is to stop before the canvas becomes overcrowded.
2. Geometric Wall Art
Geometric designs are ideal if you like modern or contemporary interiors.
Use painter’s tape to create:
- Arches
- Rectangles
- Triangles
- Stripes
- Overlapping blocks
- Grids
- Asymmetrical shapes
Paint inside the taped sections, let the paint dry, and remove the tape carefully.
This method gives beginners clean lines without requiring advanced drawing skills.
3. Botanical Wall Art
Botanical wall art brings a natural feeling into the room. You can use pressed leaves, dried flowers, botanical illustrations, plant silhouettes, or simple hand-painted leaves.
This style works especially well with bedrooms, dining rooms, entryways, and relaxed living spaces.
4. DIY Gallery Wall
A gallery wall allows you to combine different types of artwork instead of relying on one large piece.
You can include:
- Personal photographs
- Abstract paintings
- Typography
- Children’s artwork
- Botanical prints
- Line drawings
- Travel photographs
- Small mirrors
- Textile pieces
The important thing is to create a visual connection between the different pieces.
5. Textured Canvas Art
Textured artwork is a strong option for neutral interiors. You can use suitable modeling paste or texture materials to create raised curves, lines, arches, waves, or organic patterns.
A monochromatic textured canvas can look particularly sophisticated because the visual interest comes from shadows and surface variation rather than bright colors.
⚠ Common Mistake: Adding too much texture. If the room already contains patterned upholstery, textured rugs, decorative finishes, and several accessories, heavily textured artwork can make the space feel busy.
6. Fabric Wall Art
Fabric can be stretched over a frame or mounted onto a lightweight panel to create soft, large-scale wall décor.
This is especially useful in bedrooms because fabric introduces warmth and softness that painted artwork may not provide.
7. Wooden Wall Art
Wood adds warmth and natural character. You can create geometric wood arrangements, painted wooden shapes, slatted panels, or simple abstract compositions.
If you like warm natural materials, explore Natural Wood Interior ideas for inspiration.
8. Paper Wall Art
Paper is one of the cheapest materials for DIY décor. You can create:
- Paper flowers
- Folded geometric art
- Layered shapes
- Collages
- Typography
- Paper leaves
- Cutout patterns
Use archival-quality paper when possible if you want the artwork to last for years.
9. Personalized Photo Art
Print several photographs using a consistent color treatment or frame style. Black-and-white photography, for example, can make a collection feel more cohesive.
10. Recycled Wall Art
Old magazines, packaging cardboard, leftover wallpaper, fabric scraps, and unused frames can all be repurposed.
The goal isn’t simply to reuse materials. The finished result should still look intentional and appropriate for the room.
How Do You Choose DIY Wall Art for Your Room?
Choose DIY wall art by considering the wall’s size, furniture beneath it, existing colors, interior style, lighting, and the visual weight of nearby objects.
A common mistake is choosing artwork first and then trying to make the room accommodate it.
Instead, evaluate the room first.
Consider the Wall Size
A large wall generally needs either:
- One large statement piece
- Two or three coordinated pieces
- A properly scaled gallery wall
A tiny frame floating above a large sofa usually looks undersized.
Consider the Furniture
Artwork should visually relate to the furniture underneath it.
For example, a wide horizontal sofa usually works well with horizontal artwork or a collection whose overall width creates a similar visual footprint.
Consider Existing Colors
Look around the room and identify two or three colors that already appear repeatedly.
You can use these colors in your artwork to create cohesion.
Consider the Interior Style
A rustic room may benefit from wood and botanical artwork, while a contemporary room may look better with geometric or abstract pieces.
For a broader decorating foundation, explore Interior Design concepts before selecting your artwork.
DIY Wall Art Ideas by Interior Design Style
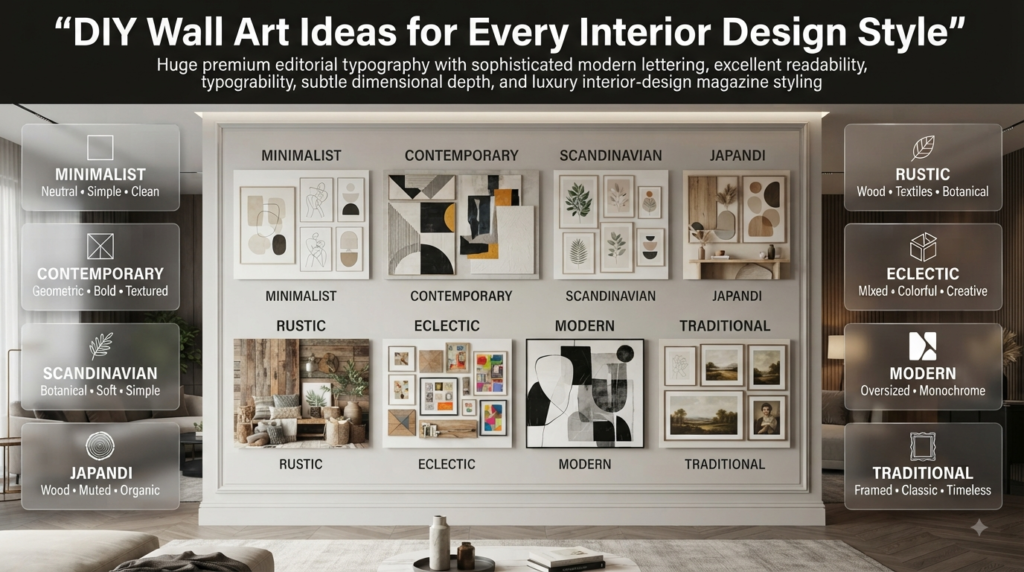
Your wall art doesn’t need to match your interior exactly, but it should feel connected to it.
| Interior style | Recommended DIY wall art |
|---|---|
| Minimalist | Neutral abstract art, line drawings, simple shapes |
| Contemporary | Geometric designs, bold abstracts, textured canvases |
| Scandinavian | Botanical art, soft neutrals, simple graphics |
| Japandi | Natural wood, muted tones, organic shapes |
| Rustic | Reclaimed wood, textiles, botanical pieces |
| Eclectic | Gallery walls, mixed materials, colorful artwork |
| Modern | Oversized abstracts, monochrome designs |
| Traditional | Framed prints, landscapes, classic compositions |
If you’re unsure which direction suits your room, browsing Interior Design Styles can help you identify the visual language you want to follow.
DIY Wall Art for Minimalist Interiors
Minimalist rooms generally benefit from fewer, stronger pieces.
Good choices include:
- One oversized neutral canvas
- Black-and-white line art
- Monochromatic textured art
- Simple geometric compositions
- Natural wood panels
- Minimal botanical prints
The goal isn’t to fill every empty area. Negative space is part of the design.
For more inspiration, see Minimalist Interior Design.
DIY Wall Art for Contemporary Interiors
Contemporary interiors can handle stronger contrast, geometric forms, abstract compositions, and unusual textures.
Try:
- Large abstract canvas
- Black-and-white geometric art
- Raised plaster-style artwork
- Asymmetrical compositions
- Mixed-media pieces
- Large photographic prints
If you’re developing a complete contemporary look, Contemporary Interior Design can provide additional direction.
DIY Wall Art for Japandi Interiors
Japandi design combines Japanese simplicity with Scandinavian warmth. DIY artwork should therefore feel calm, natural, and restrained.
Consider:
- Natural wood
- Neutral textured canvas
- Simple botanical artwork
- Organic shapes
- Handmade paper
- Soft beige, cream, charcoal, and muted green
Avoid excessive decoration. The strength of this style comes from simplicity and material quality.
For more ideas, explore Japandi Interior Design.
DIY Wall Art for Scandinavian Interiors
Scandinavian spaces often benefit from clean graphics, natural subjects, light colors, and uncomplicated compositions.
Try botanical illustrations, minimalist line drawings, simple typography, black-and-white photography, or pale abstract artwork.
You can explore Scandinavian Interior Design for additional inspiration.
What Materials Do You Need for DIY Wall Art?
You don’t need to buy an enormous collection of craft supplies. A basic toolkit can handle many projects.
Essential Materials
- Blank canvas
- Acrylic paint
- Paintbrushes
- Painter’s tape
- Pencil
- Ruler
- Measuring tape
- Scissors
- Craft knife
- Picture frames
- Suitable adhesive
- Sandpaper
- Wood panels
- Decorative paper
- Fabric
- Mounting hardware
Optional Materials
Depending on your project, you may also use:
- Modeling paste
- Palette knives
- Texture tools
- Stencils
- Natural wood pieces
- Dried flowers
- Rope
- Cork
- Foam board
- Reclaimed materials
Choose materials based on the final application. A lightweight decorative piece may need completely different construction from a heavy wood panel.
How Do You Make DIY Wall Art Step by Step?
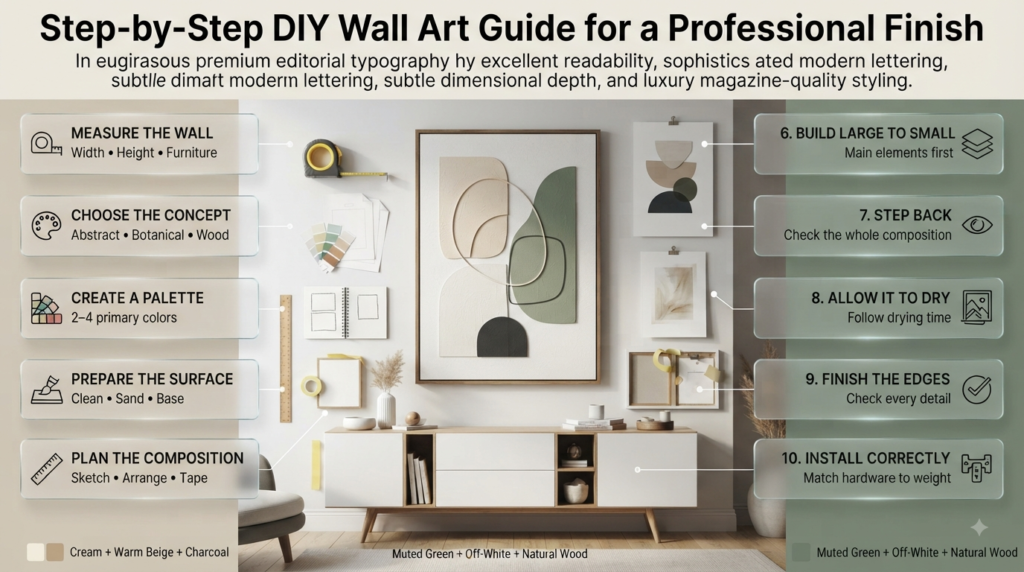
A professional-looking result comes from planning rather than rushing into the creative stage.
Step 1: Measure the Wall
What to do: Measure the available width and height.
Why it matters: It prevents you from creating artwork that is too small or too large.
Professional advice: Also measure the furniture underneath the artwork.
Common mistake: Guessing dimensions.
Quick example: If you are decorating above a wide sofa, photograph the wall and use simple paper templates to test possible artwork sizes.
Step 2: Choose the Concept
Decide whether you want:
- Abstract
- Geometric
- Botanical
- Textured
- Photographic
- Wood-based
- Fabric-based
- Personalized artwork
Don’t start buying materials until you know what you’re making.
Step 3: Create a Color Palette
Select two to four primary colors.
A simple formula is:
Dominant color + supporting color + small accent
For example:
Cream + warm beige + charcoal
or
Muted green + off-white + natural wood
Step 4: Prepare the Surface
Clean and prepare your canvas, wood, or other surface.
For wood, sanding can help create a smoother finish. For painted artwork, an appropriate base can help improve consistency.
Step 5: Plan the Composition
Before applying paint or adhesive, sketch the main arrangement.
For geometric artwork, use a ruler and painter’s tape.
For gallery walls, arrange the frames on the floor.
For collage work, position every element before gluing.
Step 6: Build From Large to Small
Start with the largest visual elements.
Add secondary shapes after the main composition is established. Finish with small details.
This prevents the artwork from becoming overworked.
Step 7: Step Back
Don’t judge artwork only from a few inches away.
Stand several feet back and look at the entire composition.
You can also take a photograph with your phone. A photo often reveals imbalance more quickly than looking at the original.
Step 8: Allow It to Dry
Follow the manufacturer’s recommended drying or curing time.
Do not frame, stack, transport, or hang artwork prematurely.
Step 9: Finish the Edges
Check:
- Corners
- Paint edges
- Frame joints
- Glue marks
- Loose fibers
- Uneven paper cuts
- Surface imperfections
The finishing stage is what separates a rushed DIY project from a polished one.
Step 10: Install It Correctly
Use suitable wall hardware for the object’s weight and the wall type.
Heavy pieces need more secure installation than lightweight prints.
📌 Quick Tip: Before drilling, place the artwork against the wall and photograph it from the normal viewing position. This simple test can prevent unnecessary holes and repositioning.
How Do You Make DIY Wall Art Look Expensive?
Expensive-looking artwork is usually about presentation rather than expensive materials.
Use a Restrained Palette
Too many colors can make a beginner project look chaotic.
A limited palette makes the composition feel intentional.
Make It Large Enough
Scale is one of the strongest factors affecting perceived quality.
An oversized simple artwork can look more sophisticated than a small complicated piece.
Use Quality Frames
A basic print in a well-selected frame can look much better than an expensive print in an unsuitable frame.
Leave Negative Space
Don’t feel obligated to fill every part of a canvas.
Empty space can give the artwork breathing room.
Repeat Elements From the Room
If your artwork contains natural wood, repeat wood elsewhere.
If it uses olive green, introduce a related tone through a cushion or plant.
If the artwork is black and cream, similar tones can appear in other décor.
⭐ Expert Tip: The goal isn’t to make every object identical. Professional interiors usually rely on repetition with variation. Repeat a color or material without copying the exact same shape everywhere.
How Should You Arrange a DIY Gallery Wall?
A gallery wall works best when the individual pieces feel like one collection.
Start by selecting a unifying element.
This could be:
- Matching frame colors
- Similar artwork colors
- A common theme
- Similar matting
- A consistent subject
- Repeated shapes
Then vary the sizes.
A Simple Gallery Wall Process
- Measure the total wall area.
- Collect the frames.
- Place them on the floor.
- Try several arrangements.
- Photograph your favorite arrangement.
- Create paper templates if necessary.
- Tape the templates to the wall.
- Check spacing.
- Install the actual frames.
Don’t assume every frame needs to be perfectly symmetrical. A controlled asymmetrical arrangement can look more relaxed and contemporary.
Can You Use DIY Wall Art as a Statement Piece?
Yes. A large DIY artwork can become the focal point of an entire room when it has sufficient scale and contrast.
Statement artwork works best when surrounding décor is relatively controlled.
For example, a large abstract canvas above a neutral sofa can create a strong focal point without requiring many additional decorations.
If you’re designing around a dramatic focal point, Statement Interiors can provide useful inspiration.
How Can Decorative Finishes Improve DIY Wall Art?
Texture, layered paint, natural materials, metallic accents, and other surface treatments can make wall art more visually interesting.
However, decorative finishes should be used with purpose.
You might use texture to:
- Add depth
- Create shadows
- Emphasize a pattern
- Introduce tactile interest
- Break up a large neutral wall
If you’re exploring different ways to add surface character, see Decorative Finishes.
What Are the Best DIY Wall Art Ideas for Small Rooms?
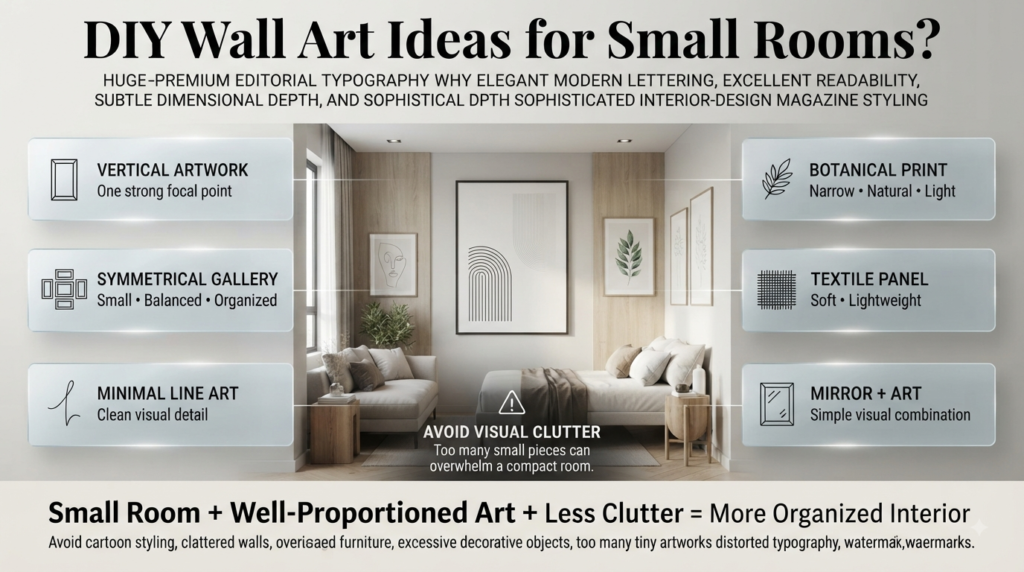
Small rooms don’t necessarily need tiny artwork. In many cases, one well-proportioned piece can make the room feel more organized.
Good options include:
- One vertical artwork
- A small symmetrical gallery
- Minimal line art
- A narrow botanical print
- A lightweight textile panel
- A simple mirror-art combination
Avoid covering every available wall with small decorative pieces. Too many small objects can make a compact room feel cluttered.
What Are the Best DIY Wall Art Ideas for Large Walls?
Large walls require visual weight.
Consider:
- Oversized canvas art
- Multi-panel artwork
- Large gallery walls
- Wood installations
- Fabric panels
- Large botanical arrangements
- Three-piece abstract sets
If you have a particularly large wall, create the artwork around the furniture rather than simply choosing the largest canvas you can find.
How Can You Make DIY Wall Art More Sustainable?
Sustainable DIY décor starts with using what you already have.
Before purchasing supplies, check whether you have:
- Old frames
- Unused artwork
- Leftover paint
- Wood offcuts
- Fabric remnants
- Cardboard
- Old photographs
- Packaging materials
- Decorative objects
Repurposing materials can reduce waste while giving the finished artwork a more personal character.
You can also think about sustainability as part of the wider home. Ideas related to Energy-Efficient Homes can help you approach home improvement more thoughtfully rather than treating décor as a collection of isolated purchases.
How Can DIY Wall Art Work With Other DIY Projects?
Wall art often looks best when it is part of a broader room update.
For example, you might:
- Refinish a side table
- Paint an accent wall
- Update old frames
- Create handmade décor
- Rearrange furniture
- Improve lighting
- Add natural materials
If you’re planning several projects at once, DIY Home Projects can help you think beyond a single wall.
For handmade decorative ideas, DIY Home Decor Crafts is another useful resource.
How Can Furniture Makeovers Complement DIY Wall Art?
Wall artwork can look disconnected when the furniture underneath it belongs to a completely different visual style.
One solution is to coordinate a furniture makeover with the artwork.
For example:
- Natural wood furniture + botanical wall art
- Black furniture + monochrome artwork
- White furniture + soft pastel artwork
- Warm wood + earthy abstract art
- Painted furniture + colorful geometric art
If you’re updating an existing piece rather than replacing it, explore Furniture Makeovers for complementary ideas.
What Are the Most Common DIY Wall Art Mistakes?
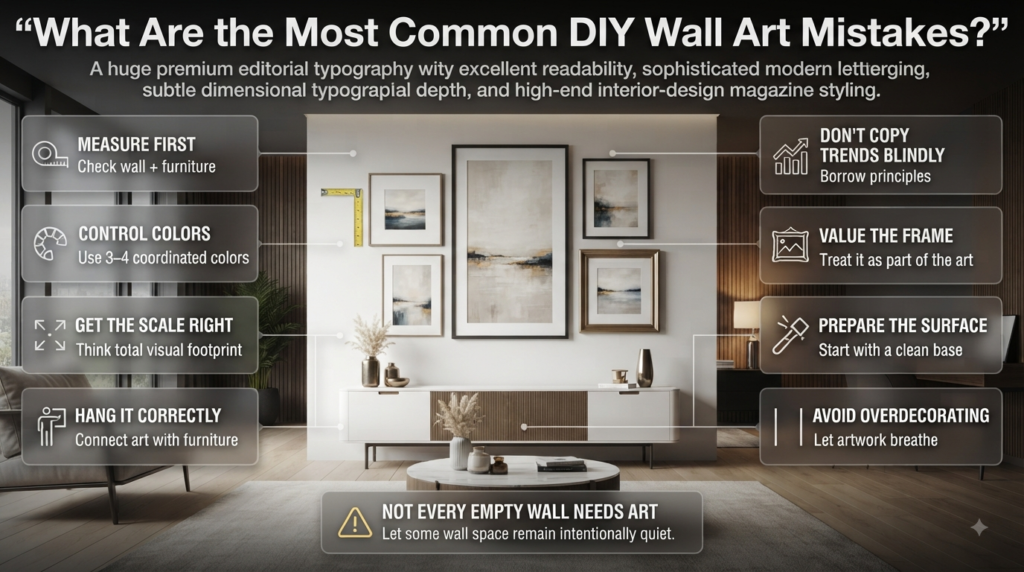
1. Choosing the Artwork Before Measuring
Why it happens: The artwork looks attractive while shopping or planning.
Why it’s a problem: It may not fit the wall or furniture arrangement.
Better approach: Measure first.
2. Using Too Many Colors
Why it happens: DIY painting encourages experimentation.
Why it’s a problem: The artwork may compete with existing décor.
Better approach: Start with three or four coordinated colors.
3. Making the Artwork Too Small
Why it happens: Small projects feel easier and cheaper.
Why it’s a problem: The artwork loses visual impact.
Better approach: Think about the total visual footprint.
4. Hanging Artwork Too High
Why it happens: People focus on the wall rather than the furniture.
Why it’s a problem: The artwork appears disconnected.
Better approach: Consider the relationship between artwork and furniture.
5. Copying Trends Blindly
Why it happens: Online inspiration can make certain styles look universally suitable.
Why it’s a problem: Your room may have completely different proportions or colors.
Better approach: Borrow principles rather than copying an entire design.
6. Ignoring Frame Quality
Why it happens: Most attention goes toward the artwork itself.
Why it’s a problem: Poor framing can reduce the overall appearance.
Better approach: Treat the frame as part of the artwork.
7. Skipping Surface Preparation
Why it happens: Preparation isn’t exciting.
Why it’s a problem: Paint may apply unevenly or the final surface may look inconsistent.
Better approach: Prepare the material before beginning the creative work.
8. Overdecorating the Wall
Why it happens: Empty space can feel uncomfortable.
Why it’s a problem: Too many pieces compete for attention.
Better approach: Let important artwork breathe.
⚠ Common Mistake: Assuming every empty wall needs decoration. Sometimes the best design decision is to leave part of a wall intentionally quiet so the surrounding artwork and furniture have more impact.
How Do Professionals Decide Where to Hang Wall Art?
Professionals consider the entire visual composition rather than treating artwork as an independent object.
They look at:
- Furniture height
- Ceiling height
- Wall width
- Viewing distance
- Artwork size
- Frame thickness
- Color contrast
- Lighting
- Nearby architectural details
The artwork should feel connected to the room’s visual center.
For example, above a sofa, artwork usually works better when it visually anchors the seating area rather than floating near the ceiling.
What Is the Best DIY Wall Art for a Budget Makeover?
For a budget makeover, prioritize projects that create maximum visual impact with inexpensive materials.
The strongest choices are usually:
- Large abstract canvas
- DIY gallery wall
- Botanical prints
- Painted geometric artwork
- Fabric wall panel
- Recycled-frame display
- Paper artwork
- Simple wood composition
You don’t need to decorate every wall. One well-executed focal point can change the appearance of an entire room.
How Can You Make a DIY Project Feel Personal?
Personalization is one of the biggest advantages of making your own artwork.
Consider using:
- Family photographs
- Travel memories
- Favorite quotes
- Children’s artwork
- Personal sketches
- Favorite colors
- Meaningful objects
- Handmade textures
- Local landscapes
You can also create a visual collection around a particular memory rather than buying unrelated decorative pieces.
For example, a hallway gallery might combine travel photographs with simple maps and small abstract pieces inspired by places you’ve visited.
What Should You Consider Before Starting a DIY Wall Art Project?
Before buying anything, answer these questions:
- Where will the artwork go?
- How large should it be?
- What colors already exist in the room?
- What interior style am I following?
- Is the wall a focal point?
- Will the artwork be viewed from close or far away?
- How heavy will the finished piece be?
- What wall hardware will I need?
- Does the material require special preparation?
- How much time do I realistically have?
- What is my total budget?
These questions prevent unnecessary purchases and help you create something that actually works in the room.
Expert Advice for Better DIY Wall Art
The difference between an average DIY project and a polished one often comes down to a few simple decisions.
Start With Scale
Don’t choose the artwork size based only on what is easiest to make. Choose it based on the wall and furniture.
Edit Your Design
When you’re unsure whether to add another detail, leave it out temporarily.
You can always add more later.
Removing unnecessary elements is much harder once paint, glue, or texture has been applied.
Photograph the Room
Take a photograph from the main viewing position.
This helps you see:
- Whether the artwork is large enough
- Whether colors work together
- Whether the composition feels balanced
- Whether the wall is becoming too crowded
Create a Mockup
You don’t need expensive design software.
Use paper, cardboard, or a simple digital photograph to visualize the artwork before making it.
Consider Lighting
Artwork can look completely different under warm evening lighting and bright daylight.
If possible, view your sample colors at different times of day.
Think About Maintenance
Textured artwork, fabric, and open shelving-style wall décor can collect dust more easily than smooth framed prints.
Choose materials according to how much maintenance you’re willing to do.
⭐ Expert Tip: Before permanently attaching anything, live with the temporary arrangement for at least a little while. A layout that looks good for five minutes may feel crowded after several hours.
What DIY wall art is trending in 2026?
In 2026, textured artwork, warm-toned abstract designs, oversized statement pieces, natural materials, and more personal gallery walls are among the strongest wall-art directions. The shift is away from perfectly polished, generic décor toward pieces that show texture, craftsmanship, warmth, and personality. Current design coverage also highlights warmer palettes and tactile surfaces as major trends.
For a DIY project, that means you don’t need to copy an expensive designer piece. You can achieve the same visual direction with affordable materials and a thoughtful composition.
Best DIY approaches:
Textured or plaster-look canvas
Warm earth-tone abstract art
Oversized handmade canvas
Natural wood wall art
Botanical or nature-inspired artwork
Personalized gallery walls
Professional tip: Don’t chase every trend. Choose one current element—such as texture or warm color—and combine it with a design that suits your home. That makes the artwork feel contemporary without looking dated when trends change.
How can I make DIY wall art look expensive and professional?
The secret to expensive-looking DIY wall art isn’t using expensive supplies. Scale, composition, color control, texture, framing, and clean finishing have a much greater impact on the final appearance. A large, simple artwork with a restrained palette can look considerably more sophisticated than a complicated piece covered in unnecessary details.
Start by choosing colors already present in the room. Then keep the composition relatively simple and give the artwork enough negative space. If you’re making a canvas, pay attention to the edges as well as the front surface. A poorly finished edge can make an otherwise attractive project look unfinished.
To create a more premium appearance:
Use two to four coordinated colors.
Choose artwork with appropriate scale for the wall.
Keep shapes and spacing intentional.
Use quality-looking frames.
Avoid excessive decorative details.
Make sure the surface and edges are clean.
Photograph the artwork from a distance before finalizing it.
Expert advice: One strong DIY statement piece is often more effective than several small projects competing for attention. Current interior-design guidance is also moving toward curated, personal artwork rather than generic mass-produced décor.
Is DIY textured wall art still popular, and how can I make it?
Yes. Textured wall art remains one of the most useful DIY directions for 2026, particularly for neutral and contemporary interiors. Texture adds depth through light and shadow, which allows a simple color palette to remain visually interesting without relying on bright patterns.
A beginner-friendly approach is to use a suitable prepared canvas and an appropriate texture compound, then create simple arches, waves, lines, or organic shapes with a palette knife or similar tool. Allow the material to dry or cure according to the manufacturer’s instructions before painting or hanging it.
For a sophisticated result:
Start with a large, simple shape.
Keep the color neutral or warm.
Avoid creating too many patterns on one canvas.
Build texture gradually rather than applying an unnecessarily thick layer.
Allow adequate drying time.
Check the finished surface under the room’s normal lighting.
Important: Don’t treat texture as a shortcut for design. The shape, scale, and placement still matter. A simple textured composition usually looks more intentional than a canvas covered randomly with thick material.
Are gallery walls still in style in 2026, or should I make one large piece?
Gallery walls are still relevant in 2026, but the preferred look has become more personal and less rigid. Instead of using identical frames in a perfectly symmetrical grid, current styling favors mixed sizes, personal artwork, varied frame finishes, and a more collected appearance. Oversized single artwork is also a strong alternative when you want a cleaner focal point.
For DIY decorating, the choice should depend on your room and the story you want the wall to tell.
Choose a gallery wall when:
You have several meaningful photographs or artworks.
You want a personal, collected appearance.
You enjoy mixing different frame sizes.
You have a hallway or large vertical wall.
You want to add visual variety.
Choose one large artwork when:
The room has a minimalist appearance.
You want a strong focal point.
The wall is large and relatively uncluttered.
You prefer a cleaner, more contemporary look.
Professional tip: Even an eclectic gallery wall needs one unifying element. Repeat a color, frame finish, subject, or overall mood so the collection feels curated rather than random.
What is the best DIY wall art for a blank wall on a budget?
The best budget option depends on the wall’s size and the style of the room, but large abstract canvas art, DIY gallery walls, botanical prints, paper art, recycled-frame displays, and simple wood artwork offer some of the strongest visual impact for relatively little money.
The biggest budgeting mistake is buying lots of small decorative items simply because each one is inexpensive. Several unrelated pieces can quickly become more expensive—and more visually cluttered—than one well-planned statement project.
Budget-friendly ideas:
Paint an inexpensive blank canvas with an abstract design.
Repurpose an old picture frame.
Print personal photographs and create a gallery wall.
Use leftover fabric for a textile wall panel.
Reuse suitable wood scraps for geometric artwork.
Create botanical art from pressed leaves or simple prints.
Turn leftover paint into a monochromatic composition.
Best professional approach: Spend more attention on proportion and presentation than on materials. Measure the wall first, test your layout with paper templates, and make sure the final artwork has enough visual weight. A thoughtfully designed low-cost piece will usually outperform a collection of randomly purchased décor.
Conclusion
DIY wall art is more than a simple craft project. When planned properly, it can become an important part of the room’s overall design.
You don’t need expensive materials or professional painting skills to create something attractive. A simple canvas, carefully selected colors, a few pieces of wood, a collection of photographs, or even recycled materials can become effective wall décor when the scale, composition, and finish are right.
The best approach is to start with the room itself. Look at the wall, furniture, colors, lighting, and interior style. Decide what the space is missing, then choose a DIY project that solves that problem.
If the wall needs a focal point, go larger. If the room already contains strong colors, keep the artwork restrained. If the space feels cold, introduce texture or natural materials. If the room lacks personality, use photographs or meaningful handmade pieces.
Most importantly, don’t feel pressured to make your project complicated. Good design often depends on knowing when to stop.
With a clear plan, a limited palette, suitable materials, and attention to finishing details, DIY Wall Art can turn an ordinary blank wall into a distinctive feature that feels genuinely connected to your home.
For more complete home inspiration and practical decorating ideas, you can also return to DesignMode24 Interior Design and continue exploring projects that complement your new wall décor.
Leave a Reply