
Introduction
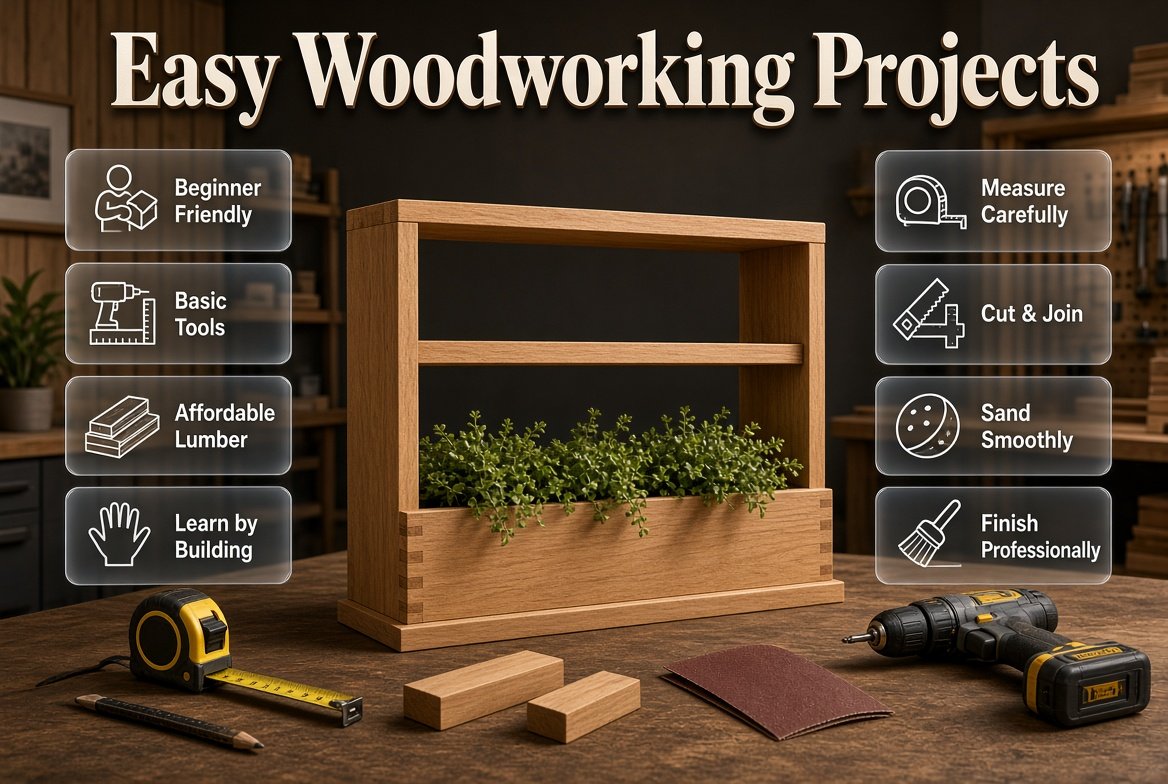
Easy Woodworking Projects | There’s something satisfying about taking an ordinary piece of wood and turning it into something useful with your own hands. A shelf that fits a forgotten corner, a planter that gives a patio some character, or a simple storage box that finally solves a clutter problem can feel far more rewarding than buying the same item from a store.
The good news is that you don’t need a professional workshop to get started. Many Easy Woodworking Projects require only a few basic tools, inexpensive lumber, and a little patience. In fact, starting with smaller projects is often the best way to learn woodworking because you can practice measuring, cutting, drilling, sanding, joining, and finishing without taking on a complicated build.
Whether you’re completely new to woodworking or you’ve already completed a few DIY projects, the right project can help you build confidence while creating something useful for your home.
In this guide, you’ll discover beginner-friendly woodworking ideas, the tools and materials you’ll need, project difficulty levels, practical construction advice, finishing techniques, common mistakes, and ways to make handmade wood projects look professionally designed.
If you’re building a broader collection of practical DIY ideas for your home, DesignMode24 Interior Design is also a useful place to explore additional home-focused inspiration.
What Are the Best Easy Woodworking Projects for Beginners?
The best beginner woodworking projects are simple enough to complete without advanced tools but useful enough to teach real woodworking skills. Shelves, trays, planter boxes, storage crates, coat racks, small benches, laptop stands, and simple wall organizers are excellent starting points because they rely mainly on straight cuts, drilling, sanding, and basic assembly.
A good first project should meet four basic requirements:
- It should use affordable materials.
- It should require tools you already have or can reasonably access.
- It shouldn’t depend on complicated joinery.
- It should give you a practical result when finished.
Starting small isn’t a sign that you’re inexperienced. It’s how experienced makers reduce mistakes, material waste, and frustration.
For example, building a small wooden tray teaches many of the same principles you’ll eventually use when making furniture. You’ll still need to measure accurately, cut boards, prepare edges, assemble pieces, and apply a finish.
The difference is that a tray is easier to correct if something goes wrong.
Easy Woodworking Projects Worth Trying
Here are some practical ideas to consider:
| Project | Difficulty | Approximate Time | Main Skills |
|---|---|---|---|
| Wooden Tray | Beginner | 2–4 hours | Measuring, sanding, assembly |
| Floating Shelf | Beginner | 2–4 hours | Cutting, drilling, mounting |
| Storage Crate | Beginner | 2–4 hours | Cutting, fastening |
| Planter Box | Beginner | 2–5 hours | Assembly, outdoor finishing |
| Coat Rack | Beginner | 1–3 hours | Drilling, mounting |
| Laptop Stand | Beginner | 2–4 hours | Cutting, sanding |
| Picture Frame | Beginner–Intermediate | 3–5 hours | Accurate cutting |
| Small Bench | Intermediate | 4–8 hours | Joinery, assembly |
| Wall Organizer | Beginner | 2–5 hours | Layout, drilling |
| Simple Side Table | Intermediate | 5–8 hours | Assembly, leveling |
Times vary depending on your experience, tools, material preparation, and finish.
💡 Pro Tip: Your first woodworking project doesn’t need to look perfect. Concentrate on making it square, strong, safe, and functional. Your finishing quality will improve naturally as you repeat the process.
How Do You Choose the Right Woodworking Project?
Choose your first project according to your tools, available space, budget, and intended use. Beginners usually have the easiest experience with projects that use straight cuts and simple screws or glue rather than complicated angles or advanced joinery.
Before choosing a project, ask yourself:
- What tools do I already have?
- What kind of wood can I easily get?
- How much workspace do I have?
- Do I need the finished project indoors or outdoors?
- How much weight will it need to support?
- How much time can I realistically spend?
- Am I comfortable using the tools required?
If you live in a small home or apartment, a compact project makes more sense than building a large workbench immediately.
If you have access to leftover boards, you can design a project around the material you already have. Scrap wood is particularly useful for small organizers, picture ledges, trays, plant stands, and decorative pieces.
For more ideas that combine practical construction with home improvement, explore DIY Home Projects.
What Tools Do You Need for Easy Woodworking Projects?
You don’t need to buy an entire workshop before making your first project. A small collection of dependable tools can handle a surprising number of beginner builds.
Essential Hand Tools
A useful starting toolkit includes:
- Tape measure
- Pencil
- Combination square
- Level
- Clamps
- Hand saw
- Hammer
- Screwdrivers
- Utility knife
- Sandpaper
- Safety glasses
A combination square is particularly useful because it helps you mark straight lines and check whether corners are square.
Useful Power Tools
As your skills develop, consider adding:
- Cordless drill/driver
- Circular saw
- Jigsaw
- Random orbital sander
A cordless drill is often the most useful first power tool. It can drill pilot holes, drive screws, install hardware, and handle many basic assembly tasks.
A circular saw becomes valuable when you’re working with larger boards or plywood sheets.
A random orbital sander can save considerable time when preparing larger surfaces.
⭐ Expert Tip: Don’t buy tools simply because they’re popular in woodworking videos. Buy a tool when a real project requires it. A small collection of tools you know how to use is more valuable than an expensive workshop full of equipment you rarely touch.
What Wood Is Best for Beginner Woodworking?
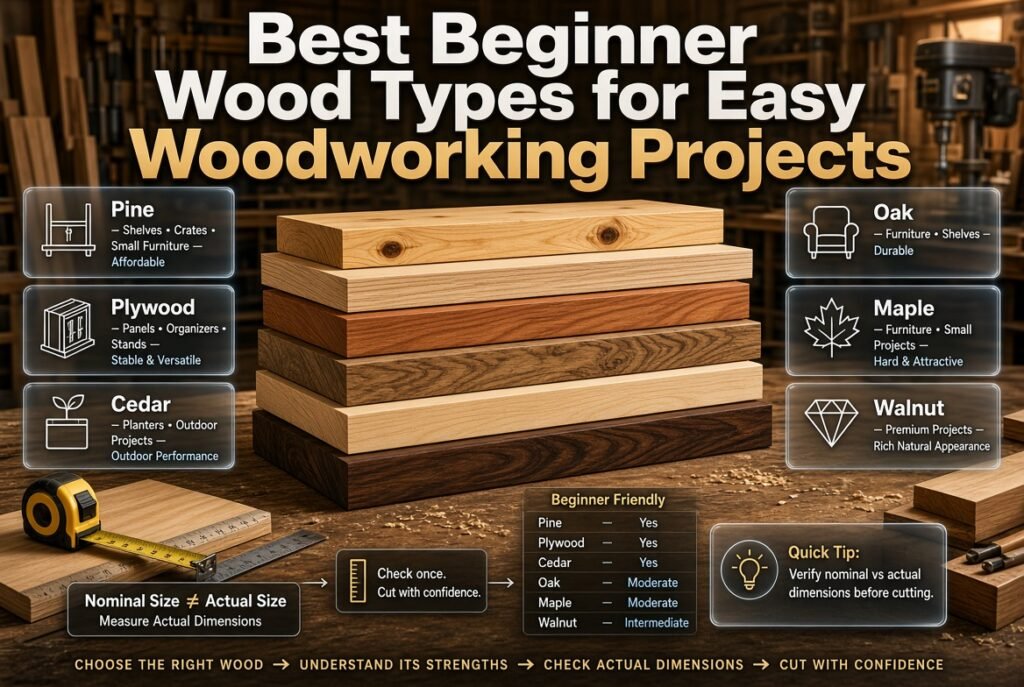
Pine is one of the easiest materials for beginners because it’s affordable, readily available, and relatively easy to cut and sand. Plywood is another practical choice for shelves, organizers, stands, and panels.
Cedar works well for many outdoor projects, particularly planter boxes. Hardwoods such as oak and maple are durable and attractive but can be more expensive and harder to cut.
| Wood Type | Best For | Beginner Friendly | Main Advantage |
| Pine | Shelves, crates, small furniture | Yes | Affordable |
| Plywood | Panels, organizers, stands | Yes | Stable and versatile |
| Cedar | Planters, outdoor projects | Yes | Good outdoor performance |
| Oak | Furniture, shelves | Moderate | Durable |
| Maple | Furniture, small projects | Moderate | Hard and attractive |
| Walnut | Premium projects | Intermediate | Rich natural appearance |
Don’t feel pressured to start with expensive hardwood. Beginners naturally make mistakes, and inexpensive material lets you practice without worrying about ruining costly boards.
Understand Nominal Wood Sizes
One common beginner mistake is assuming that a board labeled 1×6 actually measures exactly 1 inch by 6 inches.
Nominal lumber dimensions are often different from the actual finished dimensions.
Always measure the actual board before designing your project.
📌 Quick Tip: If you’re following a woodworking plan, verify whether the dimensions refer to nominal or actual lumber sizes before making any cuts.
1. Build a Simple Floating Shelf
A floating shelf is one of the most useful beginner woodworking projects because it solves a real storage problem while teaching several fundamental skills.
You can use a shelf for books, plants, framed photos, bathroom supplies, collectibles, or everyday storage.
For additional inspiration, see Floating Shelf Ideas.
Materials
You’ll typically need:
- Wooden board
- Appropriate shelf hardware
- Drill
- Screws
- Level
- Sandpaper
- Finish or paint
Step-by-Step
Step 1: Measure the wall
Determine the desired shelf length and mounting height.
Step 2: Cut the board
Cut the board to the required length or have it cut for you.
Step 3: Sand the edges
Remove rough areas and slightly soften sharp exposed corners.
Step 4: Locate secure mounting points
Whenever possible, attach the mounting hardware to wall studs.
Step 5: Install the hardware
Drill appropriate pilot holes and secure the hardware according to its specifications.
Step 6: Position the shelf
Use a level before tightening everything completely.
Common mistake: Assuming that every drywall anchor can support a shelf loaded with books or heavy objects.
Always check the hardware’s actual load rating.
2. Make a Wooden Storage Crate
A storage crate is one of the easiest projects for using scrap lumber. It can be used for toys, books, blankets, tools, pantry items, or decorative storage.
You can leave the wood natural, stain it, paint it, or add handles.
Basic Construction
Start by deciding the crate’s final dimensions. Then cut the side pieces and bottom panel.
After cutting:
- Sand the boards.
- Lay the pieces out on a flat surface.
- Drill pilot holes.
- Assemble the sides.
- Attach the bottom.
- Check the corners.
- Sand the completed crate.
- Apply your chosen finish.
The biggest challenge is keeping the crate square.
A simple way to check this is to measure diagonally from corner to corner. Compare both diagonal measurements. If they’re equal, your rectangular frame is much more likely to be square.
⚠ Common Mistake: Fastening the crate immediately without checking its shape. Once several screws are installed, correcting a crooked frame becomes much harder.
3. Build a Wooden Planter Box
A planter box is another excellent project because it doesn’t require advanced furniture joinery.
Cedar is a popular outdoor option, while treated or appropriately protected wood can also be used depending on the application.
What You’ll Need
- Four side boards
- Bottom board
- Exterior-rated screws
- Drill
- Saw
- Sandpaper
- Exterior finish
Cut the side boards to matching lengths and assemble them with screws.
The bottom should include drainage holes.
Without adequate drainage, water can remain trapped inside the planter, which can harm plants and contribute to wood deterioration.
Why Planter Boxes Are Great for Beginners
They teach you:
- Basic measuring
- Repeated cuts
- Screw placement
- Simple box construction
- Outdoor finishing
- Material planning
📌 Quick Tip: Slightly round sharp exposed corners with sandpaper. It makes the planter safer to handle and gives the finished piece a more refined appearance.
4. Make a Wooden Serving Tray
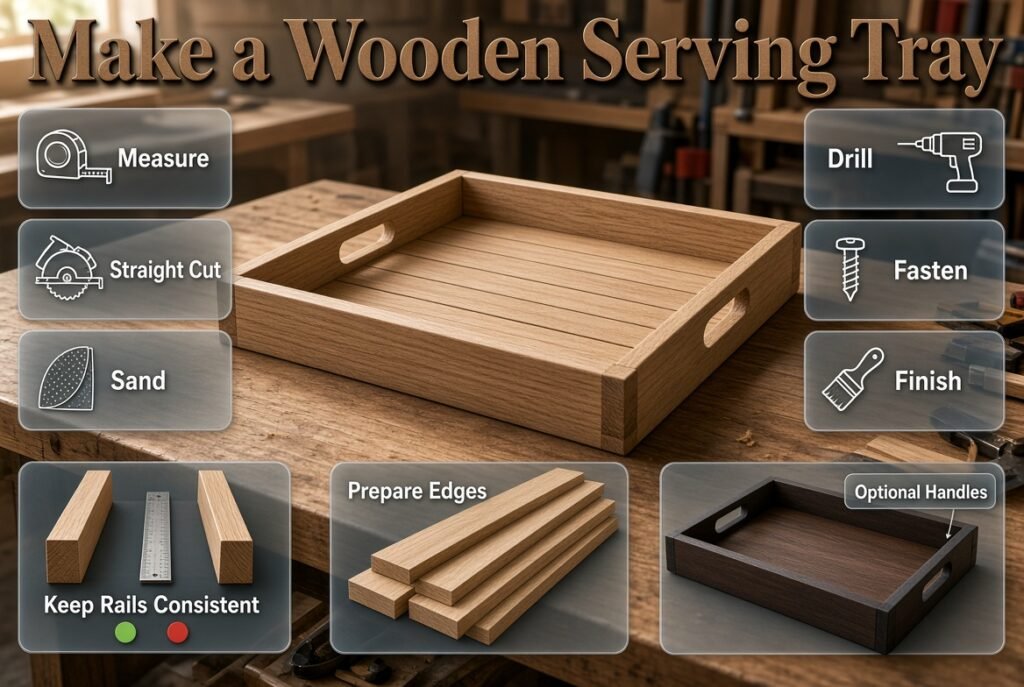
A wooden tray looks more complicated than it really is.
A basic tray can be constructed from a flat base with four side rails. You can add handles later if desired.
Why Build a Tray?
A tray is small enough to manage comfortably while teaching:
- Measuring
- Straight cutting
- Sanding
- Drilling
- Fastening
- Finishing
Choose relatively straight boards and take time to prepare the edges.
If you want a more decorative appearance, consider contrasting the tray’s base with painted or stained side rails.
The key is consistency. If one side rail is noticeably taller than another, the finished tray can look uneven.
5. Create a Simple Wooden Coat Rack
A coat rack can be made from one board and several hooks.
Choose a board that complements the room where it will be installed. Sand it, apply your chosen finish, allow it to cure, and then attach appropriately rated hooks.
The most important part isn’t the woodworking itself. It’s the mounting system.
Coats, bags, backpacks, and other items can put significant force on the wall.
Make sure the rack is attached to suitable structural points or use properly rated anchors for the wall type.
If you’re thinking about how functional furniture and accessories fit into a larger room, Home Styling offers useful complementary ideas.
6. Build a Laptop Stand
A wooden laptop stand is compact, practical, and easy to customize.
You can make one from plywood or hardwood depending on your desired appearance.
The design can be as simple as an angled platform with a small front lip to stop the laptop from sliding forward.
Design Considerations
Think about:
- Laptop width
- Desired viewing height
- Keyboard angle
- Stability
- Ventilation
- Desk space
Avoid making the stand too steep. The laptop should remain stable during normal use.
Sanding the edges thoroughly is particularly important because the stand will be handled frequently.
7. Make a Wooden Picture Frame
A simple picture frame is a great next step once you’ve become comfortable with straight cuts.
Traditional frames often use 45-degree miter cuts, which require greater accuracy.
If you’re new to miter cuts, start with a simpler overlapping construction method.
Once you’re comfortable with accurate measuring and cutting, move toward traditional miter joints.
Handmade frames can work beautifully with artwork and decorative projects. For additional inspiration, explore DIY Wall Art.
8. Build a Small Wall Organizer
A wall organizer can combine a shelf, hooks, small compartments, or mail storage into one compact project.
It’s especially useful near:
- Entryways
- Home offices
- Kitchens
- Bedrooms
- Mudrooms
Design the organizer around the items you actually need to store.
Don’t make compartments simply because they look interesting. If you have nowhere to put a specific object, the design isn’t solving a real problem.
This is one of the principles that makes functional woodworking so valuable in home improvement: good design begins with understanding how a space is used.
9. Make a Simple Plant Stand
A small wooden plant stand can be built using four legs and a top platform.
The key challenge is stability.
Measure the legs carefully and make sure they’re equal in length. If one leg is even slightly longer, the stand can wobble.
For a cleaner look, soften the edges and use a finish that complements the plant pot.
Natural wood works especially well in interiors influenced by simple, warm, or nature-focused design.
10. Build a Small Bench
A basic bench is a good project for someone who has already completed a few smaller builds.
You’ll need to pay more attention to structural strength because the bench needs to support body weight.
Use appropriately sized lumber and strong joints. Avoid relying on decorative construction methods that aren’t designed for load-bearing furniture.
Before anyone sits on the finished bench, inspect every joint and fastening point.
A small bench can work in an entryway, bedroom, covered porch, or mudroom.
11. Create a Simple Bedside Table
A basic bedside table can be made from a top, four legs, and optional lower storage.
You don’t need drawers for your first version.
A simple open-shelf design is much easier to build and can still look sophisticated.
Focus on proportion.
The table should generally be comfortable relative to the height of the bed. Measure your actual furniture rather than copying dimensions from a random plan.
12. Make a Wooden Key Holder
A key holder is one of the fastest woodworking projects you can complete.
Take a small board, sand it, apply a finish, and install several hooks.
You can personalize it with:
- Paint
- Stencils
- Wood-burning
- Engraving
- Decorative hardware
The project is small enough to be an excellent practice piece for learning finishes.
How Do You Measure Wood Correctly?
Accurate measuring is one of the most important woodworking skills because a perfect assembly can’t fix an incorrectly cut board.
Use this simple sequence:
Measure → Mark → Check → Clamp → Cut → Test Fit → Assemble
Don’t skip the checking stage.
When several pieces look similar, write their intended dimensions directly on the wood. This reduces the chance of grabbing the wrong piece during assembly.
Keep your pencil marks clear but thin. A thick line can create unexpected dimensional errors on small projects.
💡 Pro Tip: Always identify which side of your cut line is the waste side. This simple habit prevents accidentally cutting away the section you actually need.
Should You Use Screws, Nails, or Wood Glue?
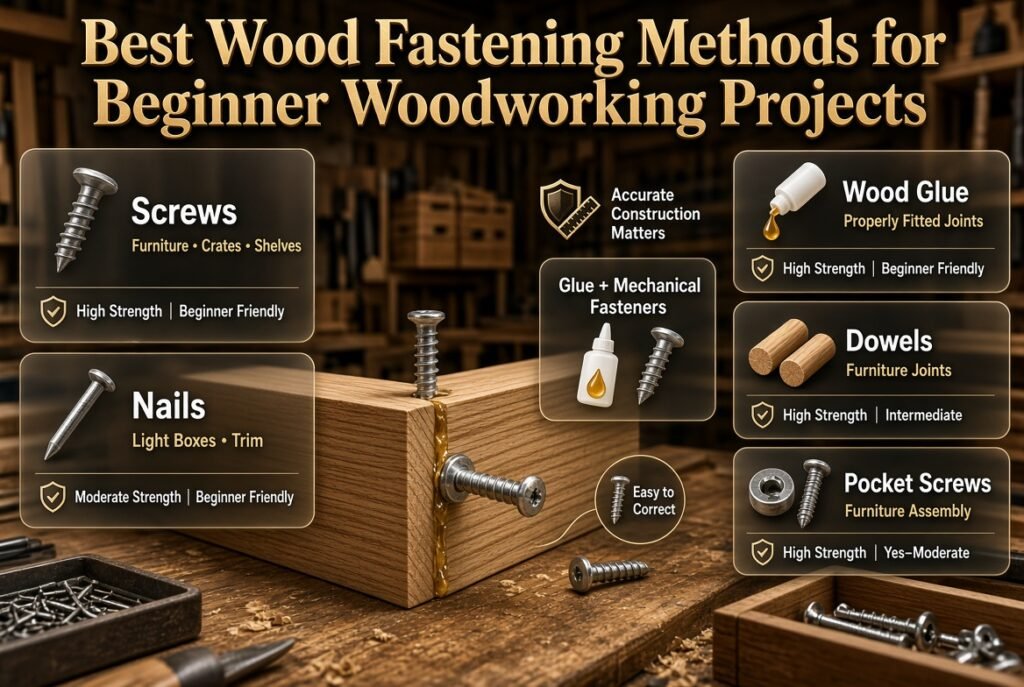
The right fastening method depends on the project.
| Method | Best For | Strength | Beginner Friendly |
| Screws | Furniture, crates, shelves | High | Yes |
| Nails | Light boxes, trim | Moderate | Yes |
| Wood Glue | Properly fitted joints | High | Yes |
| Dowels | Furniture joints | High | Intermediate |
| Pocket Screws | Furniture assembly | High | Yes–Moderate |
Wood glue can create very strong joints when the mating surfaces fit properly.
However, glue isn’t a replacement for accurate construction.
Screws provide mechanical fastening and are particularly convenient for beginners because they can often be removed if an assembly needs correction.
For many projects, combining glue with mechanical fasteners provides an effective solution.
When Should You Drill Pilot Holes?
Pilot holes are especially useful near board ends, close to edges, and when working with materials that may split.
The correct drill-bit size depends on the screw and material.
Don’t assume that every screw needs the same pilot hole.
How Should You Sand a Woodworking Project?
Sanding should prepare the surface for the intended finish, not simply remove as much material as possible.
Start with a suitable grit for the condition of the wood and progress to finer grits as needed.
Avoid aggressive sanding on corners and edges because you can accidentally change the shape.
A common approach is:
Rough surface → Medium sanding → Fine sanding → Dust removal → Finish
Remove dust before applying paint, stain, oil, or clear finish.
A small amount of remaining dust can become surprisingly visible after finishing.
How Do You Finish Easy Woodworking Projects?
The right finish depends on how the project will be used.
Paint
Paint is useful when:
- You want a specific color.
- The wood has inconsistent appearance.
- You’re creating a decorative piece.
- You want to coordinate the project with a room.
Stain
Stain works well when you want the wood grain to remain visible.
Clear Finish
Clear finishes protect the surface while preserving much of the wood’s natural appearance.
Oil-Based Finishes
Oils can emphasize grain and create a natural appearance, but always follow the manufacturer’s instructions regarding application, ventilation, and curing.
For more ideas related to color selection and finishes, visit Paint Color and Decorative Finishes.
How Can You Make Simple Woodworking Projects Look Expensive?
Professional-looking woodworking isn’t necessarily about expensive wood.
Clean proportions, accurate cuts, smooth surfaces, consistent edges, and thoughtful finishing often matter more.
Pay attention to:
- Even dimensions
- Straight edges
- Square corners
- Consistent sanding
- Clean screw placement
- Appropriate hardware
- Smooth exposed edges
- Proper finish application
A simple shelf made accurately can look better than an elaborate piece assembled carelessly.
This principle also applies to broader home design. A well-made handmade piece can complement both simple and more expressive interiors.
For inspiration, explore Home Design Ideas.
How Does Woodworking Fit Into Interior Design?
Woodworking becomes particularly interesting when you stop thinking of individual projects as isolated objects.
A shelf, bench, tray, frame, or organizer can become part of a room’s overall visual language.
For example:
- Natural oak can add warmth.
- Painted wood can introduce color.
- Dark-stained wood can create contrast.
- Light pine can support a relaxed aesthetic.
- Minimal shelving can reinforce a clean interior.
- Handmade furniture can add personality.
If you’re interested in a simpler approach, Minimalist Interior Design provides useful inspiration for using fewer, more purposeful elements.
For a cleaner modern look, Contemporary Interior Design can help you think about proportions, materials, and visual balance.
Can Woodworking Projects Work With Japandi Interiors?
Yes. Wood is particularly well suited to Japandi-inspired spaces because natural materials, simplicity, functionality, and calm visual balance are central to the aesthetic.
A simple wooden bench, low shelf, plant stand, or storage box can work better than an overly decorative project.
If you’re designing around this style, Japandi Interior Design offers additional ideas for combining natural materials with understated interiors.
The important lesson is restraint.
You don’t need to add decorative details to every woodworking project. Sometimes the beauty is in the material, proportions, and craftsmanship.
How Can Woodworking Support Different Interior Design Styles?
The same basic woodworking technique can produce completely different results depending on the finish and design.
A rough pine shelf with a natural finish may suit a relaxed rustic interior.
The same shelf painted in a clean neutral color could work in a contemporary space.
A dark-stained hardwood shelf may feel more traditional or dramatic.
You can explore Interior Design Styles to understand how material choices can support different visual directions.
This makes DIY woodworking especially useful: you’re not limited to whatever finishes manufacturers happen to sell.
Common Beginner Woodworking Mistakes
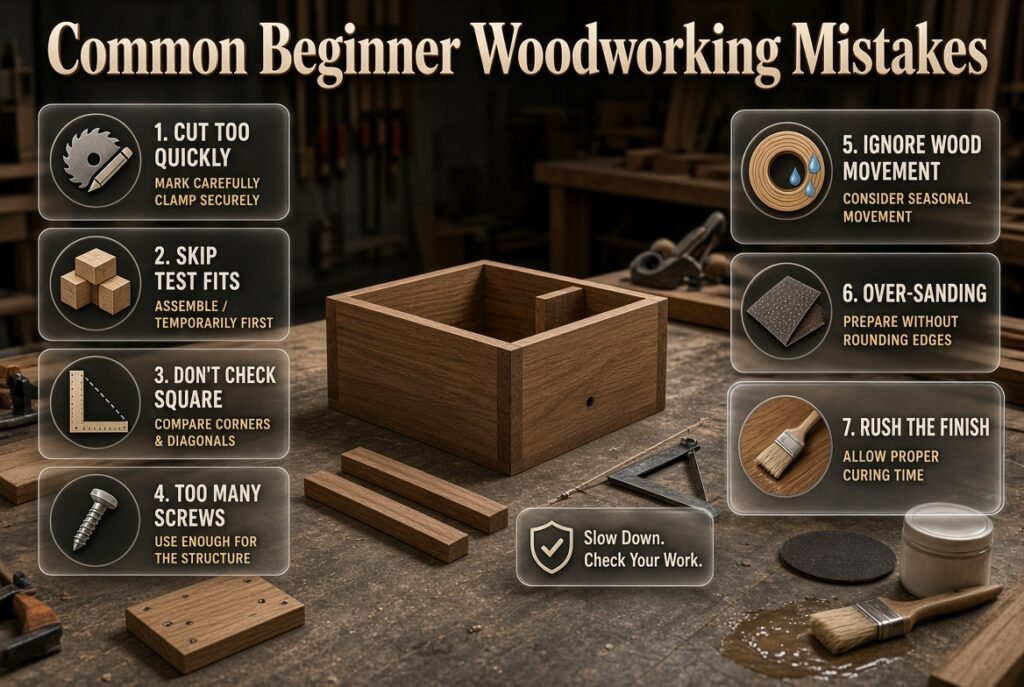
Beginner mistakes are usually caused by rushing rather than a lack of intelligence or creativity.
Mistake 1: Cutting Too Quickly
A fast cut isn’t necessarily a good cut.
Why it happens: You want to finish the project.
Why it’s harmful: An inaccurate cut can affect every later step.
How to avoid it: Mark carefully, clamp securely, and let the tool do the work.
Mistake 2: Skipping Test Fits
Some beginners permanently fasten every piece immediately.
Why it’s harmful: Problems become difficult to correct.
Better approach: Assemble pieces temporarily first.
Mistake 3: Not Checking Square
A box can look almost square while still being noticeably distorted.
Solution: Check corners and compare diagonals.
Mistake 4: Using Too Many Screws
More screws don’t automatically mean stronger construction.
Too many fasteners can weaken thin boards or create unnecessary visual clutter.
Use enough fastening for the structural requirement.
Mistake 5: Ignoring Wood Movement
Wood is a natural material that responds to moisture and environmental conditions.
Large furniture projects need more consideration of seasonal movement than tiny decorative projects.
If you’re making complex furniture, learn how wood movement affects your particular design.
Mistake 6: Over-Sanding
Excessive sanding can round edges and change dimensions.
Sand until the surface is properly prepared rather than continuing indefinitely.
Mistake 7: Rushing the Finish
A finish may require multiple coats or curing time.
Trying to handle or assemble the piece too soon can damage the surface.
Follow the finish manufacturer’s instructions.
What Safety Rules Should Beginners Follow?
Woodworking should be enjoyable, but safety can’t be treated as optional.
Wear appropriate eye protection when cutting, drilling, or sanding.
Secure your material instead of trying to hold it in place with your hand.
Keep your work area clean.
Make sure you understand how a tool works before using it.
Basic Safety Checklist
- Wear eye protection.
- Secure the workpiece.
- Keep hands away from cutting paths.
- Inspect tools before use.
- Use the correct blade or bit.
- Keep cords away from cutting areas.
- Maintain good lighting.
- Keep the workspace free from unnecessary clutter.
- Allow blades to stop before setting tools down.
- Keep children and pets away from active tools.
- Follow manufacturer safety instructions.
⚠ Common Mistake: Never assume a small project is automatically a safe project. Even a tiny piece of wood can become dangerous if it isn’t properly secured while using a power tool.
What Are the Best Woodworking Projects for Scrap Wood?
Scrap wood is ideal for small projects.
Instead of throwing away usable offcuts, sort them by size and store them where they remain dry and accessible.
Useful scrap-wood projects include:
- Small shelves
- Picture frames
- Plant stands
- Key holders
- Candle holders
- Small trays
- Phone stands
- Wall hooks
- Organizers
- Decorative signs
- Small boxes
Scrap wood is particularly valuable for practicing cuts.
If you’re unsure about a measurement, test the design using scrap before cutting your better material.
How Can You Reduce Woodworking Waste?
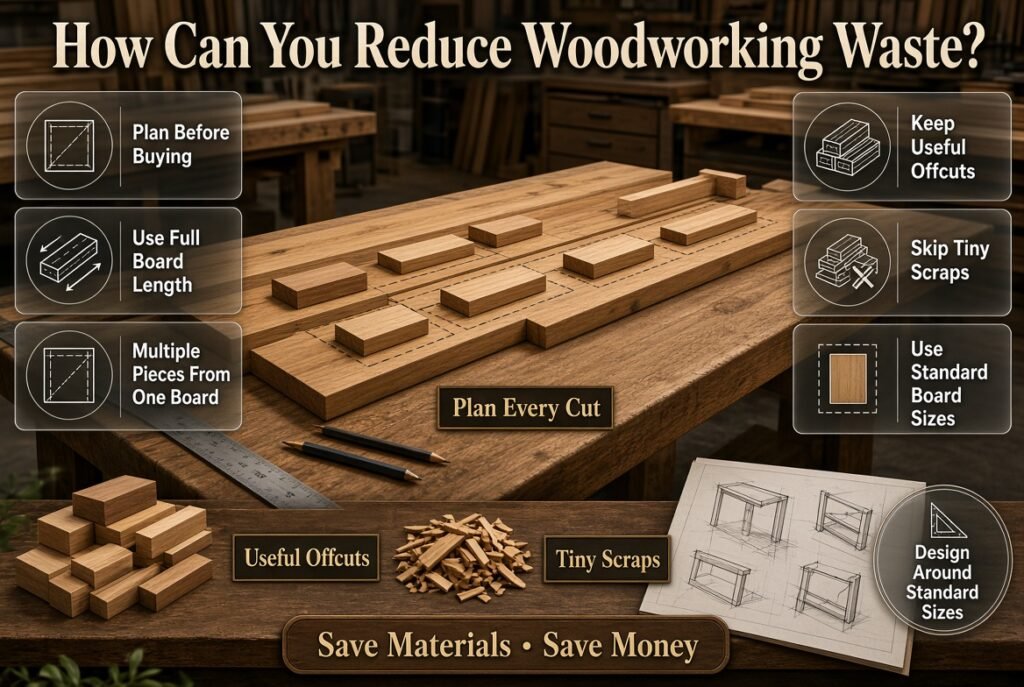
Good project planning can significantly reduce waste.
Before buying lumber, make a cutting plan.
For example, if you need several short boards, look at the full length of the lumber and determine whether multiple pieces can be cut from one board.
Keep useful offcuts.
Don’t save every tiny piece, but keep pieces large enough to become future components.
You can also design projects around standard board sizes instead of forcing lumber into inefficient dimensions.
This is both economical and environmentally sensible.
Can Beginner Woodworking Projects Be Eco-Friendly?
Yes. Woodworking can be made more resource-conscious by choosing durable materials, reducing waste, reusing suitable scrap, and creating items designed to last.
Avoid building something simply because it’s quick if you know you’ll throw it away a few months later.
A well-designed shelf that lasts for years is a better use of material than a decorative object that quickly becomes unwanted.
You can also explore broader sustainable home concepts through Energy-Efficient Homes.
How Do You Plan a Woodworking Project Before Cutting?
A simple sketch is often enough.
You don’t need professional CAD software for a small project.
Draw the project from the front, side, and top if necessary.
Write down:
- Overall width
- Overall height
- Overall depth
- Board thickness
- Number of pieces
- Piece dimensions
- Fastener locations
- Finish type
Then create a cut list.
Simple Planning Example
Suppose you’re building a small wall shelf.
Your plan might include:
- 1 top board
- 1 lower support
- 2 side supports
- Mounting hardware
Write the dimensions beside each piece.
Then check whether the pieces actually fit together before cutting.
This simple planning stage prevents many beginner errors.
What Is the Best Way to Learn Woodworking?
The fastest way to improve is to complete projects rather than simply watching woodworking videos.
Choose a manageable project.
Build it.
Identify what went wrong.
Build it again.
Your second version will often be noticeably better because you’ll already understand the difficult parts.
Keep notes about:
- Measurements
- Tools used
- Mistakes
- Material choices
- Finishing methods
- What you’d change next time
This creates your own practical woodworking reference.
Over time, you develop judgment that can’t be learned entirely from instructions.
Expert Advice for Better Woodworking Results
Experienced woodworkers often spend more time preparing than beginners expect.
They inspect the material before cutting.
They plan the sequence of operations.
They test assemblies.
They choose fasteners according to the application.
They sharpen or replace dull cutting tools.
They don’t rush the finishing stage.
One of the most valuable habits you can develop is learning to stop and reassess when something doesn’t look right.
If a board isn’t sitting correctly, don’t force it into place simply because you want to continue.
Find out why.
A small correction early can prevent a major repair later.
⭐ Expert Tip: Build the same simple project twice. Repeating a shelf, crate, or tray is one of the fastest ways to improve because you can compare your second build directly with your first.
How Can You Add Personality to Easy Woodworking Projects?
The simplest way to personalize a project is through the finish.
You can use:
- Paint
- Stain
- Two-tone finishes
- Decorative hardware
- Engraving
- Stencils
- Wood-burning
- Contrasting wood
- Rounded edges
However, personalization should support the project’s purpose.
A small coat rack doesn’t need ten decorative elements.
Sometimes changing the wood finish or hardware is enough.
For more ideas involving bold, personalized spaces, explore Statement Interiors.
What Is the Easiest Woodworking Project for a Complete Beginner?
A small wooden shelf, storage crate, serving tray, or simple planter box is usually a better first woodworking project than a complicated piece of furniture. These projects are manageable because they rely on the fundamentals every woodworker needs: accurate measuring, straight cuts, drilling, fastening, sanding, and basic finishing. They also give you a finished object you can actually use, which makes the learning process much more rewarding.
The smartest first project is not necessarily the one that looks easiest on Pinterest. It’s the one that matches your current tools and gives you an opportunity to repeat basic skills without introducing too many variables at once. A small shelf, for example, can teach you how to make accurate cuts, keep an assembly square, drill pilot holes, and mount a finished piece securely.
Current beginner woodworking guidance similarly emphasizes starting with simple, forgiving projects rather than jumping immediately into complicated furniture or advanced joinery.
Good first-project options include:
Small floating shelf: Great for measuring, cutting, drilling, and wall mounting.
Storage crate: Excellent for learning basic box construction and keeping corners square.
Wooden tray: Useful for practicing clean edges, sanding, and simple assembly.
Planter box: A practical introduction to repeated cuts and outdoor finishing.
Simple coat rack: Requires very little material while teaching drilling and hardware installation.
The important thing is to choose a project you can realistically finish. Completing a simple project gives you much more practical experience than spending weeks planning something beyond your current skill level.
Professional tip: Build your first project with inexpensive pine or plywood. Your first build is partly a learning exercise, so affordable material takes away the pressure of making every cut perfect.
What Tools Do I Really Need to Start Easy Woodworking Projects?
You don’t need a garage full of expensive machinery to begin woodworking. A reliable measuring tool, square, basic saw, drill/driver, clamps, sandpaper, and appropriate safety equipment are enough for a large number of beginner projects. The exact setup depends on what you’re planning to build, but the principle is simple: buy tools according to the projects you actually want to make.
One of the biggest mistakes beginners make is purchasing equipment before developing basic woodworking skills. Recent 2026 beginner guides repeatedly make the same point: layout, measuring, cutting, joining, and finishing skills matter more at the beginning than owning large machines.
A practical starter setup:
Tape measure: For accurate dimensions.
Combination or speed square: For marking straight and 90-degree lines.
Pencil or marking tool: For clear cut lines.
Hand saw or circular saw: For basic cutting.
Cordless drill/driver: For drilling and driving screws.
Clamps: For holding pieces securely during assembly.
Sandpaper or sander: For preparing surfaces and edges.
Safety glasses: For protecting your eyes.
Hearing protection: Particularly useful around louder power tools.
You can add a jigsaw when you start making curved cuts. A random orbital sander becomes worthwhile when you’re doing larger surfaces regularly. More specialized equipment can wait until your projects actually justify it.
The better strategy is to let your projects determine your workshop.
For example, if your next three projects are a shelf, crate, and planter box, you don’t need a table saw, router, planer, or large collection of specialty hand tools. A basic saw, drill, square, clamps, and sanding equipment can cover most of the work.
Professional tip: Before buying a new tool, ask yourself, “What specific problem will this tool solve in my next three projects?” If you don’t have a clear answer, you probably don’t need it yet.
What Is the Best Wood for Easy Woodworking Projects?
For most beginners, pine and plywood are practical starting materials because they’re accessible, relatively affordable, and suitable for a wide variety of simple projects. Pine works particularly well for shelves, crates, small benches, organizers, and decorative furniture, while plywood is useful for boxes, panels, stands, and projects where dimensional stability matters.
The best wood, however, depends on what you’re building.
A planter box needs different material considerations than an indoor picture frame. A small decorative shelf has different requirements from a bench designed to support a person.
Choose your material according to the project:
Wood
Good Beginner Uses
Why Choose It
Pine
Shelves, crates, benches
Affordable and easy to work
Plywood
Organizers, boxes, shelves
Stable and versatile
Cedar
Planters and outdoor projects
Suitable for many outdoor uses
Poplar
Painted furniture
Easy to work and paint
Oak
Durable furniture
Strong and attractive
Maple
Furniture and small projects
Hard and durable
Softwood such as pine is often a sensible choice when you’re still learning because mistakes are less expensive. That matters more than many beginners realize. If you accidentally cut a board incorrectly, replacing a low-cost piece is far less frustrating than ruining an expensive hardwood board.
Plywood is especially useful when you need a broad, stable panel. It can be used for shelving, organizers, laptop stands, storage boxes, and many other beginner builds.
Another important point is that lumber dimensions aren’t always what the label suggests. A board sold under a nominal dimension may have smaller actual dimensions after milling, so always measure the material you’re holding before creating your cut list.
Points to remember:
Inspect boards for major warping before buying.
Avoid severely damaged or cracked material for structural projects.
Check actual board dimensions rather than relying only on the label.
Match indoor and outdoor material to the environment.
Use scrap pieces for test cuts whenever possible.
Don’t choose expensive hardwood simply to make a beginner project look impressive.
Professional tip: Good project design matters more than expensive wood. A simple shelf made from inexpensive lumber with accurate cuts, clean sanding, and a thoughtful finish can look far better than a complicated project made from premium material but assembled poorly.
How Can Beginners Make Woodworking Projects Look Professional?
The secret to a professional-looking woodworking project isn’t usually an expensive tool. It’s accuracy and attention to small details. Straight cuts, square corners, consistent edges, clean assembly, careful sanding, and an appropriate finish can make an inexpensive project look considerably more refined.
Beginners often concentrate heavily on the cutting stage and then rush everything afterward. That’s usually where the finished appearance suffers.
A professional-looking result starts before the first cut.
Focus on these details:
1. Make accurate measurements
Measure carefully and mark clearly. A small dimensional error can become much more obvious once several pieces are assembled.
2. Keep assemblies square
A box or frame that isn’t square can look crooked even when every individual board appears acceptable.
3. Use clamps
Clamps keep pieces where they belong while you drill, screw, or glue them. Trying to hold everything manually often creates uneven joints.
4. Sand with purpose
Don’t simply keep sanding because smoother sounds better. Prepare the surface for the finish you’re using and avoid unnecessarily rounding corners.
5. Treat the edges
Slightly softening sharp exposed edges can make furniture feel more comfortable and finished.
6. Pay attention to hardware
Cheap or poorly positioned hardware can make an otherwise good project look unfinished. Choose hardware that suits the scale and design.
7. Don’t rush the finish
Allow paint, stain, oil, or clear finishes to dry and cure according to the manufacturer’s instructions.
8. Keep the design simple
Simple woodworking often looks more sophisticated when the construction is accurate. Clean lines and good proportions can outperform complicated decorative details.
There is also a strong connection between woodworking and interior design. A handmade shelf, bench, frame, or organizer should complement the room rather than compete with everything around it.
Professional tip: If you’re unsure whether a design will look good, make a small prototype from scrap wood first. It lets you test proportions before spending time on the final piece.
How Can a Beginner Learn Woodworking Without Spending a Lot of Money?
The most cost-effective way to learn woodworking is to start with a small number of useful tools, inexpensive materials, and simple projects that build one skill at a time. You don’t need a complete workshop, expensive machinery, or a huge collection of specialty tools. In fact, buying too much equipment too early can make woodworking more confusing rather than easier.
A sensible learning path is to start with measuring and marking, then move into basic cutting, drilling, fastening, sanding, and finishing. After you’ve completed a few projects, you’ll know which tools you actually need.
A practical progression could look like this:
Project 1: Wooden Tray
Learn:
Measuring
Straight cuts
Basic assembly
Sanding
Finishing
Project 2: Storage Crate
Develop:
Repeated measurements
Square assembly
Pilot holes
Screw placement
Basic structural thinking
Project 3: Floating Shelf
Practice:
Accurate mounting
Leveling
Wall hardware
Load considerations
Project 4: Planter Box
Learn:
Outdoor material selection
Drainage
Exterior finishing
Repeated cuts
Project 5: Small Bench or Side Table
Move toward:
Structural design
Stronger joints
Consistent dimensions
More demanding assembly
This approach lets every project introduce something new without overwhelming you.
You can also reduce costs by using suitable scrap wood, buying only the material required for the current project, borrowing occasional tools, and avoiding large machines until your projects genuinely require them. Current beginner-focused guidance consistently recommends building a few projects before expanding the workshop.
A smart low-cost strategy:
Start with pine or plywood.
Buy only essential tools.
Use scrap wood for practice cuts.
Make a cut list before buying lumber.
Reuse useful offcuts.
Borrow specialty tools when practical.
Repeat simple projects to improve accuracy.
Upgrade tools when they solve a recurring problem.
Professional tip: Don’t measure progress by how many tools you own. Measure it by how accurately you can plan, cut, assemble, and finish a project.
The fastest way to become better at woodworking is to build things. Your first shelf may have an imperfect corner, your first crate may need extra sanding, and your first finish may not turn out exactly as expected. That’s normal. Each project gives you information that the next one can use.
Conclusion
Easy woodworking projects are a practical way to turn basic materials into something useful, attractive, and personal without needing a professional workshop or years of experience. The best place to start is with a manageable project such as a wooden tray, floating shelf, storage crate, planter box, or simple organizer. These projects teach the core skills you’ll continue using as your woodworking abilities grow.
The biggest difference between a frustrating project and a successful one usually comes down to preparation. Measure carefully, plan your cuts, secure your workpiece, use the right fasteners, and don’t rush sanding or finishing. You don’t need expensive tools to produce good results; accurate work, patience, and attention to detail matter far more.
Most importantly, don’t wait until you feel like an expert before building something. Choose one project that matches your current skill level, build it safely, learn from the mistakes, and use those lessons on the next project. With every build, you’ll become more confident with your tools and better at creating woodworking pieces that genuinely fit your home and your needs.
Leave a Reply