
Introduction
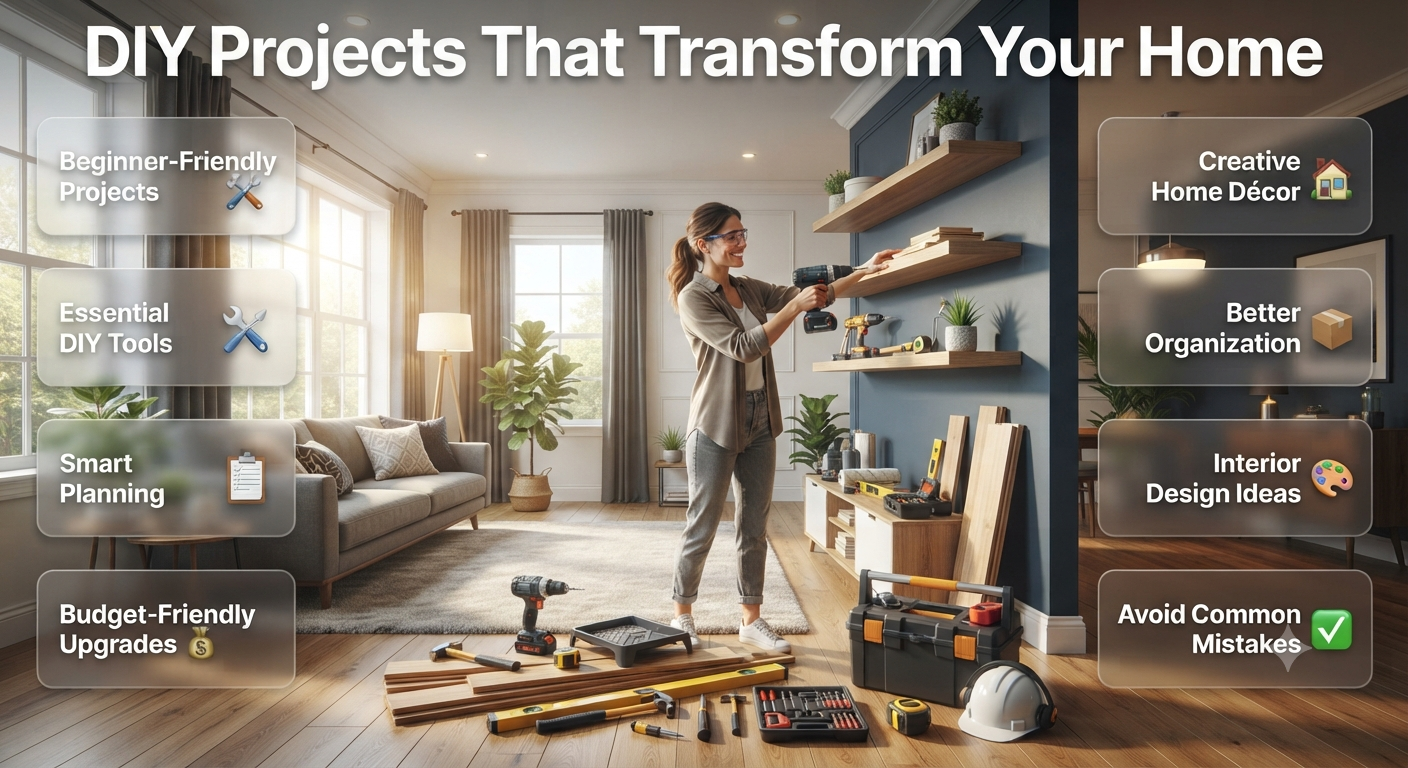
DIY Projects That Transform Your Home | Have you ever looked around your home and thought, “I could make that myself”? You’re not alone. DIY projects have become one of the most popular ways to improve a home without spending a fortune. Whether you want to refresh your living room, build custom furniture, organize your garage, or create stylish home décor, a DIY project allows you to add your personal touch while learning valuable skills.
The best part is that you don’t need years of experience to get started. With the right planning, a few essential tools, and some creativity, you can complete impressive projects that enhance both the beauty and functionality of your home. Many homeowners even combine DIY upgrades with professional Interior Design ideas to achieve a polished and cohesive look.
In this guide, you’ll discover everything you need to know about DIY projects—from choosing the right project and gathering the necessary tools to avoiding common mistakes and completing your work with confidence.
What Are DIY Projects?
DIY (Do-It-Yourself) projects are tasks that individuals complete themselves instead of hiring professionals. These projects can include home improvement, decorating, woodworking, painting, furniture restoration, storage solutions, gardening, and creative crafts that improve both the appearance and functionality of a home.
DIY projects are more than just a way to save money. They give you complete control over the design, materials, budget, and timeline while allowing you to create something unique that reflects your personality.
Some DIY projects take less than an hour, while others may require several weekends to complete. The key is choosing a project that matches your experience level.
Popular DIY project categories include:
- Home improvement
- Wall decoration
- Furniture building
- Furniture restoration
- Painting projects
- Storage solutions
- Garden improvements
- Outdoor furniture
- Organization projects
- Lighting upgrades
If you’re planning multiple improvements throughout your house, exploring Home Design Ideas can help you create a consistent style across every room.
Why DIY Projects Are So Popular
DIY projects continue to grow in popularity because they help homeowners save money, personalize their living spaces, learn practical skills, and complete home improvements at their own pace.
Save Money Without Sacrificing Quality
Professional renovations often include high labor costs.
Simple improvements like:
- Installing shelves
- Painting walls
- Building storage cabinets
- Updating furniture
- Creating wall décor
can often be completed for much less when you do them yourself.
That doesn’t mean cutting corners—it means investing your budget in better materials instead of labor.
Create a Home That Reflects Your Style
Mass-produced furniture rarely feels unique.
DIY projects allow you to customize:
- Colors
- Materials
- Dimensions
- Finishes
- Decorative details
- Storage features
Whether your style is modern, farmhouse, Scandinavian, industrial, or minimalist, DIY projects let you create spaces that truly feel like home. If you’re looking for more decorating inspiration, browse Interior Inspiration for fresh ideas that complement your projects.
Learn Practical Skills
Every completed project teaches something valuable.
Over time you’ll naturally learn:
- Measuring accurately
- Using power tools safely
- Painting professionally
- Installing fixtures
- Repairing furniture
- Solving unexpected problems
These skills become increasingly useful for future home maintenance.
Help the Environment
DIY encourages recycling and repurposing.
Instead of replacing furniture, many homeowners:
- Repaint cabinets
- Restore dining tables
- Refinish dressers
- Turn pallets into furniture
- Transform wooden crates into shelves
This reduces waste while creating one-of-a-kind furniture pieces.
💡 Pro Tip
Choose DIY projects that solve a real problem in your home before starting decorative projects. Functional improvements provide lasting value and are often easier to complete successfully.
Benefits of DIY Projects
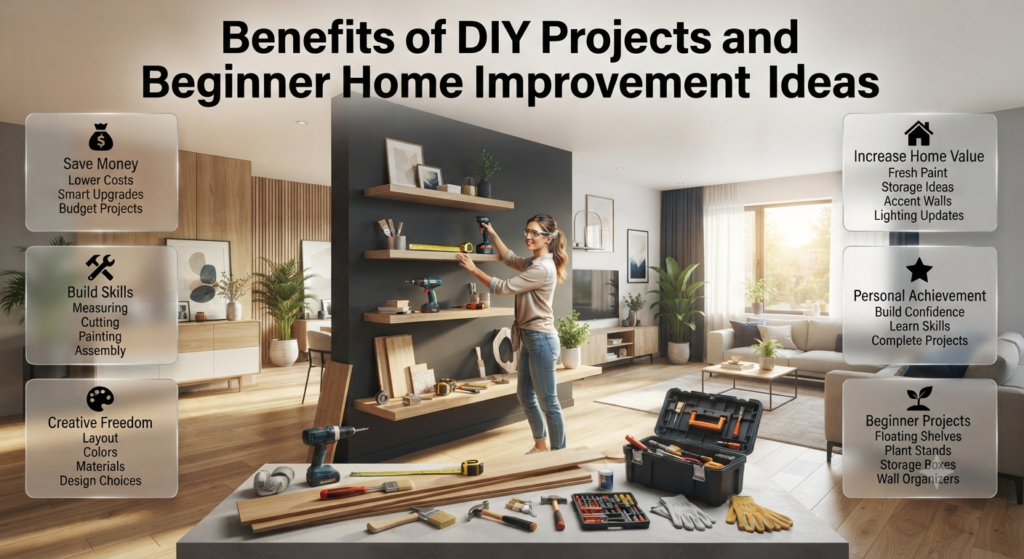
DIY projects offer financial savings, creative freedom, valuable learning opportunities, increased home value, and the satisfaction of creating something with your own hands.
1. Lower Home Improvement Costs
Hiring professionals for every small project can become expensive.
By completing manageable projects yourself, you can save hundreds—or even thousands—of dollars over time.
Examples include:
- Installing floating shelves
- Painting rooms
- Replacing cabinet hardware
- Building storage benches
- Creating custom wall décor
2. Develop Useful Skills
DIY teaches practical problem-solving.
Every project improves your confidence with:
- Measuring
- Cutting
- Drilling
- Painting
- Sanding
- Assembly
Those skills become valuable for future renovations.
3. Complete Creative Freedom
Unlike hiring contractors, DIY lets you make changes whenever inspiration strikes.
You decide:
- Layout
- Colors
- Materials
- Budget
- Schedule
This flexibility makes every project unique.
4. Increase Home Value
Well-executed DIY improvements can make your home more attractive to future buyers.
Projects that often add value include:
- Fresh paint
- Storage solutions
- Accent walls
- Updated lighting
- Built-in shelving
You can also combine these upgrades with stylish Home Styling ideas to create a more welcoming and functional living space.
5. Enjoy a Sense of Achievement
There is something deeply satisfying about stepping back and admiring something you’ve built yourself.
Even small projects build confidence for larger renovations later.
⭐ Expert Tip
Take before-and-after photos of every project. They help you track progress, identify improvements, and provide inspiration for future DIY ideas.
How to Choose the Right DIY Project
The best DIY project is one that matches your skills, budget, available tools, and the amount of time you can realistically dedicate to completing it.
Starting with an overly ambitious project often leads to frustration.
Instead, begin with smaller projects that teach foundational skills.
Consider Your Experience Level
Beginner Projects
Start with:
- Floating shelves
- Picture frames
- Wooden crates
- Plant stands
- Storage boxes
- Wall organizers
Intermediate Projects
Once you’ve gained confidence, consider:
- Coffee tables
- Entryway benches
- Closet organizers
- Accent walls
- Built-in shelving
If you’re planning to refresh walls as part of your project, choosing the right Paint Color can dramatically improve the final result.
Advanced Projects
Experienced DIY enthusiasts often tackle:
- Kitchen cabinet renovations
- Bathroom vanities
- Deck construction
- Custom furniture
- Complete room makeovers
Plan Your Budget
Before shopping, estimate the cost of:
- Lumber
- Hardware
- Paint
- Fasteners
- Sandpaper
- Protective equipment
- Tools
Adding a 10–15% contingency budget helps cover unexpected expenses.
Estimate Your Time Honestly
One of the biggest beginner mistakes is underestimating how long a project will take.
Allow extra time for:
- Drying paint
- Measuring twice
- Material adjustments
- Unexpected repairs
- Cleanup
Working without rushing almost always produces better results.
📌 Quick Tip
Finish one project before beginning another. Completing projects builds momentum and prevents unfinished work from accumulating.
Essential DIY Tools Every Beginner Needs
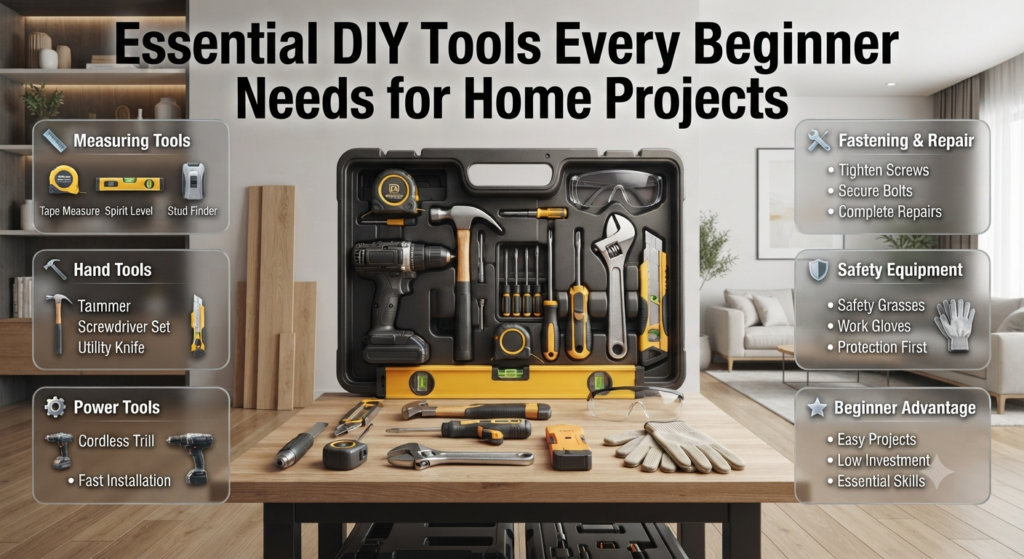
Every beginner should own a basic toolkit that includes measuring tools, hand tools, safety equipment, and a cordless drill. These essentials are enough to complete most common DIY projects around the home.
| Tool | Primary Purpose |
|---|---|
| Tape Measure | Accurate measurements |
| Hammer | Driving nails |
| Screwdriver Set | Tightening screws |
| Cordless Drill | Drilling and fastening |
| Spirit Level | Straight installation |
| Utility Knife | Cutting materials |
| Adjustable Wrench | Tightening bolts |
| Stud Finder | Locating wall studs |
| Safety Glasses | Eye protection |
| Work Gloves | Hand protection |
These tools provide an excellent starting point without requiring a large investment.
Power Tools Worth Buying Later
As your skills improve, consider adding:
- Circular saw
- Jigsaw
- Orbital sander
- Impact driver
- Miter saw
- Oscillating multi-tool
Purchase quality tools gradually rather than buying everything at once.
Organize Your Workspace
A clean workspace improves both safety and efficiency.
Good organization includes:
- Pegboards
- Toolboxes
- Rolling carts
- Wall storage
- Labeled containers
An organized workspace helps you spend more time building and less time searching for tools.
⚠ Common Mistake
Many beginners buy expensive tools before mastering the basics. Invest in high-quality essential tools first, then expand your collection as your experience grows.
Safety Tips Before Starting Any DIY Project
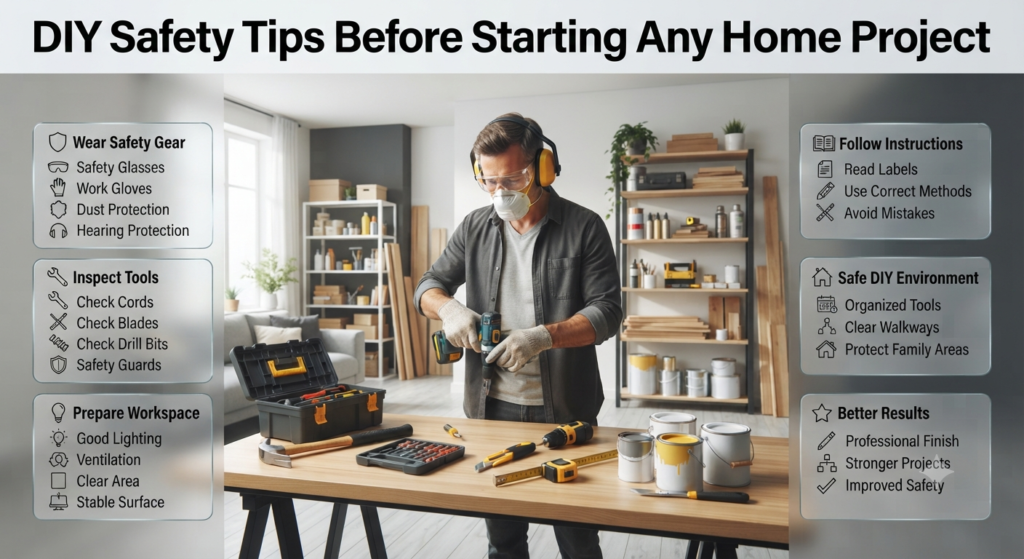
Before starting any DIY project, wear proper protective equipment, inspect your tools, prepare a clean workspace, and carefully follow all instructions. Good preparation reduces accidents and improves the quality of your finished work.
Safety should never be treated as an afterthought.
Wear Proper Safety Gear
Always use:
- Safety glasses
- Work gloves
- Hearing protection
- Dust mask or respirator
- Non-slip closed-toe shoes
These simple precautions greatly reduce the risk of injury.
Inspect Your Tools
Before beginning any project, check for:
- Loose handles
- Damaged cords
- Dull blades
- Cracked drill bits
- Missing safety guards
Using damaged tools is both dangerous and ineffective.
Prepare Your Work Area
A safe workspace should include:
- Good lighting
- Adequate ventilation
- Stable work surfaces
- Clear walkways
- Easily accessible tools
Keeping children and pets away from the workspace also helps prevent accidents.
Follow Product Instructions
Whether you’re using paint, wood stain, adhesives, or power tools, always read the manufacturer’s instructions carefully.
This helps you:
- Avoid mistakes
- Improve durability
- Achieve professional results
- Stay safe throughout the project
If your DIY plans include repainting a room, understanding different Paint Finishes before buying paint can help you choose the right finish for durability and appearance.
Step-by-Step Guide to Planning a Successful DIY Project
A successful DIY project starts with proper planning. Define your goal, create a budget, gather the right tools and materials, measure carefully, and work step by step. Good planning reduces mistakes, saves money, and delivers better results.
Many DIY projects fail because people jump straight into the work without preparing. Spending a little extra time planning can save hours of frustration later.
Step 1: Decide What You Want to Achieve
Every DIY project should begin with a clear objective.
Ask yourself:
- What problem am I solving?
- Is this project decorative, functional, or both?
- Will it improve my home’s appearance?
- Will it add storage or increase comfort?
For example, instead of saying, “I want to improve my bedroom,” set a clear goal like:
“I want to build floating shelves and repaint the walls to create a modern and organized bedroom.”
If you’re planning a complete room makeover, browsing Bedroom Color Inspiration can help you choose colors that complement your DIY furniture and décor.
Step 2: Create a Realistic Budget
Before buying supplies, write down every expected expense.
Typical costs include:
- Lumber
- Paint
- Hardware
- Adhesives
- Brushes
- Screws
- Sandpaper
- Protective equipment
- Tool rental (if needed)
| Budget Item | Estimated Cost |
|---|---|
| Materials | 50–60% |
| Tools | 20–30% |
| Safety Equipment | 5–10% |
| Extra Supplies | 10–15% |
Adding a small emergency budget helps cover unexpected purchases.
⭐ Expert Tip
Buy quality materials whenever possible. Cheap materials often wear out faster and may require repairs sooner, costing more in the long run.
Step 3: Measure Everything Twice
The old saying remains true:
Measure twice. Cut once.
Incorrect measurements waste materials and increase costs.
Always verify:
- Wall dimensions
- Furniture sizes
- Door clearance
- Shelf spacing
- Window measurements
Taking five extra minutes can prevent hours of rework.
Step 4: Gather Tools Before You Begin
Nothing slows a project more than stopping halfway to buy missing tools.
Prepare everything in advance.
Example checklist:
✔ Tape measure
✔ Drill
✔ Screws
✔ Paint brushes
✔ Sandpaper
✔ Safety glasses
✔ Gloves
✔ Drop cloth
Step 5: Prepare Your Workspace
A clean workspace helps you work faster and safer.
Before starting:
- Remove unnecessary furniture.
- Protect floors.
- Organize materials.
- Ensure good lighting.
- Keep extension cords out of walkways.
📌 Quick Tip
Label containers for screws, nails, and hardware. Small pieces are surprisingly easy to lose during a project.
15 Easy DIY Projects for Beginners
The best beginner DIY projects are affordable, require basic tools, and help you build practical skills while improving your home.
1. Floating Wooden Shelves
Perfect for:
- Living rooms
- Bedrooms
- Bathrooms
- Home offices
Skills learned:
- Measuring
- Drilling
- Wall mounting
- Leveling
2. Painted Furniture Makeover
Transform old furniture using:
- Primer
- Paint
- Protective finish
- New handles
If you’re unsure which colors work best, explore Paint Color ideas before choosing your palette.
3. Entryway Organizer
Build a simple organizer with:
- Hooks
- Wooden shelf
- Storage basket
- Key holder
Great for reducing daily clutter.
4. Wooden Coffee Table
An excellent beginner woodworking project that teaches:
- Assembly
- Sanding
- Finishing
- Wood staining
5. Decorative Wall Art
Create unique wall décor using:
- Canvas
- Wood panels
- Fabric
- Stencils
- Reclaimed wood
6. Raised Garden Bed
Perfect for growing:
- Herbs
- Vegetables
- Flowers
Requires only basic woodworking skills.
7. Wooden Plant Stand
A stylish addition for indoor plants while practicing accurate measurements and clean cuts.
8. DIY Bookshelves
Bookshelves increase storage while adding character to a room.
They can be customized for any wall size.
9. Custom Closet Organizer
Improve storage using:
- Adjustable shelves
- Hanging rods
- Storage baskets
10. Picture Gallery Wall
Design a gallery wall using:
- Family photos
- Artwork
- Mirrors
- Decorative frames
Pairing it with inspiring Home Styling ideas can create a professionally designed feature wall.
11. Wooden Storage Bench
Perfect for:
- Entryways
- Patios
- Bedrooms
Provides both seating and hidden storage.
12. Floating Nightstands
Ideal for smaller bedrooms where floor space is limited.
13. Bathroom Storage Shelves
Simple floating shelves help organize:
- Towels
- Toiletries
- Decorative accessories
14. Pallet Furniture
Old wooden pallets can become:
- Coffee tables
- Outdoor seating
- Planters
- Shoe racks
15. DIY Accent Wall
A feature wall instantly transforms a room.
Popular options include:
- Wood slats
- Geometric molding
- Board and batten
- Painted designs
For more inspiration on creating visually striking spaces, check out Beautiful Interior ideas.
DIY Home Improvement Projects That Add Value
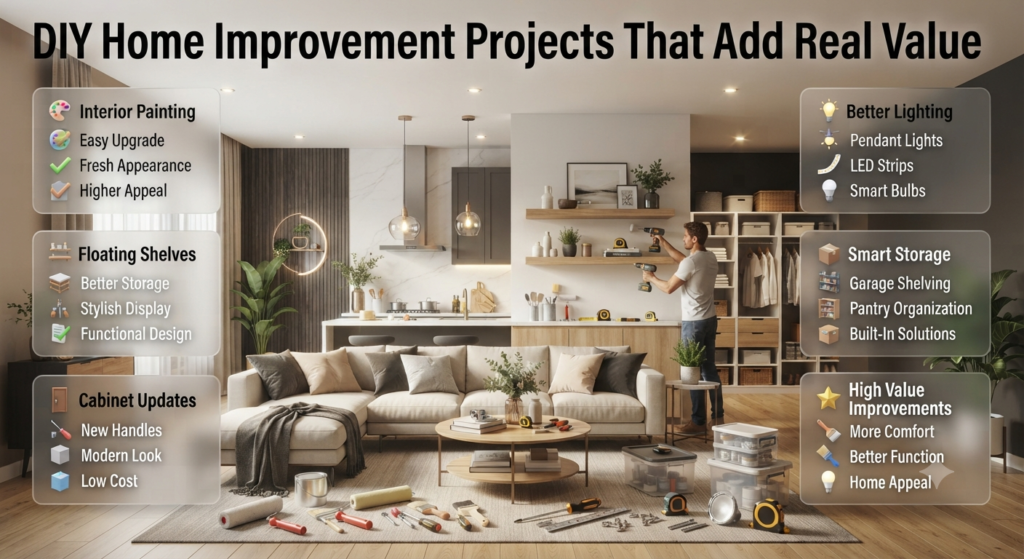
Some DIY projects not only improve your home’s appearance but can also increase its functionality and resale value when completed correctly.
| Project | Difficulty | Value Added |
|---|---|---|
| Interior Painting | Easy | High |
| Floating Shelves | Easy | Medium |
| Kitchen Backsplash | Medium | High |
| Cabinet Painting | Medium | High |
| New Lighting Fixtures | Medium | High |
| Closet Organization | Easy | Medium |
| Smart Storage Solutions | Easy | High |
Refresh Your Walls
Fresh paint remains one of the most affordable home improvements.
Choosing modern Warm Color Palettes can make rooms feel brighter, cozier, and more inviting.
Upgrade Cabinet Hardware
Replacing:
- Handles
- Knobs
- Hinges
can dramatically modernize kitchens and bathrooms for very little cost.
Install Better Lighting
Lighting changes the atmosphere of every room.
Popular upgrades include:
- Pendant lights
- LED strips
- Wall sconces
- Smart bulbs
Improve Storage
Storage improvements remain one of the highest-value DIY upgrades.
Ideas include:
- Under-stair storage
- Garage shelving
- Mudroom benches
- Pantry organizers
💡 Pro Tip
Projects that solve everyday problems usually provide the highest return on investment because they improve both convenience and home value.
DIY Interior Decorating Projects
DIY decorating projects help personalize your home without major renovations. Simple upgrades like accent walls, decorative shelves, lighting, and handmade décor can dramatically transform any room.
Create a Feature Wall
Popular materials include:
- Wood panels
- Wallpaper
- Paint
- Decorative molding
For more inspiration, browse Living Room Paint Ideas before selecting colors and finishes.
Build Decorative Shelving
Floating shelves combine beauty with functionality.
Use them to display:
- Plants
- Books
- Artwork
- Family photographs
- Decorative objects
Update Room Colors
Changing paint colors remains one of the easiest ways to refresh any room.
Understanding different Paint Finishes helps ensure your walls are both beautiful and durable.
Refresh the Kitchen
Small DIY improvements include:
- Painting cabinets
- Installing peel-and-stick backsplash
- Updating lighting
- Replacing cabinet handles
For additional inspiration, explore Kitchen Paint Colors before beginning your renovation.
Add Smart Home Features
Modern DIY projects increasingly include technology.
Simple upgrades include:
- Smart lighting
- Smart switches
- Motion sensors
- Smart thermostats
Learn more about integrating technology into your home with Smart Home Design ideas.
DIY Project Comparison Table
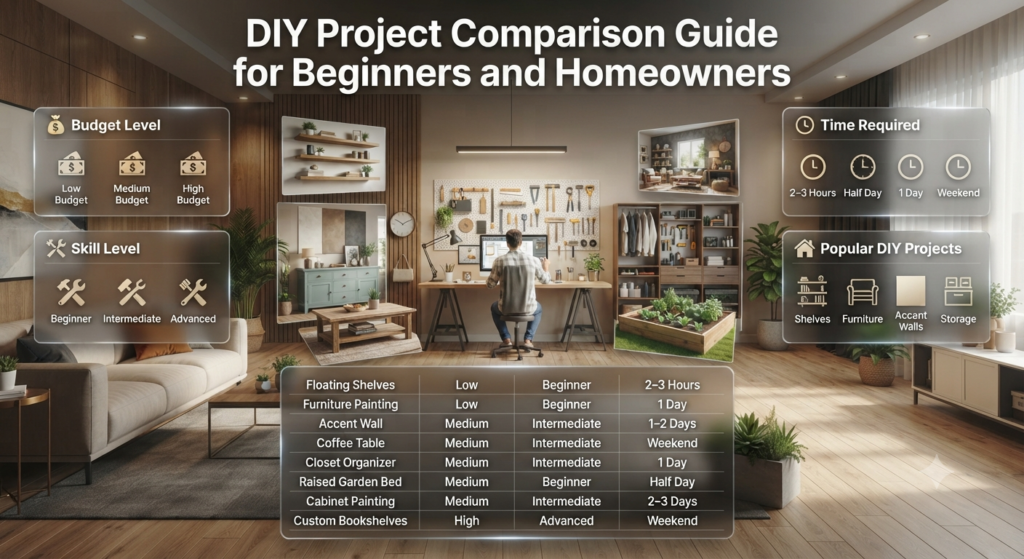
| Project | Budget | Skill Level | Time Required |
|---|---|---|---|
| Floating Shelves | Low | Beginner | 2–3 Hours |
| Furniture Painting | Low | Beginner | 1 Day |
| Accent Wall | Medium | Intermediate | 1–2 Days |
| Coffee Table | Medium | Intermediate | Weekend |
| Closet Organizer | Medium | Intermediate | 1 Day |
| Raised Garden Bed | Medium | Beginner | Half Day |
| Cabinet Painting | Medium | Intermediate | 2–3 Days |
| Custom Bookshelves | High | Advanced | Weekend |
⚠ Common Mistake
Many beginners start multiple DIY projects at the same time. This often leads to unfinished work, wasted materials, and unnecessary expenses. Focus on completing one project before moving on to the next for better results and a more organized workflow.
Common DIY Mistakes Beginners Should Avoid
The most common DIY mistakes include poor planning, inaccurate measurements, using the wrong tools, skipping safety precautions, and rushing the project. Avoiding these mistakes saves time, reduces costs, and helps you achieve a professional-looking finish.
Even experienced DIY enthusiasts make mistakes from time to time. The difference is that they learn from them and develop better habits with every project.
1. Starting Without a Plan
Why It Happens
Many people become excited about a project and begin working immediately without planning the steps.
Why It’s Harmful
Without a plan, you may:
- Buy the wrong materials
- Forget important tools
- Waste time
- Exceed your budget
- End up with poor results
How to Avoid It
Before you begin:
- Create a simple checklist.
- Sketch your design.
- Measure the space.
- List every material you’ll need.
- Estimate the project timeline.
2. Measuring Incorrectly
Why It Happens
Beginners often rely on rough estimates instead of precise measurements.
Why It’s Harmful
Even a small measurement error can lead to:
- Crooked shelves
- Misaligned cabinets
- Wasted lumber
- Extra material costs
How to Avoid It
Always:
- Measure twice.
- Mark clearly.
- Double-check before cutting.
- Use a level during installation.
3. Buying Cheap Materials
Why It Happens
Trying to reduce costs is understandable, but the cheapest option isn’t always the best.
Why It’s Harmful
Low-quality materials may:
- Wear out quickly
- Crack or warp
- Require repairs sooner
- Reduce the overall appearance of the project
How to Avoid It
Invest in durable materials that match your project’s purpose. Quality products usually provide better long-term value.
4. Ignoring Safety
Why It Happens
Some people think small DIY projects don’t require protective equipment.
Why It’s Harmful
Skipping safety gear increases the risk of:
- Eye injuries
- Cuts
- Dust inhalation
- Hearing damage
How to Avoid It
Always wear:
- Safety glasses
- Gloves
- Hearing protection
- Dust mask when needed
5. Rushing the Finishing Stage
Why It Happens
After hours of work, it’s tempting to finish as quickly as possible.
Why It’s Harmful
Rushing can cause:
- Uneven paint
- Visible brush marks
- Poor stain absorption
- Weak adhesive bonds
How to Avoid It
Allow enough time for:
- Drying
- Sanding
- Cleaning
- Final inspection
⚠ Common Mistake
Never skip surface preparation. Cleaning, sanding, and priming often determine whether the finished project looks professional or amateur.
Expert Advice for Better DIY Results
Professionals achieve better DIY results by planning carefully, investing in quality tools, focusing on precision, and taking their time. Small improvements in preparation often make the biggest difference in the final outcome.
Here are some practical tips used by experienced DIYers:
Work on One Project at a Time
Finishing one project before starting another helps you stay organized and reduces wasted materials.
Buy the Best Tools You Can Afford
You don’t need every tool immediately, but the tools you do buy should be reliable and durable.
Practice Before Working on Visible Surfaces
If you’re painting, staining, or using a new power tool, practice on a scrap piece first.
Keep Leftover Materials
Store extra:
- Paint
- Screws
- Wood stain
- Tiles
- Hardware
These supplies are useful for future repairs.
Maintain Your Tools
Clean tools after every project.
Sharp blades, clean brushes, and well-maintained drills produce better results and last much longer.
⭐ Expert Tip
Professional-looking DIY projects are usually the result of patience—not expensive materials. Focus on accuracy, preparation, and finishing details rather than speed.
What are the highest-ROI DIY projects that actually increase home value?
Not every DIY project adds the same value to your home. If your goal is to improve resale value or make your property more attractive to future buyers, focus on upgrades that enhance functionality, appearance, and energy efficiency. These projects usually require a modest investment but can deliver an impressive return.
One of the best examples is repainting interior walls with modern, neutral colors. Fresh paint instantly makes a home feel cleaner, brighter, and more inviting. Updating cabinet hardware, replacing outdated light fixtures, installing floating shelves, improving storage solutions, and upgrading curb appeal with landscaping are also excellent choices.
Homebuyers often appreciate improvements that make daily living easier rather than purely decorative upgrades. Organized closets, smart storage, refreshed kitchens, and modern bathrooms create a strong first impression and increase perceived value.
Projects with the Best Return on Investment
Interior painting in neutral colors
Cabinet painting and new hardware
Modern LED lighting upgrades
Floating shelves and built-in storage
Entryway improvements
Bathroom fixture updates
Kitchen backsplash installation
Closet organization systems
Landscaping and outdoor improvements
Smart home upgrades like lighting or thermostats
How do I choose between a DIY approach and hiring a professional contractor?
The decision depends on three key factors: your skill level, the complexity of the project, and the potential safety risks involved. DIY is an excellent option for cosmetic improvements, furniture building, painting, decorating, shelving, and simple installations. These projects are relatively low-risk and offer great opportunities to save money while learning new skills.
However, projects involving structural changes, electrical wiring, gas systems, roofing, or major plumbing should usually be handled by licensed professionals. Mistakes in these areas can be dangerous, expensive to fix, and may violate local building regulations.
Before deciding, ask yourself whether you have the right tools, enough time, and the confidence to complete the project safely. If the answer is no, hiring an experienced contractor may actually save money in the long run by avoiding costly repairs.
DIY is Best For
Painting walls and furniture
Installing shelves
Decorative wall treatments
Furniture restoration
Home organization projects
Landscaping and garden projects
Hire a Professional For
Electrical installations
Gas line work
Structural wall removal
Major plumbing repairs
Roof repairs
HVAC installation
⭐ Expert Tip: If you’re unsure about a project, complete the cosmetic work yourself and leave technical or safety-critical tasks to professionals. This hybrid approach often provides the best balance of savings and quality.
What are the best ways to transform a dark, cramped room without knocking down walls?
A small or dark room can feel much larger without changing the floor plan. The secret is to improve light, color, storage, and furniture placement rather than making expensive structural changes.
Start by choosing light-colored paint such as warm white, soft beige, or light gray. These colors reflect natural light and instantly brighten the room. Large mirrors placed opposite windows also help distribute light throughout the space, making the room appear more open.
Furniture should be scaled appropriately for the room. Bulky pieces create visual clutter, while slim-profile furniture with visible legs gives the illusion of extra floor space. Replacing heavy curtains with sheer window treatments allows more daylight to enter, and layered lighting eliminates dark corners.
Smart storage is another game changer. Floating shelves, multifunctional furniture, and built-in storage reduce clutter, which makes even the smallest room feel larger.
Easy Room Transformation Ideas
Paint walls in light, neutral colors.
Add large mirrors to reflect light.
Replace heavy curtains with sheer fabrics.
Install layered lighting (ceiling, floor, and table lamps).
Choose multifunctional furniture with hidden storage.
Use floating shelves instead of bulky cabinets.
Keep decorations simple to avoid visual clutter.
Add vertical storage to maximize wall space.
💡 Pro Tip: A clutter-free room often feels larger than a room with expensive furniture. Organization is one of the most effective DIY upgrades you can make.
How can I soundproof a room or home office using DIY methods?
Complete soundproofing requires specialized construction, but several DIY improvements can significantly reduce noise and create a quieter environment for work, study, or relaxation.
Begin by sealing gaps around doors and windows with weatherstripping or acoustic sealant. Even small openings allow sound to travel easily. Adding thick curtains, rugs, carpets, and upholstered furniture helps absorb sound instead of reflecting it around the room.
Bookshelves filled with books act as natural sound barriers, especially when placed against shared walls. Acoustic foam panels and decorative acoustic boards are also effective for reducing echo and improving sound quality in home offices.
For even better results, install a solid-core door instead of a hollow one and use a door sweep to block sound entering through the bottom gap.
DIY Soundproofing Checklist
Install weatherstripping around doors and windows.
Add heavy curtains or acoustic curtains.
Place thick rugs or carpets on hard floors.
Use bookshelves against shared walls.
Install acoustic wall panels.
Seal wall cracks and gaps.
Add fabric furniture to absorb sound.
Use door sweeps to reduce noise leakage.
⚠ Common Mistake: Many people only cover the walls and forget doors, windows, and floor gaps. These areas often allow the most sound to pass through.
What essential tools should a beginner invest in for home transformation projects?
You don’t need a professional workshop to complete successful DIY projects. A carefully selected collection of high-quality essential tools is enough for most home improvements. Buying reliable tools from the beginning will make projects easier, safer, and more accurate.
Start with measuring and hand tools before investing in power equipment. A tape measure, hammer, screwdriver set, utility knife, spirit level, and cordless drill are the foundation of almost every DIY toolkit. Safety equipment is equally important and should never be overlooked.
As your skills improve, you can gradually add advanced tools such as a jigsaw, orbital sander, circular saw, and impact driver based on the projects you plan to tackle.
Essential Tool
Why You Need It
Tape Measure
Accurate measuring for every project
Cordless Drill
Drilling holes and driving screws
Hammer
Basic construction and repairs
Screwdriver Set
Furniture assembly and installations
Spirit Level
Ensures shelves and frames are straight
Utility Knife
Cutting materials safely
Adjustable Wrench
Tightening bolts and plumbing fittings
Stud Finder
Locating wall studs before mounting items
Safety Glasses
Protecting your eyes from debris
Work Gloves
Preventing cuts and improving grip
📌 Quick Tip: Invest in quality tools rather than buying the cheapest option. Well-made tools last longer, perform better, and make every DIY project more enjoyable.
Conclusion
DIY projects are more than just a way to save money—they’re an opportunity to transform your home, develop practical skills, and create spaces that reflect your personal style. Whether you’re refreshing a single room with a fresh coat of paint, building custom furniture, adding smart storage solutions, or tackling a larger home improvement project, every successful DIY upgrade adds value to both your home and your experience.
The key to great results isn’t having professional-level expertise. It’s about choosing projects that match your skill level, planning carefully, using the right tools and materials, and taking the time to complete each step properly. Small improvements completed with attention to detail often have a bigger impact than expensive renovations done in a hurry.
Remember that every expert DIY enthusiast started as a beginner. Start with manageable projects, learn from each experience, and gradually challenge yourself with more advanced transformations. As your confidence grows, you’ll discover that DIY projects can improve not only your home’s appearance and functionality but also your creativity and problem-solving skills.
If you’re looking for more inspiration, practical home improvement ideas, and expert design advice, explore Design Mode 24 Interior Design. You’ll find helpful resources on Home Improvement, Interior Design, Home Styling, Paint Color, and many other topics to help you confidently plan your next DIY project.
No matter the size of your project, the most important step is simply getting started. With careful planning, patience, and a willingness to learn, you can turn ordinary spaces into beautiful, functional, and personalized environments that you’ll enjoy for years to come.

Leave a Reply