
Introduction
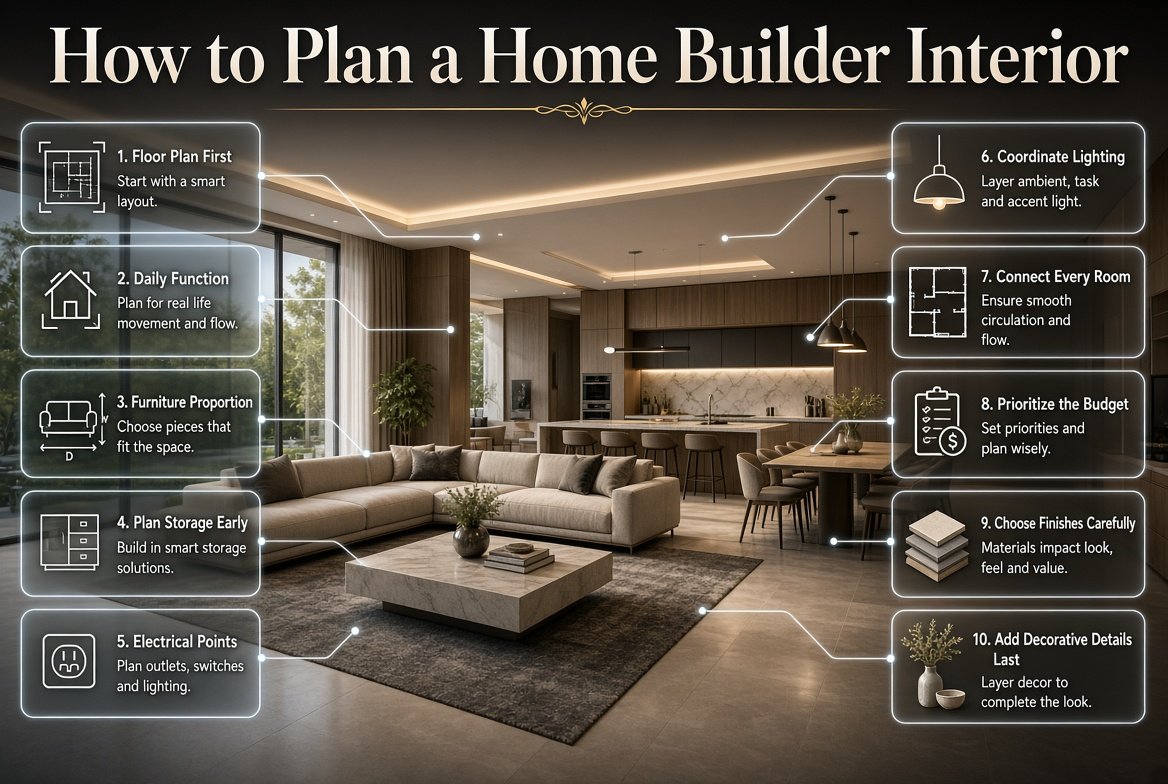
How to Plan a Home Builder Interior | Building a new home gives you something that an older property often can’t: the opportunity to think about the interior before everything becomes fixed. Walls, ceilings, windows, electrical points, kitchens, bathrooms, flooring, storage, and lighting can all be considered as part of one connected plan rather than being changed one room at a time.
But that opportunity can also become overwhelming.
Many homeowners start by saving beautiful living rooms, choosing paint colors, buying furniture, or picking decorative lights. Those things are enjoyable, but they’re not necessarily the best place to begin. A successful new-build interior starts with a much simpler question: How do you want the home to work every day?
That question affects almost everything that follows.
If the sofa is too large, circulation suffers. If storage isn’t planned early, clutter becomes visible. If electrical outlets aren’t positioned around furniture, everyday devices become difficult to use. If lighting is selected after the ceiling is finished, important areas may be poorly illuminated. And if every room is designed independently, the finished home can feel disconnected.
Learning how to plan a home builder interior means creating a clear sequence for these decisions. You need to know what should be decided early, what can wait, where your budget deserves attention, and how to make practical choices without sacrificing personality.
This guide takes you through that process from the first floor-plan review to the final decorative details.
What Does Home Builder Interior Planning Actually Mean?
Home builder interior planning is the process of deciding how a newly built home will function, look, and feel before the interior is fully completed. It includes space planning, furniture layouts, storage, lighting, electrical requirements, flooring, cabinetry, wall finishes, colors, materials, and decorative elements.
The important part is that these decisions aren’t separate.
A dining table affects the pendant light above it. A sofa affects the location of power outlets and the television. A kitchen island affects circulation and lighting. A wardrobe affects bedroom space. Curtains affect window dimensions and furniture placement.
Good planning connects these decisions before construction or installation makes them difficult to change.
A useful sequence is:
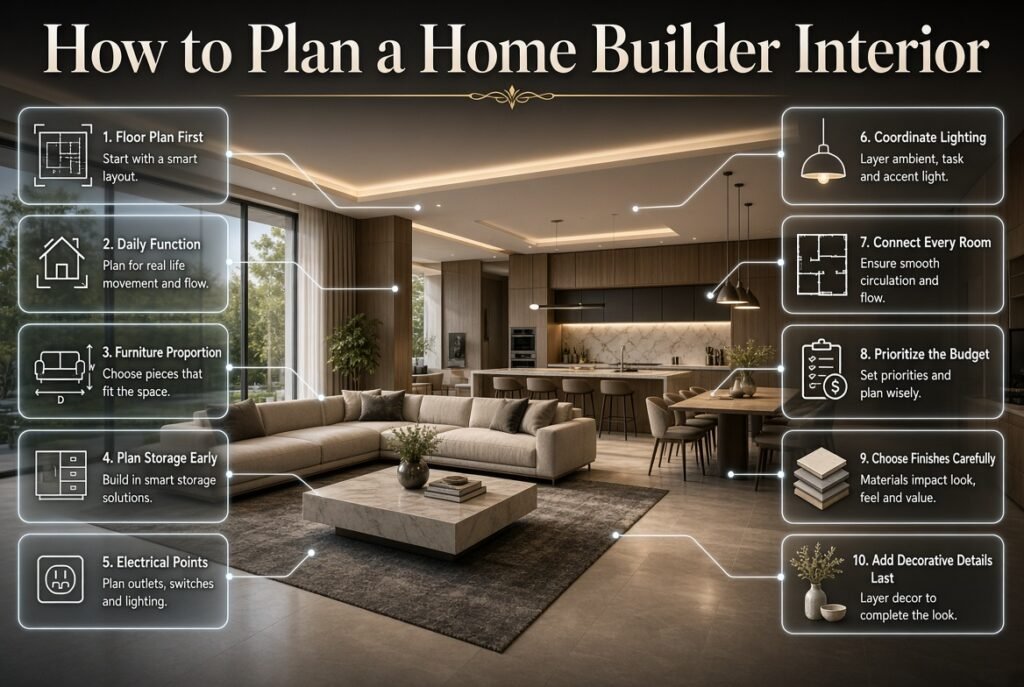
Lifestyle → Floor Plan → Furniture → Storage → Electrical → Lighting → Materials → Colors → Furniture Purchases → Accessories
You don’t have to follow this sequence rigidly in every project, but it provides a reliable framework.
If you want broader professional inspiration while developing your concept, DesignMode24 Interior Design can also be used as a starting point for exploring different approaches to residential interiors.
Why Should You Plan a New Home Interior Before Construction Is Finished?
The earlier you plan, the more choices you have.
Once a wall has been painted, electrical wiring installed, cabinetry fabricated, and flooring fitted, changing your mind becomes more expensive. Some changes are simple, but others involve contractors, demolition, replacement materials, or delays.
Early planning helps you coordinate:
- Room functions
- Furniture dimensions
- Storage
- Lighting
- Electrical outlets
- Flooring
- Cabinetry
- Wall treatments
- Kitchen appliances
- Bathroom fixtures
- Window treatments
- Decorative elements
It also gives you a chance to identify conflicts.
For example, perhaps you want two large bedside tables, but the bedroom door swing leaves limited space beside the bed. Or you may want a kitchen island with seating, but the planned walkway behind the stools isn’t wide enough.
These problems are much easier to solve on paper than after installation.
What Is the Most Important Principle in New-Home Interior Planning?
The most important principle is to design from function to appearance, rather than from appearance to function.
Start with what people need to do in each room. Then determine the furniture, circulation, storage, lighting, and finishes that support those activities. Once the practical foundation works, use colors, textures, patterns, artwork, and accessories to create personality.
A room should look good, but it should also make everyday life easier.
Step 1: Understand the Floor Plan Before Choosing a Style
Before choosing a design style, study the floor plan carefully.
Don’t rely only on the dimensions written on the builder’s drawing. Check the actual usable space and identify everything that may influence furniture placement.
Look for:
- Doors and door swings
- Windows
- Window heights
- Columns
- Structural walls
- Beams
- Ceiling drops
- Staircases
- Plumbing points
- Electrical locations
- Air-conditioning units
- Radiators or heating systems
- Built-in niches
- Service areas
- Balcony or terrace access
These fixed elements create the boundaries within which your interior has to work.
Why Is the Floor Plan So Important?
Because a room that looks spacious when empty can become surprisingly tight when furniture is introduced.
Consider a bedroom with enough floor area for a king-size bed. That doesn’t automatically mean there is enough space for two large bedside tables, a dressing chair, a wardrobe, and comfortable circulation.
Likewise, a living room may technically fit a large sectional sofa, but if that sofa blocks a doorway or leaves no practical route through the room, the layout isn’t successful.
This is why space planning should happen before shopping.
Step 2: Plan the Home Around Your Lifestyle
A good interior isn’t based only on the size of the house. It reflects the routines of the people who live there.
Ask practical questions about every room.
Living Room
- Do you watch television regularly?
- Do you entertain guests?
- Do you need flexible seating?
- Do children use the space?
- Do you want a reading area?
- Do you need hidden storage?
Kitchen
- Do you cook every day?
- Do several people work in the kitchen simultaneously?
- Do you use small appliances frequently?
- Do you need a pantry?
- Do you prefer open display or concealed storage?
Bedroom
- Do you need a dressing area?
- How much clothing storage is required?
- Do you read in bed?
- Where will phones and chargers go?
- Do you need a desk or vanity?
Home Office
- Will you work there full time?
- Do you need video-call lighting?
- How much equipment needs power?
- Do you need bookshelves or filing storage?
The answers determine the interior much more effectively than simply saying, “I want a modern house.”
Step 3: Create a Room-by-Room Planning Sheet
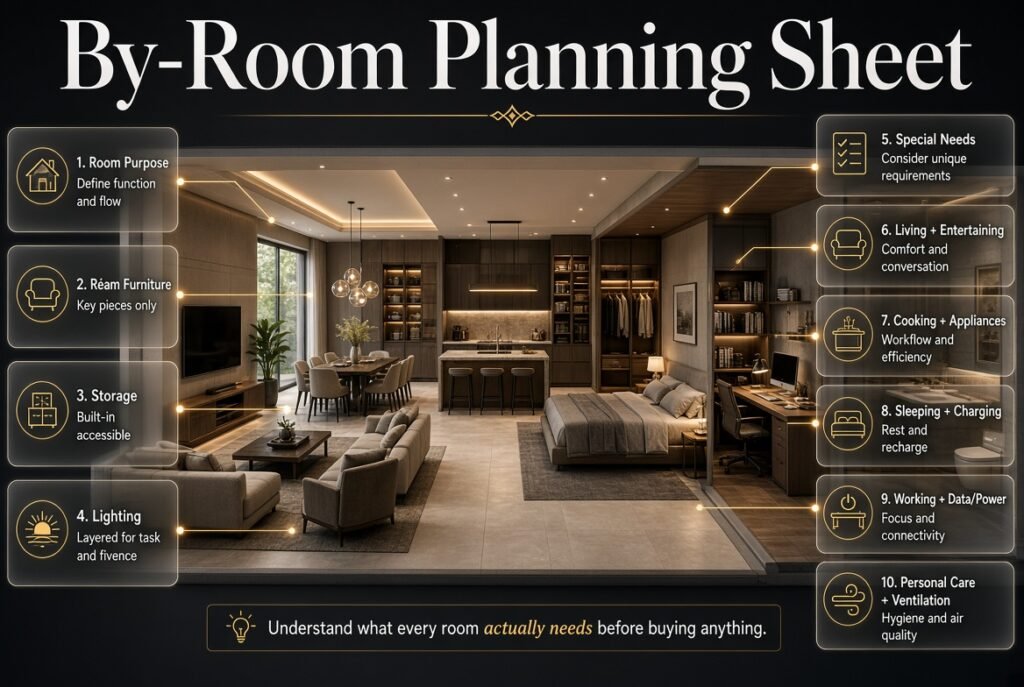
Before buying anything, create a simple document for every room.
Record:
| Room | Purpose | Essential Furniture | Storage | Lighting | Special Needs |
|---|---|---|---|---|---|
| Living Room | Relaxing + entertaining | Sofa, chairs, table | Media/storage | Layered | TV + charging |
| Dining | Meals | Table + chairs | Crockery | Pendant | Circulation |
| Kitchen | Cooking | Cabinets + island | Pantry | Task + ambient | Appliances |
| Bedroom | Sleeping | Bed + side tables | Wardrobe | Soft + task | Charging |
| Office | Working | Desk + chair | Files/books | Task | Data/power |
| Bathroom | Personal care | Vanity + fixtures | Cabinets | Mirror + ambient | Ventilation |
This simple exercise prevents a common problem: making attractive choices without understanding what each room actually needs.
For additional room-specific planning ideas, the Room-by-Room Design Hub is useful when you move from whole-home planning into individual rooms.
Step 4: Establish Your Interior Design Direction
Once you understand how the house needs to function, decide how you want it to feel.
Don’t worry about choosing every product at this stage.
Instead, define three to five words that describe the atmosphere you want.
For example:
Warm + Modern + Natural + Calm + Elegant
Or:
Minimal + Bright + Comfortable + Refined + Timeless
These words become a decision-making filter.
Suppose your goal is a warm, natural interior. When you’re choosing flooring, cabinetry, furniture, and lighting, you can ask whether each option supports that direction.
This prevents random purchasing.
You don’t need every item to match. You need the major elements to belong to the same visual conversation.
Step 5: Build a Whole-Home Color Palette
One of the easiest ways to make a new home feel disconnected is to select every room’s colors independently.
A better approach is to establish a whole-home palette.
For example:
- Warm off-white as the main wall color
- Natural oak as the primary wood
- Soft beige as a supporting neutral
- Brushed brass as a metal finish
- Muted green as an accent
- Occasional darker tones for contrast
The palette doesn’t need to appear in exactly the same proportions everywhere.
The living room may use more green, while the bedroom uses more beige. The kitchen may emphasize oak and brass. The hallway may remain mostly neutral.
The repeated elements create continuity.
For more ideas about choosing and coordinating wall colors, explore Paint Color.
Should Every Room Use the Same Color?
No.
A cohesive home doesn’t mean every room looks identical. It means the rooms have relationships.
You can change accent colors, patterns, furniture styles, and textures while keeping a few common elements consistent.
That might be the same flooring, similar wood tones, related hardware, or a shared neutral wall color.
Step 6: Plan Furniture Before Finalizing Electrical Locations
Furniture planning is one of the most important stages in a new-build interior.
You don’t necessarily need to buy the furniture yet. You need to know its approximate dimensions and location.
Measure:
- Sofa width and depth
- Coffee table
- Dining table
- Dining chairs
- Bed
- Bedside tables
- Wardrobes
- TV unit
- Desk
- Office chair
- Accent chairs
- Rugs
Then place those dimensions onto the floor plan.
Why Does Furniture Affect Electrical Planning?
Because electrical points need to serve real objects.
A bedside table might require:
- A lamp
- Phone charging
- Smartwatch charging
- Another device
A media wall might require:
- TV power
- Internet
- Streaming device
- Sound system
- Additional equipment
A desk may need several outlets for:
- Laptop
- Monitor
- Desk lamp
- Printer
- Phone charger
If you install outlets without considering furniture, you may discover that the sofa covers one or the desk sits several feet away from the nearest useful outlet.
⚠ Common Mistake: Planning electrical points from the empty room instead of the final furniture arrangement.
Step 7: Create Comfortable Circulation
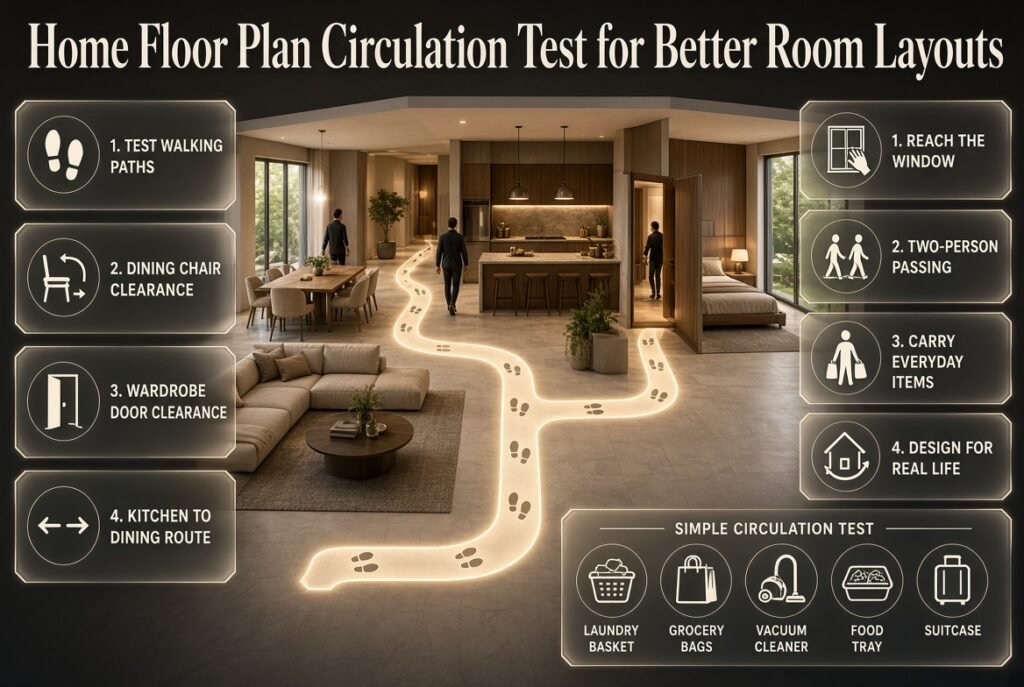
A good floor plan isn’t simply one where everything fits.
It needs to feel comfortable when people move through it.
Test the layout by imagining real activities.
Can someone walk behind the dining chairs while people are seated?
Can a wardrobe door open without hitting the bed?
Can you move from the kitchen to the dining table without navigating around furniture?
Can you reach the window easily?
Can two people pass each other?
These questions reveal problems that a basic furniture diagram may miss.
A Simple Circulation Test
Imagine carrying:
- A laundry basket
- Grocery bags
- A vacuum cleaner
- A tray of food
- A suitcase
If the room becomes difficult to navigate, reconsider the layout.
A home should work during ordinary moments, not only when it’s perfectly tidy.
Step 8: Plan Storage Before Clutter Appears
Storage is one of the most important elements of a comfortable home.
Many homeowners wait until they move in to discover that they don’t have enough places to put everyday items.
Instead, plan storage around what you actually own.
For the entrance, consider:
- Shoes
- Bags
- Keys
- Coats
- Umbrellas
- Everyday accessories
For bedrooms:
- Clothing
- Shoes
- Luggage
- Bedding
- Accessories
- Seasonal items
For living spaces:
- Electronics
- Books
- Games
- Children’s items
- Documents
- Decorative objects
For the kitchen:
- Cookware
- Food
- Small appliances
- Cleaning products
- Tableware
The best storage isn’t necessarily the biggest. It’s storage located where the item is naturally used.
You can explore Smart Storage and Organization Ideas for additional ways to integrate storage without making rooms visually heavy.
Step 9: Decide What Should Be Built-In
Built-ins are particularly useful in new homes because they can be designed around the architecture.
Common examples include:
- Wardrobes
- Media walls
- Kitchen cabinetry
- Entry cabinets
- Home-office storage
- Bathroom vanities
- Pantry systems
- Window seats
Built-ins can make a home look cleaner because they reduce visual gaps and use awkward areas more efficiently.
However, they also reduce flexibility.
A freestanding cabinet can be replaced later. A built-in wardrobe requires much more planning.
When Are Built-Ins Worth It?
They’re especially useful when:
- Storage requirements are high.
- The room has awkward dimensions.
- You want a clean architectural appearance.
- You need concealed equipment.
- You want to maximize vertical space.
- The furniture needs to integrate with walls or ceilings.
Don’t build cabinetry simply because an empty wall exists. First identify what the cabinet needs to accomplish.
Step 10: Plan Lighting as a Layered System
Lighting shouldn’t be treated as a final decorative purchase.
It affects how rooms function and how materials look.
A practical lighting plan usually combines several layers.
| Lighting Type | Main Purpose |
|---|---|
| Ambient | General illumination |
| Task | Lighting for specific activities |
| Accent | Highlighting architecture or objects |
| Decorative | Adding visual character |
A kitchen might use ceiling lighting, under-cabinet task lighting, pendant lights over an island, and accent lighting inside display areas.
A bedroom might use soft ambient lighting, bedside lights, wardrobe lighting, and subtle decorative fixtures.
A living room may benefit from ceiling lighting, floor lamps, table lamps, wall lights, and accent lighting.
For more ideas on coordinating lighting with ceilings and architectural details, explore Lighting and Ceiling Ideas.
⭐ Expert Tip: Place lighting based on furniture and activities rather than the center of an empty room. A pendant should visually serve the dining table or island, not simply occupy the geometric center of the ceiling.
Step 11: Plan Natural Light and Window Treatments
Natural light should influence your interior choices.
A room with strong afternoon sunlight may need different curtains and finishes from a darker north-facing room.
Think about:
- Direction of sunlight
- Glare
- Privacy
- Heat
- Curtain placement
- Furniture near windows
- Artwork exposure
- Fabric durability
Window treatments also affect the perceived height and width of a room.
Curtains mounted higher and wider than the window opening can make a room feel taller and more substantial, provided the architecture allows it.
Don’t wait until the end to think about curtains. Their hardware and recesses may need to be considered alongside the window and ceiling design.
Step 12: Coordinate Flooring Across the Home
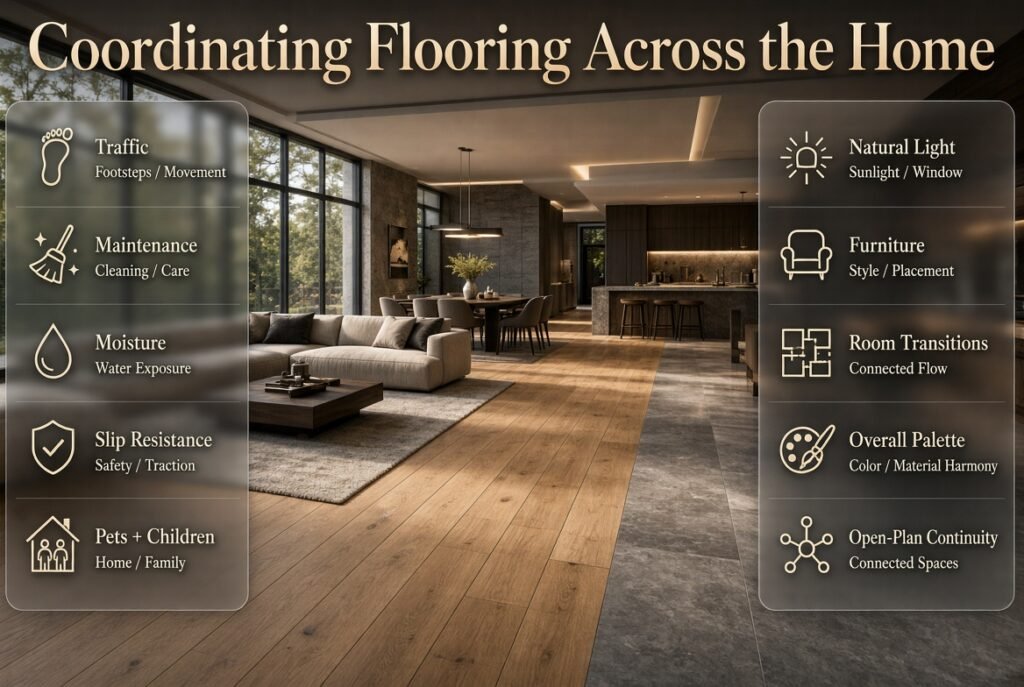
Flooring establishes one of the largest visual surfaces in the house.
Before choosing it, consider:
- Traffic
- Maintenance
- Moisture
- Slip resistance
- Pets
- Children
- Natural light
- Furniture
- Room transitions
- Overall palette
In open-plan homes, flooring continuity can be especially powerful.
You don’t necessarily have to use exactly one flooring material everywhere, but transitions should feel deliberate.
A sudden change in color or pattern can visually divide areas that are meant to feel connected.
For ideas that combine floors with walls and broader surface treatments, explore Flooring and Wall Design Inspiration.
Step 13: Plan the Kitchen Around Workflow
The kitchen deserves detailed planning because many different activities happen in a relatively compact space.
Think about the sequence of everyday work:
Storage → Preparation → Cooking → Serving → Cleaning
Frequently used items should be easy to reach from the areas where they’re needed.
Consider:
- Refrigerator location
- Sink position
- Cooking zone
- Prep surface
- Pantry
- Appliance storage
- Waste and recycling
- Dishwasher
- Island seating
- Cabinet doors
- Drawer openings
- Small appliances
- Lighting
The kitchen should also accommodate more than one person if that’s common in your household.
A beautiful island isn’t successful if it leaves insufficient room for someone to open a dishwasher while another person is preparing food.
Step 14: Plan the Bathroom Around Daily Movement
Bathrooms require careful coordination because plumbing, storage, lighting, mirrors, and fixtures occupy a relatively small area.
Think about:
- Vanity width
- Sink location
- Mirror size
- Shower dimensions
- Toilet position
- Towel storage
- Cabinet storage
- Lighting
- Ventilation
- Cleaning access
Mirror lighting deserves special attention.
A beautiful mirror with poor lighting can make the entire vanity area frustrating to use.
Likewise, storage should be positioned around actual routines. Items used every morning shouldn’t be buried in a cabinet across the bathroom.
Step 15: Coordinate Materials Before Ordering Anything
Never evaluate important materials completely independently.
A floor sample may look excellent by itself. A countertop may also look excellent alone. But when you put the two together with your cabinetry, wall color, backsplash, and hardware, the combination may feel too busy.
Create a physical or digital material board.
Include:
- Flooring
- Cabinet finish
- Countertop
- Backsplash
- Wall color
- Wood
- Metal
- Upholstery
- Tile
- Hardware
Then evaluate everything together.
How Many Strong Materials Should You Use?
There isn’t a universal number, but restraint generally produces a more sophisticated result.
If you have a dramatic stone countertop, you may not need an equally dramatic backsplash.
If the floor has a strong pattern, simpler cabinetry may create balance.
If the cabinetry is highly detailed, quieter walls can prevent visual overload.
The goal is hierarchy.
One or two elements can lead visually while the others support them.
Step 16: Choose the Kitchen and Bathroom Hardware Carefully
Small details can influence the perceived quality of an interior.
Cabinet handles, faucets, door hardware, shower fittings, switches, and other visible elements should be considered as part of the overall material palette.
You don’t necessarily need everything to match exactly.
For example, a home might combine:
- Brushed brass
- Warm wood
- Soft stone
- Matte neutral cabinetry
The important thing is that the finishes appear intentional.
Avoid introducing a different metal finish every time you enter a new room unless there’s a deliberate reason.
Step 17: Choose Paint After Major Materials Are Understood
Paint is often easier to change than flooring, cabinetry, countertops, or tile.
That makes it sensible to finalize paint after major fixed finishes have been selected.
A warm floor can make a neutral wall color appear warmer.
A cool stone surface can make the same paint appear different.
Artificial lighting can also change color perception dramatically.
Always test large samples when possible.
Check them:
- In morning light
- During afternoon light
- At night
- Under the actual artificial lighting
A color that looks perfect in a showroom may behave differently in the finished home.
Step 18: Choose Furniture Based on Scale, Not Just Style
Furniture should relate to the size and architecture of the room.
A large room can usually handle larger furniture, but that doesn’t mean every piece should be oversized.
Likewise, a small room doesn’t necessarily need tiny furniture. Sometimes one appropriately scaled larger piece creates a stronger composition than many small pieces.
Pay attention to:
- Sofa depth
- Seat height
- Coffee-table size
- Rug dimensions
- Ceiling height
- Window proportions
- Door locations
- Walking paths
What Is the Best Way to Test Furniture Scale?
Use masking tape on the floor to mark the approximate footprint.
This is especially helpful before ordering:
- Sectional sofas
- Dining tables
- Beds
- Kitchen islands
- Large rugs
- Media units
Walking around the taped layout gives you a better sense of scale than looking at measurements on paper.
Step 19: Use Rugs to Connect Furniture
Rugs are more than decorative accessories.
They help define zones and visually connect furniture.
One common mistake is choosing a rug that’s too small.
If a rug sits only under the coffee table while all the seating floats around it, the furniture can look disconnected.
A larger rug that reaches beneath the main seating usually creates a stronger visual relationship.
In dining areas, make sure the rug is large enough for chairs to remain on it when they are pulled away from the table.
Step 20: Add Textiles Without Overloading the Room
Textiles introduce softness and texture.
These include:
- Curtains
- Cushions
- Throws
- Upholstery
- Rugs
- Bedding
Use them to balance harder materials such as stone, metal, glass, and wood.
You don’t need many patterns.
For example, if your room already contains a patterned rug and expressive artwork, neutral cushions can prevent the space from becoming visually noisy.
If the architecture and furniture are very simple, textiles can introduce more texture and personality.
For farmhouse-inspired rooms, Farmhouse Pillow Covers can introduce a relaxed layer without requiring a complete redesign.
For a cooler accent palette, Blue and Green Pillows can add color while remaining relatively easy to change later.
For quieter rooms, Neutral Throw Pillows can add texture without creating strong visual contrast.
Step 21: Plan the Living Room Around Conversation and Comfort
The living room often becomes the visual center of a home, but it shouldn’t be designed only around the television.
Think about multiple activities:
- Conversation
- Television viewing
- Reading
- Entertaining
- Relaxing
- Family activities
If the room is large, consider multiple zones rather than one enormous seating arrangement.
For example:
Main sofa + chairs + coffee table
can create one social zone.
A nearby:
Accent chair + floor lamp + small table
can become a reading area.
A:
Console + artwork
can establish a secondary visual zone without filling the room with unnecessary furniture.
For additional inspiration, see Living Room Transformation.
Step 22: Don’t Forget the Entrance
The entrance establishes the first impression of the home.
It should be practical as well as attractive.
Consider:
- Shoe storage
- A console
- Mirror
- Lighting
- Small-item storage
- Artwork
- Seating if space permits
Avoid filling the entry with furniture simply because it is the first room visitors see.
The best entrance usually feels clear, intentional, and easy to use.
Step 23: Treat Hallways as Connecting Spaces
Hallways are often ignored because they aren’t traditional “rooms.”
But they connect the entire interior.
A hallway can be improved through:
- Appropriate lighting
- Artwork
- Wall color
- Architectural trim
- Flooring continuity
- Built-in storage
- Mirrors
The key is restraint.
A narrow hallway doesn’t need large furniture. It needs visual interest that doesn’t interfere with movement.
Step 24: Make the Home Feel Intentional Rather Than Perfect
A professionally designed home isn’t necessarily one where every object is expensive.
It feels intentional because relationships have been considered.
The sofa relates to the rug.
The rug relates to the chairs.
The chairs relate to the coffee table.
The lighting supports the furniture.
The wall color supports the flooring.
The artwork relates to the palette.
The storage supports the household’s lifestyle.
That’s what creates visual coherence.
If you want to refine the decorative layer after the functional work is complete, How to Set Up My Home Decor can help guide that transition.
Step 25: Use Decorative Accessories as the Final Layer
Accessories should be added after the major pieces are in place.
This includes:
- Artwork
- Vases
- Books
- Plants
- Sculptural objects
- Decorative bowls
- Cushions
- Throws
- Small lamps
The advantage of waiting is that you can see what the room actually needs.
Perhaps the room already has enough visual interest and needs only a few pieces.
Or perhaps the furniture is very neutral and the room needs stronger artwork and color.
Don’t buy accessories just to fill empty surfaces.
Empty space can be part of the design.
Step 26: Create a Budget That Reflects Priorities
A new-build interior can become expensive because there are so many opportunities to upgrade.
The solution is not necessarily to make everything cheap.
Instead, divide the budget into priorities.
Essential
These affect function or construction:
- Electrical
- Plumbing
- Kitchen
- Bathrooms
- Built-ins
- Essential lighting
- Flooring
High Impact
These strongly affect appearance:
- Main sofa
- Dining table
- Lighting fixtures
- Curtains
- Cabinet hardware
- Feature materials
- Rugs
Flexible
These can be added gradually:
- Artwork
- Decorative objects
- Extra cushions
- Plants
- Side tables
- Seasonal accessories
This approach allows you to complete the home properly without feeling pressured to purchase every decorative item before moving in.
For practical ideas that work across different spending levels, see Easy Decorating Tips for Every Budget.
How Can You Make a Builder Home Look More Custom?
A standard builder home can feel more personalized through a few carefully chosen upgrades.
You don’t have to customize everything.
Focus on elements that have a large visual impact:
- Better lighting
- More thoughtful cabinetry
- Quality hardware
- Consistent flooring
- Custom-looking built-ins
- Carefully selected wall treatments
- Large-scale artwork
- Proper furniture proportions
- Layered window treatments
The difference often comes from coordination rather than cost.
A room with expensive materials can still look ordinary if everything is unrelated.
A room with moderately priced materials can look refined when the proportions, colors, lighting, and finishes work together.
How Can You Use Inspiration Photos Correctly?
Save inspiration photos, but don’t copy them blindly.
Instead, analyze why the image works.
Ask:
- Is it the color palette?
- Is it the natural light?
- Is it the furniture scale?
- Is it the architecture?
- Is it the material combination?
- Is it the styling?
- Is it the amount of empty space?
- Is it the lighting?
You may discover that what you really like is not a specific sofa or wall color.
You might actually be responding to the room’s balance.
This distinction helps you create an interior suited to your own architecture rather than forcing another home’s design into your floor plan.
Can Celebrity Homes Help With Interior Inspiration?
They can, as long as they’re used for inspiration rather than imitation.
Large or highly designed homes can demonstrate ideas about:
- Scale
- Material hierarchy
- Architectural features
- Lighting
- Furniture zoning
- Open-plan layouts
- Statement spaces
For example, Mark Cuban House can be explored as a reference point for studying how a high-profile residential interior can combine lifestyle requirements with large-scale architectural and decorative decisions.
The useful lesson isn’t to reproduce the same house.
It’s to understand why certain design choices work at a particular scale.
What Are the Biggest Mistakes in Home Builder Interior Planning?
Choosing Style Before Function
This happens because inspirational images are exciting.
The problem is that a style doesn’t tell you where the television, storage, outlets, or dining table should go.
Better approach: Define room functions and furniture layouts first.
Buying Furniture Before Measuring
A sofa can look perfect online and still be too deep for the room.
Better approach: Record exact dimensions and test the footprint.
Leaving Electrical Planning Until the End
This can result in inconvenient outlets and visible extension cords.
Better approach: Finalize electrical requirements alongside the furniture plan.
Ignoring Storage
A beautifully styled room can quickly become cluttered when there isn’t enough storage.
Better approach: Plan storage based on actual belongings and routines.
Using Too Many Materials
Homeowners sometimes try to make every surface interesting.
The result can feel visually chaotic.
Better approach: Give important materials a clear hierarchy.
Making Every Room Completely Different
This can make the home feel like several unrelated properties.
Better approach: Repeat selected colors, woods, metals, flooring, or lighting characteristics.
Choosing Trends Over Longevity
Trendy materials can become visually dated or difficult to live with.
Better approach: Keep permanent elements relatively timeless and use trends in changeable pieces.
Filling Every Empty Space
Empty space is often mistaken for unfinished design.
But breathing room helps important furniture and architecture stand out.
Better approach: Add objects only when they serve a visual or practical purpose.
Ignoring Real-Life Movement
A layout can look beautiful from one viewpoint and become awkward once people start moving.
Better approach: Test walking routes and furniture clearances.
What Decisions Should Be Made First in a New-Build Interior?
A useful priority order is:
| Stage | Main Decisions |
|---|---|
| 1 | Lifestyle and room functions |
| 2 | Floor plan |
| 3 | Furniture layout |
| 4 | Storage |
| 5 | Electrical |
| 6 | Lighting |
| 7 | Flooring |
| 8 | Cabinetry |
| 9 | Countertops and major finishes |
| 10 | Paint |
| 11 | Furniture purchasing |
| 12 | Rugs and curtains |
| 13 | Artwork and accessories |
This order isn’t a strict law, but it helps reduce expensive conflicts.
The general principle is simple:
Decide difficult-to-change elements before easy-to-change elements.
Which Interior Decisions Are Hardest to Change?
| Decision | Difficulty |
|---|---|
| Structural changes | Very High |
| Plumbing | Very High |
| Electrical wiring | High |
| Ceiling construction | High |
| Built-in cabinetry | High |
| Flooring | High |
| Kitchen finishes | High |
| Wall paint | Low |
| Curtains | Low |
| Furniture | Low–Medium |
| Accessories | Very Low |
This is why you should spend more planning time on the first half of the list.
You can replace cushions much more easily than you can relocate a bathroom drain.
How Can You Keep an Interior Cohesive Without Making It Boring?
Use repetition with variation.
For example, you might repeat natural wood throughout the house but change how it’s used.
In the kitchen, it may appear as cabinetry.
In the living room, it may appear as a console.
In the bedroom, it may appear in bedside tables.
The material creates continuity while the application creates variety.
The same principle works with colors.
A muted green may appear as a cushion in one room, artwork in another, and a small accent chair somewhere else.
You don’t need to repeat the exact object.
Repeat the visual idea.
How Should You Handle a Small Home?
Small homes benefit from careful planning because every square meter has to work harder.
Prioritize:
- Multi-purpose furniture
- Built-in storage
- Vertical space
- Clear circulation
- Light visual palettes
- Furniture with appropriate depth
- Hidden storage
- Flexible rooms
Avoid filling a small room with many small furniture pieces.
That can actually make it look more cluttered.
Sometimes one properly scaled sofa and one well-sized rug create a stronger result than a collection of small chairs, tables, and cabinets.
How Should You Handle a Large Home?
Large homes have a different problem: visual fragmentation.
When there is plenty of space, homeowners can accidentally create completely separate design languages in every room.
A better strategy is to establish a consistent foundation.
Repeat:
- Flooring
- Wood tones
- Hardware
- Lighting temperatures
- Wall colors
- Architectural details
- Metal finishes
Then allow each room to develop its own personality.
The result feels larger because the eye can recognize relationships between spaces.
How Can You Refresh the Design Without Starting Over?
Not every interior problem requires a renovation.
Sometimes a room needs:
- New cushions
- Better lighting
- A larger rug
- Rearranged furniture
- New artwork
- Different curtains
- A few plants
- Improved storage
- A simplified arrangement
This is where a thoughtful Room Refresh can be more appropriate than a full redesign.
The important question is:
What is actually wrong with the room?
If the furniture scale is wrong, accessories won’t fix it.
If the lighting is poor, adding cushions won’t solve the problem.
If storage is inadequate, simply styling surfaces differently won’t eliminate clutter.
Solve the underlying issue first.
How Do You Know When the Interior Plan Is Ready?
Before construction or major installation, review the entire house as one project.
Check:
Space Planning
- Does every room have a clear purpose?
- Does furniture fit?
- Are walking paths comfortable?
- Do doors and drawers open properly?
- Are windows accessible?
Electrical
- Are outlets located around furniture?
- Are charging points available?
- Are media requirements covered?
- Are kitchen appliances accounted for?
- Are office needs covered?
Lighting
- Is each room adequately illuminated?
- Is task lighting included?
- Is accent lighting needed?
- Are decorative fixtures correctly positioned?
Storage
- Is everyday clutter accounted for?
- Are wardrobes large enough?
- Is entry storage included?
- Is kitchen storage sufficient?
- Is bathroom storage practical?
Materials
- Do flooring, cabinetry, walls, and countertops work together?
- Are metal finishes coordinated?
- Are strong patterns balanced?
Budget
- Are essential items funded first?
- Are high-impact upgrades identified?
- Which decorative purchases can wait?
A Practical New-Home Interior Checklist
Before finalizing your project, work through this list.
Floor Plan
- Accurate room dimensions confirmed
- Doors and windows checked
- Furniture footprints mapped
- Circulation tested
- Major clearances verified
Kitchen
- Appliance locations confirmed
- Storage planned
- Work surfaces adequate
- Island circulation checked
- Lighting planned
- Electrical requirements confirmed
Bedrooms
- Bed size confirmed
- Bedside tables planned
- Wardrobe dimensions checked
- Charging points included
- Lighting planned
- Curtains considered
Living Areas
- Main seating planned
- TV location confirmed
- Rug size considered
- Lighting layered
- Storage integrated
- Circulation tested
Bathrooms
- Vanity dimensions confirmed
- Mirror selected
- Lighting planned
- Storage included
- Shower clearance checked
- Towel locations considered
Whole Home
- Color palette established
- Flooring coordinated
- Wood tones coordinated
- Hardware finishes coordinated
- Lighting temperature considered
- Accessories left until final stage
How early should I start planning my new home interior?
Start as early as possible, ideally while the floor plan is still being developed or before construction reaches the stage where electrical, plumbing, ceiling, and built-in decisions become fixed. Early planning doesn’t mean buying everything immediately. It means understanding furniture, storage, lighting, and lifestyle requirements before construction limits your choices.
Should I choose furniture or paint first?
For a new-build home, it is usually better to understand the furniture layout and major finishes before finalizing paint. Furniture dimensions influence circulation, while flooring, cabinetry, countertops, and natural light can affect how paint colors appear. Paint is also relatively easy to change later, so it doesn’t need to drive the earliest design decisions.
How do I plan an interior around a builder’s standard floor plan?
Begin by identifying what you can and cannot change. Work with the existing structural walls, windows, doors, plumbing, and ceiling heights, then optimize furniture, storage, lighting, colors, and finishes around those conditions. If changes are still possible, prioritize modifications that improve daily function rather than making changes simply for visual novelty.
What should I spend more money on in a new home?
Prioritize items that are difficult to replace or strongly affect everyday use. Electrical work, plumbing, kitchen cabinetry, good storage, flooring, functional lighting, and properly designed bathrooms generally deserve more attention than decorative accessories. Once the permanent foundation works well, you can upgrade artwork, cushions, lamps, and other flexible elements over time.
How do I make an open-plan home feel organized?
Use furniture orientation, rugs, lighting, ceiling details, flooring changes, and storage to create zones. The goal isn’t to physically divide every area. Instead, give each activity a recognizable place while maintaining visual connections between spaces. A dining table can be visually defined by a pendant light, while a seating area can be connected with a large rug.
Conclusion
Knowing how to plan a home builder interior can save you from many of the problems that appear after construction is complete.
The best interiors aren’t created by making hundreds of isolated choices. They’re created by making the right choices in the right order.
Start with how you live. Study the floor plan. Establish furniture layouts. Check circulation. Plan storage. Coordinate electrical and lighting. Select flooring and major materials. Build a consistent color palette. Then bring in furniture, textiles, artwork, and accessories.
This approach gives every decision a purpose.
It also makes the home easier to live in because the design responds to real routines rather than simply looking good in photographs.
Most importantly, don’t feel pressured to finish every decorative decision at once. The permanent foundation deserves careful planning; the flexible details can evolve.
A new home should not feel like a showroom assembled from unrelated products. It should feel connected, comfortable, personal, and practical.
When architecture, function, proportion, lighting, storage, materials, and decoration work together, the result is an interior that feels intentional from the moment you walk through the door—and comfortable long after the design trends have changed.

Leave a Reply