
Introduction
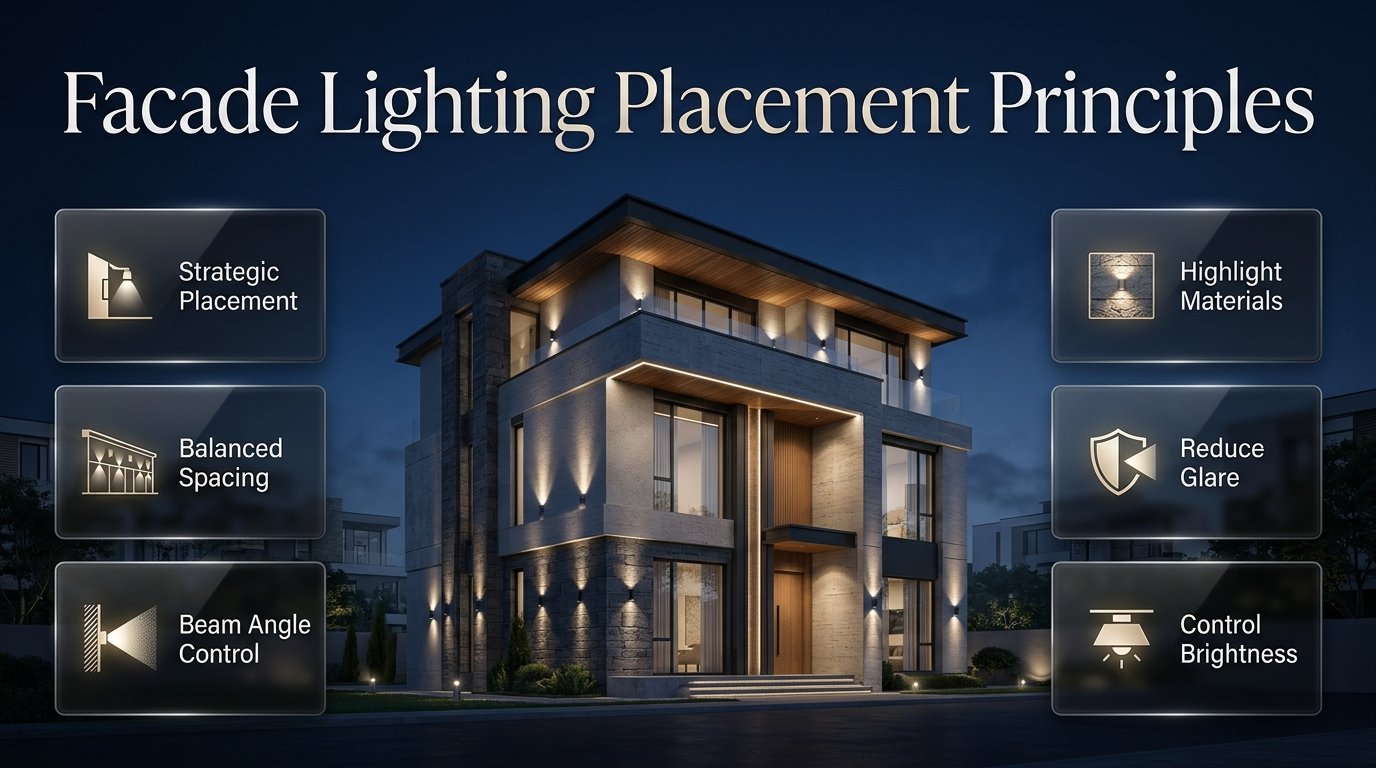
Facade Lighting Placement Principles | A building can have beautiful architecture, premium materials, and an impressive entrance, yet look ordinary after sunset because its exterior lighting has been poorly planned. Lights placed at the wrong height, unevenly spaced fixtures, excessive brightness, and harsh shadows can hide architectural details instead of making them stand out. The solution isn’t always to install more lights. It’s to understand how light interacts with the building.
The right facade lighting placement principles help homeowners, architects, property developers, and designers create exterior lighting that looks balanced, improves visibility, and highlights the building’s strongest features. Whether you’re designing a modern house, renovating a traditional property, or planning lighting for a commercial building, careful fixture placement makes a noticeable difference.
For homeowners looking to coordinate exterior improvements with their overall property design, DesignMode24 Interior Design offers a starting point for exploring practical design ideas. In this guide, we’ll explain how to choose fixture positions, calculate suitable spacing, select beam angles, highlight different materials, reduce glare, and develop a lighting plan that works in real-world conditions.
What Are Facade Lighting Placement Principles?
Facade lighting placement principles are the guidelines used to determine where exterior light fixtures should be installed, how their beams should be directed, and how their brightness should be balanced across a building. These principles consider architectural proportions, surface textures, fixture spacing, mounting height, color temperature, viewing angles, and the surrounding environment.
The goal is to make the building look attractive at night without creating unnecessary brightness or discomfort.
A successful facade lighting plan usually addresses three priorities:
- Architectural emphasis: Highlight entrances, columns, textured walls, balconies, rooflines, and distinctive structural features.
- Practical visibility: Illuminate entrances, steps, paths, and other areas where people need to see clearly.
- Visual comfort: Control glare, prevent excessive light spill, and maintain a balanced relationship between the illuminated building and its surroundings.
For example, a house with a stone entrance may benefit from directional lighting that reveals the texture of the masonry. A modern property with smooth walls may look better with broad, even illumination. A building with decorative columns might need narrow accent beams rather than bright floodlights covering the entire front elevation.
The best placement depends on the architecture, the intended effect, and how people experience the building after dark.
Why Is Correct Facade Lighting Placement Important?
Correct placement determines whether exterior lighting creates a polished architectural appearance or produces distracting hotspots, deep shadows, and uncomfortable glare. Even high-quality fixtures can deliver disappointing results when their beam angles and mounting positions don’t suit the building.
It reveals architectural details
Daylight reveals the overall form of a building, but artificial lighting can emphasize details that become less noticeable after sunset.
These may include:
- Textured brick and natural stone.
- Decorative columns and entrance surrounds.
- Recessed windows and balconies.
- Roof overhangs and horizontal architectural bands.
- Decorative screens and exterior wall panels.
Instead of illuminating everything equally, designers can establish a visual hierarchy. The main entrance might receive the strongest emphasis, while secondary walls remain more subdued.
This approach gives the building a clear focal point without making the entire facade appear excessively bright.
It improves navigation around the property
Exterior lighting also helps people identify entrances, steps, ramps, pathways, and changes in ground level.
However, decorative lighting and practical lighting perform different functions. A wall illuminated from below may look attractive while leaving the adjacent walkway poorly lit.
For this reason, entrance and pathway lighting should be considered separately from architectural accent lighting. Each area needs an appropriate distribution of light for its intended use.
It supports a consistent design
A facade can look disjointed when different areas use unrelated fixtures, color temperatures, and brightness levels.
A coordinated plan creates a connection between the entrance, wall surfaces, windows, landscaping, and other exterior features. The result feels intentional rather than like a collection of separate lighting products.
It reduces energy waste
Poorly aimed fixtures often send light into areas that don’t need illumination. Correct placement and suitable optics help direct more of the available light toward the intended surface.
Timers, compatible dimmers, and automatic controls can further reduce unnecessary operating hours.
Pro Tip: Before selecting fixtures, photograph the building during daylight and mark the features you want to emphasize. This helps you prioritize the entrance, architectural details, and broad wall surfaces before deciding where lights should go.
What Are the Main Types of Facade Lighting?
Different lighting techniques produce different effects. Understanding these methods first makes it easier to choose the right fixture position, beam distribution, and mounting arrangement.
1. Wall washing
Wall washing creates relatively even illumination across a broad surface. Fixtures are usually positioned away from the wall so their beams can spread and overlap without producing excessive bright spots.
This technique works well for:
- Smooth painted walls.
- Contemporary rendered facades.
- Broad concrete surfaces.
- Large architectural wall sections.
- Selected commercial building elevations.
The main advantage is a clean, consistent appearance. Wall washing can make a building feel larger and emphasize its overall shape.
However, it may look flat when applied to a highly textured surface that would benefit from directional shadows. Poor spacing can also create alternating bright and dark areas.
2. Wall grazing
Wall grazing directs light across a surface at a shallow angle, revealing variations in texture through highlights and shadows.
It can be effective on brick, stone, textured concrete, decorative masonry, and relief panels.
The technique is particularly useful when the material itself is an important design feature. A textured wall can appear deeper and more visually interesting when the light travels across its irregular surface.
The drawback is that grazing can exaggerate imperfections, uneven mortar joints, stains, and inconsistent construction. Always test the effect before using it across an entire facade.
3. Accent lighting
Accent lighting focuses attention on a selected architectural feature rather than illuminating the whole wall.
Typical applications include entrance portals, columns, sculptures, distinctive wall panels, and decorative recesses.
The beam should suit the size and shape of the target. A narrow beam may work for a slim column, while a broader feature might require a wider distribution or more than one fixture.
Accent lighting is most effective when it supports a clear visual hierarchy. If every feature receives equally strong illumination, the facade can lose its sense of focus.
4. Linear and concealed lighting
Linear lighting uses elongated fixtures to create continuous lines along selected architectural features.
It can emphasize roof edges, canopies, recessed ceilings, wall reveals, and horizontal bands. Concealed installations are especially useful when the design calls for a clean appearance without visible light sources.
Before installation, consider drainage, heat management, driver access, and the manufacturer’s mounting requirements. A concealed fixture can look excellent initially but become difficult to maintain if access hasn’t been planned properly.
5. Uplighting and downlighting
Uplighting sends light upward from a low position, often toward columns, textured walls, or tall architectural details. Downlighting directs light from a higher position toward walls, entrances, or ground surfaces.
Both methods can be effective, but their success depends on beam direction and the viewer’s position.
Uplights require particular attention to glare and upward spill. Downlights should be aimed so that they provide useful illumination without creating uncomfortable bright spots or excessive shadows.
How Do You Choose the Correct Position for Facade Lights?
The correct position depends on the height of the building, the material being illuminated, the fixture’s optics, and the intended visual effect. A useful approach is to work from the architecture toward the lighting equipment rather than choosing a fixture first and trying to make it fit.
Step 1: Measure the building elevation
Start by recording the height and width of each major wall section. Mark windows, doors, balconies, columns, roof overhangs, and other features that may interrupt the light distribution.
Divide the facade into manageable zones, such as:
- Main entrance and porch.
- Broad wall surfaces.
- Decorative columns and vertical features.
- Windows and balcony surrounds.
- Garage and side entrances.
- Roofline and architectural bands.
This makes it easier to assign a suitable lighting technique to each area.
Step 2: Decide what each fixture should accomplish
Every fixture should have a defined purpose.
One fitting may emphasize the entrance, while another creates even illumination across a large wall. A third may highlight textured stonework.
Avoid installing fixtures simply because a particular position looks symmetrical. Architectural symmetry is useful, but it shouldn’t override practical requirements such as window locations, glare control, and beam coverage.
Step 3: Choose the mounting position
Different mounting positions create different effects.
| Mounting position | Suitable application | Important consideration |
|---|---|---|
| Ground level | Uplighting columns and walls | Drainage, glare, and upward spill |
| Low wall | Grazing textured materials | Shadow intensity and access |
| Mid-wall | Selected architectural accents | Fixture visibility and beam direction |
| Soffit or overhang | Downlighting and wall washing | Beam spread and mounting depth |
| Roofline | Highlighting architectural edges | Spill beyond the building |
| Recessed architectural detail | Concealed linear effects | Maintenance and heat management |
The position should support the intended effect and fit the building’s construction details.
Step 4: Check the beam direction
A fixture can be correctly positioned but still illuminate the wrong area if its beam is aimed poorly.
Check whether the light reaches the intended surface, whether it creates unwanted shadows, and whether it is visible directly from the street or nearby windows.
If the fixture has adjustable aiming, make small changes before committing to the final position.
Step 5: Test the result after dark
A daytime inspection cannot reveal the complete nighttime effect.
Where practical, temporarily position a representative fixture and evaluate it from several viewpoints. Check the appearance from the street, entrance, driveway, and pedestrian approach.
Look for hotspots, dark gaps, unwanted reflections, and excessive brightness. Adjust the position before installing the remaining fixtures.
How Far Should Facade Lights Be Installed From a Wall?
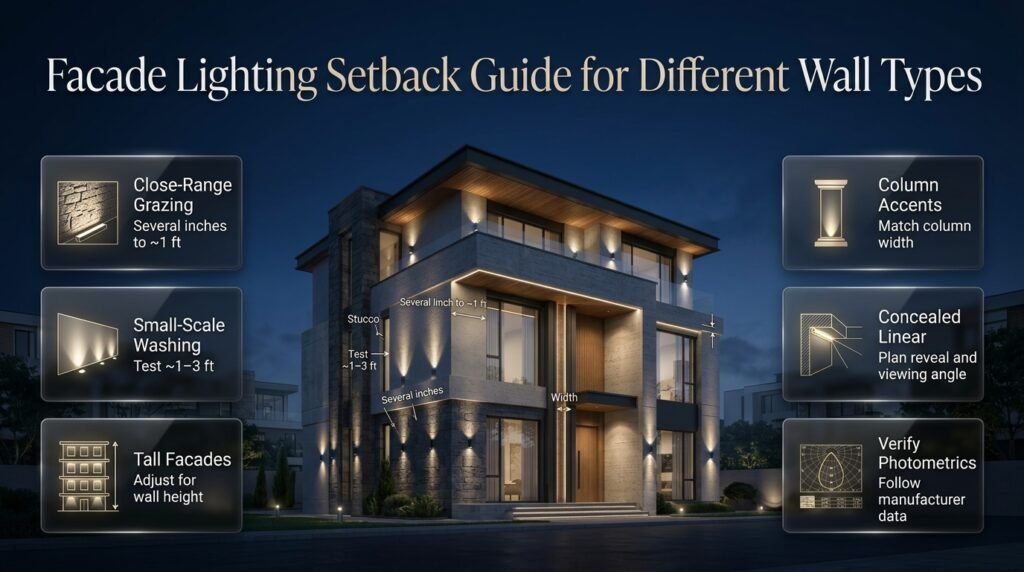
There is no universal setback for facade lighting. The correct distance depends on wall height, beam angle, fixture optics, mounting position, and the type of illumination required.
Wall grazing generally uses a closer position than broad wall washing. A tall wall may require a different arrangement from a small entrance surround, even when both use similar fixtures.
The following measurements are preliminary starting points for testing, not fixed installation rules.
| Application | Initial planning approach |
|---|---|
| Close-range wall grazing | Often several inches to approximately 1 foot from the surface |
| Small-scale wall washing | A starting setback of approximately 1–3 feet may be worth testing |
| Tall facade washing | Consider a greater setback based on wall height and fixture optics |
| Column accent lighting | Set the position according to the column’s width and beam distribution |
| Concealed linear lighting | Determine the setback from the intended reveal and viewing angle |
Manufacturer recommendations and photometric data should take priority over general guidelines.
How can you estimate beam coverage?
A simplified geometric estimate for the width of a beam reaching a flat surface is:
[
W \approx 2d\tan\left(\frac{\theta}{2}\right)
]
Here, (W) represents the approximate beam width, (d) is the perpendicular distance to the target surface, and (\theta) is the beam angle.
For example, a beam with a 60-degree angle reaching a wall from a perpendicular distance of 2 feet has an approximate geometric width of 2.31 feet.
This is only an estimate. Real fixtures have intensity distributions that affect the visible illuminated area, and the nominal beam angle doesn’t describe every part of the light pattern.
When several fixtures illuminate the same wall, consider how their distributions overlap. Excessive overlap can produce bright areas, while insufficient overlap may leave dark gaps.
Expert Tip: Use a manufacturer’s photometric file or lighting calculation when uniformity is important. Geometric estimates are useful for initial planning, but they shouldn’t replace proper distribution data for complex elevations.
How Should Facade Lights Be Spaced?
Even spacing can create a pleasing rhythm, but equal distances between fixtures don’t automatically guarantee uniform illumination. The building’s structural layout, fixture optics, mounting distance, and surface reflectance all influence the final appearance.
Start by identifying the architectural centerline and major structural divisions.
Then consider the following:
- Align accent fixtures with columns or entrance features when appropriate.
- Maintain consistent setbacks along broad walls where the architecture permits.
- Adjust fixture positions around windows, balconies, and recessed sections.
- Review the combined illumination rather than judging each fitting separately.
- Avoid placing bright fixtures where their beams will reflect directly from glass.
Example: Planning lights for a 24-foot-wide facade
Imagine a house with a 24-foot-wide front wall, a centered entrance, and two windows.
Simply dividing the wall into equal sections might place a fixture directly in front of a window or create unwanted brightness around the entrance.
A more useful approach is to identify the entrance as the primary focal point, determine whether the remaining wall should be washed evenly, and assess the window positions before choosing fixture locations.
A preliminary layout might include two accent fittings near the entrance, suitable wall-washing fixtures for the broad wall sections, and separate lighting for the pathway.
The final fixture count and spacing should be based on the actual beam distribution, required illumination, and nighttime testing.
Should every fixture be placed symmetrically?
Not always. Symmetry is useful on traditional and contemporary facades with balanced architectural features, but the lighting layout may need small adjustments to avoid glare or unwanted shadows.
A well-balanced result is more important than perfect mathematical symmetry.
How Do You Select the Right Color Temperature?
Color temperature influences whether the building looks warm and welcoming, neutral and contemporary, or cool and dramatic. For many homes, warm white creates a comfortable appearance, while neutral white may suit selected modern and commercial buildings.
Color temperature is measured in kelvins (K).
| Color temperature | General appearance | Common applications |
|---|---|---|
| 2200K–2700K | Very warm to warm | Traditional homes, stone, brick, hospitality properties |
| 3000K | Warm white | Many residential facades |
| 3500K–4000K | Neutral to cool-neutral | Selected modern and commercial buildings |
| Above 4000K | Cooler appearance | Specialized applications where justified by the design |
These are general design ranges rather than mandatory specifications. Material colors, surrounding lighting, and environmental considerations should influence the final choice.
Why should color temperature remain consistent?
When fixtures illuminate the same continuous wall, inconsistent color temperatures can make adjacent areas appear disconnected.
For example, one section of a stone facade may look yellowish while another appears distinctly blue-white. The difference can distract from the architecture.
Use matching color temperatures across related lighting zones whenever practical. Also consider color-rendering quality, especially when lighting natural stone, brick, wood, or painted surfaces.
If a project uses different color temperatures for separate zones, make sure the distinction is intentional.
For additional guidance on coordinating interior finishes and colors, explore Paint Color.
How Bright Should Facade Lighting Be?
Facade lighting should reveal architectural details without overwhelming the building or its surroundings. The required brightness depends on the wall’s reflectance, the fixture’s distribution, viewing distance, ambient light, and the importance of the illuminated feature.
There is no single lumen value suitable for every facade.
Instead of selecting the brightest fitting available, determine how much light the target surface actually needs.
Consider the surface material
Pale surfaces generally appear brighter than dark surfaces under similar illumination. A light-colored rendered wall may need less output than a dark stone wall to achieve a similar visual impression.
Reflective finishes can create bright hotspots even when the fixture’s total output is relatively modest.
Consider the surrounding environment
A building on a dark residential street may need a different lighting approach from one surrounded by brightly illuminated commercial properties.
Excessive brightness in a dark environment can be uncomfortable and can make nearby spaces appear even darker by comparison.
Establish a visual hierarchy
The entrance may need more emphasis than a secondary wall, but that doesn’t mean it must receive dramatically higher brightness.
The relationship between the focal point and surrounding surfaces matters more than the output of an individual fitting.
Lighting designers may use illuminance measurements, luminance assessments, photometric calculations, and nighttime trials to establish appropriate levels.
Common Mistake: Increasing fixture output to compensate for poor positioning. A misplaced beam can still create glare and dark patches at higher brightness. Correct the fixture’s position and optics before increasing output.
How Do Different Facade Materials Affect Light Placement?

Facade materials respond differently to directional light. Their texture, color, reflectance, and surface irregularities determine whether a lighting technique creates a subtle appearance or dramatic highlights and shadows.
Brick and natural stone
Brick and stone often benefit from grazing because their irregular surfaces create depth.
However, grazing may emphasize inconsistent mortar joints, stains, chipped edges, and construction imperfections. Test the effect across representative sections before applying it to the entire building.
Warm white lighting can complement many traditional materials, although the final appearance depends on their natural color and surrounding finishes.
Smooth concrete and painted render
Smooth surfaces generally suit wall washing because it can create more even illumination.
Pay attention to mounting distance and fixture distribution. Poor positioning can reveal surface repairs, uneven paint coverage, or visible variations in texture.
If the surface has a glossy or reflective finish, inspect it from multiple angles to identify hotspots.
Glass and metal
Glass and reflective metal require careful aiming because they can produce bright reflections from certain viewing positions.
Avoid directing beams toward occupied windows or reflective panels when doing so would cause discomfort. For contemporary buildings, concealed linear lighting can emphasize architectural divisions without illuminating every surface equally.
Wood cladding and decorative screens
Directional light can emphasize wood grain, slats, perforations, and layered details.
However, close-range lighting may create shadows that overpower the intended appearance. Test the beam across both the decorative material and its supporting structure.
Use suitable exterior-rated fixtures and follow the cladding manufacturer’s requirements for clearances, mounting, and fire safety.
Painted surfaces and decorative panels
Paint color affects how light is perceived. Dark finishes may absorb more light, while pale finishes can appear brighter.
Decorative wall panels may also create shadows depending on their depth and arrangement. Consider these details before selecting a grazing or washing technique.
The aim is to make the material look attractive while preserving the character of the architecture.
How Should You Illuminate Entrances, Windows, Columns, and Rooflines?
Architectural features should be illuminated according to their shape, purpose, and visual importance. A doorway needs practical light for visitors, while a decorative column may require a controlled beam that emphasizes its vertical form.
Entrance and doorway lighting
The entrance is often the main focal point of a residential facade.
Use suitable lighting near the door, steps, and approach. Wall-mounted fixtures can frame the entrance, while concealed lighting can emphasize a canopy or recessed porch.
Avoid exposed light sources that shine directly toward people approaching the property.
The entrance should feel welcoming without becoming so bright that the rest of the building appears visually unimportant.
Windows and balconies
Windows are both architectural features and occupied spaces, so their lighting requires particular care.
Avoid directing strong beams into bedrooms or creating distracting reflections on glass. Where the design calls for illuminated window surrounds, aim the light at the architectural frame rather than the interior.
Balconies can interrupt light from above because their slabs project outward from the facade. Evaluate these areas individually rather than assuming that a uniform arrangement will illuminate every level equally.
Columns and vertical features
Narrow-beam accent lighting can emphasize columns, piers, and vertical recesses.
The fixture should reveal the intended feature without producing an excessively bright strip or an unwanted shadow across adjacent surfaces.
For broad columns, test whether a single source provides sufficient coverage or whether a different distribution is needed.
Rooflines and soffits
Linear lighting can emphasize roof edges, canopies, and horizontal architectural bands.
Conceal the source where practical, and inspect the result from street level. A roofline that looks attractive from directly underneath may appear too bright from across the road.
Control upward spill and make sure the fixture can be accessed for future maintenance.
Garages and secondary entrances
Garage doors and side entrances often receive less design attention than the main entrance, but they still contribute to the overall composition.
Use practical lighting where people walk, open doors, or move around vehicles. Keep decorative accents separate from task lighting so the arrangement remains functional.
How Can You Reduce Glare and Light Pollution?
Glare and light pollution can be reduced by selecting suitable fixtures, shielding exposed light sources, aiming beams toward the intended surfaces, and limiting unnecessary illumination. Good exterior lighting considers the building and the people living or working nearby.
A facade may look attractive from one viewpoint while causing discomfort from a nearby sidewalk or bedroom window. Inspect the design from several positions before finalizing it.
Choose suitable optics
Use fixtures designed for the required beam distribution rather than relying on general-purpose floodlights.
The fixture should illuminate the intended area without creating unnecessary spill. Shielding accessories may help when direct views of the light source are unavoidable.
Aim beams carefully
Direct light toward the target surface instead of across the street or toward neighboring windows.
Where fixtures are adjustable, make small aiming changes and review the result from the main viewing positions.
Limit upward light
Uncontrolled upward light can contribute to skyglow and reduce nighttime visibility.
Where practical, use shielded fittings and carefully directed beams. Uplighting should be used only when the architectural effect justifies it and the resulting spill can be controlled.
Use appropriate controls
Timers, photocells, dimmers, and compatible smart controls can limit unnecessary operating hours.
For example, decorative lighting may operate at a higher setting during the early evening and switch off or dim later at night. Practical entrance lighting can follow a separate schedule.
Consider neighbors and local regulations
Check whether nearby windows receive unwanted light and whether the project is subject to local outdoor-lighting requirements.
Dark-sky-sensitive areas may impose additional restrictions on fixture types, brightness, or operating hours. Follow applicable regulations rather than relying on a general design guideline.
What Are the Most Common Facade Lighting Mistakes?
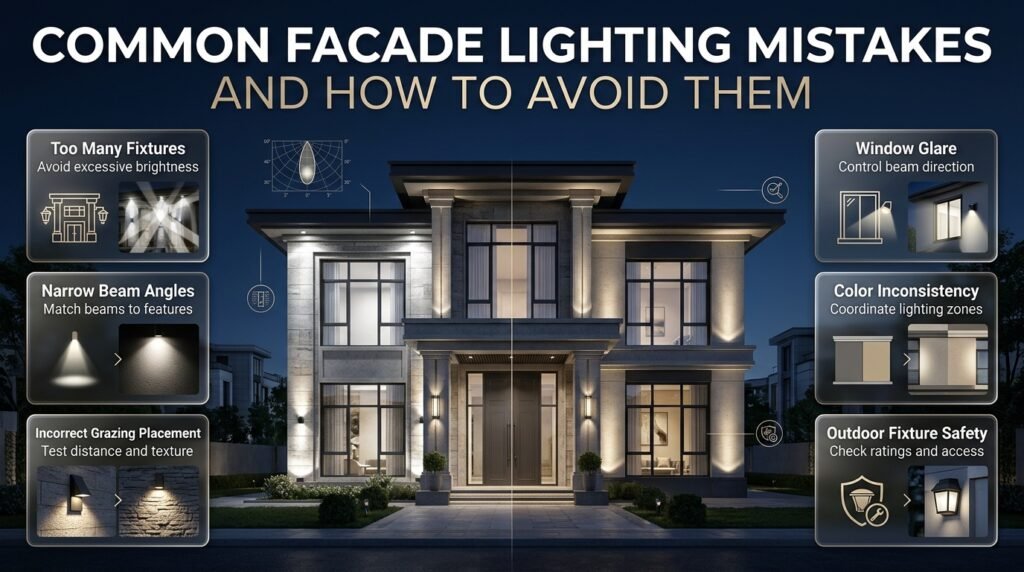
Many exterior lighting problems occur because fixtures are chosen before the building is measured or because the completed installation is judged from only one viewpoint. Recognizing these mistakes early can save money and prevent expensive adjustments.
| Mistake | Why it causes problems | How to avoid it |
|---|---|---|
| Installing too many fixtures | Creates visual clutter and excessive brightness | Establish a lighting hierarchy |
| Using overly narrow beams | Produces isolated bright spots | Match beam distribution to the feature |
| Placing grazing lights too far away | Reduces texture definition | Test the beam near the surface |
| Ignoring window positions | Creates glare and unwanted interior light | Review beam direction carefully |
| Mixing color temperatures randomly | Makes adjacent areas look inconsistent | Coordinate related lighting zones |
| Choosing fixtures by lumens alone | Ignores distribution and glare | Review photometric information |
| Using unsuitable outdoor fittings | Increases the risk of damage and electrical hazards | Check ratings and installation requirements |
| Skipping nighttime testing | Leaves visible problems undiscovered | Test before completing the installation |
| Overlooking maintenance | Makes repairs expensive or difficult | Plan access and replaceable components |
Why does overlighting happen?
Property owners sometimes assume that a brighter building automatically looks more luxurious or secure.
In reality, excessive illumination can flatten architectural details, create sharp contrasts, and make neighboring spaces uncomfortable. A well-designed facade often uses fewer fixtures with better optics instead of many powerful floodlights.
Why is fixture quality important?
Outdoor fittings must withstand the environmental conditions of their installation, including rain, humidity, temperature changes, dust, and possible corrosion.
Check the fixture’s ingress protection rating, mounting requirements, electrical specifications, and suitability for the location. An IP rating alone doesn’t establish that a product is appropriate for every outdoor condition.
Ground-recessed lights may require particular attention to drainage and sealing. High-mounted fixtures need secure mounting and a practical maintenance plan.
For wiring, work at height, and installations requiring specialized electrical knowledge, use appropriately qualified professionals and follow local codes.
How Do You Create a Facade Lighting Plan Step by Step?
A structured planning process helps ensure that each fixture serves a purpose and that the final installation looks balanced from the intended viewpoints.
Step 1: Study the building during daylight
Identify the entrance, strongest architectural features, material changes, and areas requiring practical illumination.
Take photographs from the street, driveway, and pedestrian approach. These will help you compare the nighttime result later.
Step 2: Create a lighting hierarchy
Choose one primary focal point and a few secondary features.
For a home, the entrance may be the primary feature, with columns or textured walls receiving supporting illumination. Avoid giving every architectural element equal visual prominence.
Step 3: Match the technique to the material
Select wall washing for broad, relatively smooth surfaces, grazing for suitable textures, and accent lighting for selected details.
Consider beam angle, shielding, output, and color temperature together rather than treating them as separate decisions.
Step 4: Review technical requirements
Check fixture dimensions, wiring routes, mounting details, weather exposure, drainage, control compatibility, and maintenance access.
Where several fittings illuminate the same wall, review photometric information or request a lighting layout from a qualified designer or supplier.
Step 5: Test after dark
Temporarily position representative fittings where practical.
Evaluate the result from several viewing distances, including nearby pedestrian areas and neighboring properties. Check brightness, shadows, color consistency, and glare.
Step 6: Adjust before final installation
Move fixtures, change aiming angles, adjust output, or select different optics when necessary.
Small adjustments at this stage can improve the result significantly and reduce the likelihood of costly changes later.
Step 7: Add controls and maintenance planning
Consider timers, photocells, dimmers, or compatible smart controls.
Confirm that the selected system supports the fixtures and drivers. Plan how fittings will be accessed for cleaning, servicing, and replacement.
For related home improvement inspiration, explore DIY Home Projects. Electrical installation should still be handled by qualified professionals whenever required.
What Should Professionals Consider Before Finalizing a Facade Lighting Design?
Professional lighting planning goes beyond selecting fixtures and placing them at regular intervals. It considers the complete nighttime scene, including architectural proportions, surface response, viewing angles, operating schedules, maintenance requirements, and the surrounding environment.
Design from the viewer’s perspective
A beam that looks attractive directly in front of a wall may appear harsh from an angle.
Inspect the facade from the street, driveway, sidewalk, and entrance. Check how the lighting looks to pedestrians and people inside nearby buildings.
Prioritize architectural features
Start with the entrance and the building’s strongest design element.
Add supporting illumination only where it improves the overall composition. This makes the design easier to control and can reduce energy consumption.
Use mock-ups for textured materials
Stone, brick, and decorative concrete can respond unpredictably to grazing light.
Test representative areas at night and compare several fixture positions. This is particularly important when the facade contains multiple materials or inconsistent surface textures.
Coordinate lighting with the overall property design
Exterior lighting should complement the entrance, landscaping, window frames, paint finishes, and interior lighting visible through the windows.
A coordinated approach prevents the facade from looking disconnected from the rest of the property.
For further ideas on creating a consistent design language, explore Layering Textures Without Overcrowding.
Plan for maintenance and long-term performance
Ground-recessed fixtures can be discreet, but they may need drainage provisions and access for cleaning or replacement.
High-mounted fixtures may require specialist access equipment. Consider the expected service life, driver replacement, and availability of compatible components.
For a project involving several architectural details, Questions to Ask an Interior Design Consultant can also help you think more systematically about design goals, coordination, and project requirements.
How Can You Coordinate Facade Lighting With the Rest of Your Property?
Exterior lighting works best when it supports the wider design instead of competing with it. The facade, entrance, landscaping, and visible interior spaces should feel connected through consistent materials, proportions, and lighting choices.
Keep visual proportions in mind
Large wall surfaces may need broad illumination, while smaller architectural details require more controlled accents.
Consider how the light distribution relates to the size of the feature. A very narrow beam on a broad wall can appear isolated, while an excessively wide beam on a slim column can spill onto adjacent surfaces.
The relationship between the fixture and the target is more important than the fixture’s appearance alone.
Coordinate the entrance with interior views
When people can see through windows or glass entrance doors, exterior and interior lighting may be visible at the same time.
Avoid extreme differences that make one space look excessively bright compared with the other. A balanced transition helps the building feel coherent after dark.
Maintain consistency between architectural elements
Matching color temperatures, related fixture finishes, and controlled brightness levels help create a unified appearance.
The goal isn’t to make every part identical. Instead, each lighting zone should contribute to the same overall design.
For more ideas about proportion and visual balance, explore Understanding Furniture Proportions. The same broader principle of scale is useful when deciding how lighting should relate to architectural features.
What Are the Best Ways to Maintain Facade Lighting Over Time?
A well-planned installation should remain practical after the initial design is complete. Outdoor fixtures are exposed to weather, dust, insects, temperature changes, and other conditions that can affect their appearance and performance.
Inspect fixtures regularly
Check for damaged seals, loose mounting, corrosion, moisture intrusion, and changes in brightness.
Clean fixtures according to the manufacturer’s recommendations, and avoid cleaning methods that may damage lenses or protective finishes.
Review aiming after maintenance
A fixture can shift during servicing or after physical disturbance. Check that the beam still reaches the intended surface and hasn’t begun illuminating neighboring windows or the sky unnecessarily.
Check controls and operating schedules
Timers and automatic controls should operate according to the intended schedule. Review seasonal settings when daylight hours change significantly.
Where dimming is used, check that the system remains compatible with the installed drivers and doesn’t cause flickering or unstable output.
Keep replacement requirements in mind
Record fixture models, color temperatures, beam specifications, and control details.
This makes future replacements easier and reduces the risk of introducing inconsistent lighting into a previously coordinated design.
What Is the Best Way to Position Lights on a Building Facade?
The best way to position facade lights is to begin with the building’s architectural features, surface materials, and intended nighttime appearance. Instead of placing fixtures at equal distances without a plan, identify the areas that deserve attention, such as the main entrance, textured walls, columns, balconies, and rooflines. Then choose a lighting technique that suits each feature.
For example, broad wall-washing fixtures can create an even appearance across smooth exterior walls, while carefully positioned grazing lights can reveal the natural texture of brick or stone. Accent lights work well for distinctive architectural details that need more visual emphasis. The final arrangement should look balanced from the street and pedestrian approach, not just from directly in front of the building.
Professional placement tips:
Measure the facade and mark windows, doors, columns, and other structural features before installation.
Choose fixture positions according to beam angle, mounting height, and the distance between the light and the wall.
Test the lighting after dark to identify uneven brightness, unwanted shadows, and glare.
Keep decorative facade lighting separate from practical entrance and pathway lighting.
How Far Should Exterior Lights Be Placed From a Wall?
The distance between a fixture and a facade depends on the wall’s height, surface texture, beam angle, and the lighting effect you want to achieve. Wall grazing generally requires a closer position to emphasize texture, whereas wall washing often needs a greater setback to spread light more evenly across a broad surface.
As an initial planning reference, a small wall-washing installation might be tested at approximately 1–3 feet from the wall. Close-range grazing may begin several inches to around 1 foot from the surface. These are starting points rather than fixed rules; tall walls, deep architectural features, and specialized optics can require different arrangements.
The most reliable method is to review the fixture’s photometric information and test a representative section before final installation. Moving a light just a few inches can change the shape of the illuminated area, especially when working with textured stone or narrow beams.
Practical guidelines:
Use manufacturer recommendations and beam-distribution data to determine the initial setback.
Position grazing fixtures carefully when the goal is to emphasize brick joints, stone texture, or decorative relief.
Check the overlap between neighboring beams to prevent bright hotspots and dark gaps.
Evaluate the result from several viewing angles before finalizing the mounting position.
Which Color Temperature Is Best for Architectural Facade Lighting?
Warm white lighting around 2700K–3000K is often a strong choice for residential facades because it creates a welcoming appearance and complements many brick, stone, and traditional exterior finishes. Neutral white around 3500K–4000K may suit selected contemporary buildings, particularly where a cleaner, more neutral appearance is desired.
However, color temperature should never be selected independently of the building’s materials. A warm light can enrich the appearance of certain natural stones and timber finishes, while a cooler source may change how painted walls or metal panels look at night. The surrounding landscape and neighboring lighting also influence the final result.
Consistency is equally important. Using noticeably different color temperatures across the same continuous wall can make the installation appear uneven, even when the fixtures are positioned correctly. Before purchasing multiple fittings, test the proposed light on the actual facade material.
Expert recommendations:
Consider 2700K–3000K for many residential and traditional architectural settings.
Evaluate neutral white for contemporary designs when it complements the materials and surroundings.
Use consistent color temperatures across fixtures illuminating the same visual zone.
Check color rendering and the appearance of exterior finishes under the selected light before installation.
How Can You Prevent Glare and Uneven Lighting on a Building Facade?
Glare and uneven illumination usually result from unsuitable beam angles, incorrect fixture positions, excessive output, or poorly controlled light sources. A facade may appear attractive from one viewpoint but uncomfortable from the sidewalk or a neighboring window. For this reason, lighting should be evaluated from the positions where people will actually see and experience it.
Start by choosing fixtures designed for the intended application. Broad wall-washing optics are often more appropriate for large surfaces than narrow spotlights, while grazing requires careful positioning to avoid excessively harsh shadows. Shielded fittings, suitable accessories, and accurate aiming can also reduce direct glare and unwanted light spill.
Brightness should be adjusted only after the fixture position and beam distribution have been reviewed. Increasing output to compensate for poor placement often makes the problem worse, creating brighter hotspots without improving the overall balance.
Ways to improve the result:
Select beam angles that match the dimensions of the wall or architectural feature.
Use shielding or recessed fixtures where direct views of the light source cause discomfort.
Review reflections from windows, glass doors, and polished exterior materials.
Test the complete installation after dark and adjust individual fittings before finalizing the design.
Use timers or compatible dimming controls to reduce unnecessary illumination during late-night hours.
How Many Lights Are Needed to Illuminate a Building Facade Properly?
The number of lights required depends on the facade’s dimensions, architectural complexity, surface reflectance, fixture distribution, and desired lighting effect. A small house with a simple entrance may need only a few carefully positioned fittings, while a large property with multiple levels, columns, and textured surfaces may require several coordinated lighting zones.
The goal isn’t to fill every section of the wall with fixtures. It’s to provide the right coverage while maintaining a clear visual hierarchy. For example, the main entrance might receive accent lighting, the broad wall surfaces might use wall washing, and the pathway might have separate fixtures for safe navigation. This layered approach can be more effective than using numerous bright floodlights.
Before deciding on the final fixture count, measure the facade and review the beam distribution of the selected products. Photometric calculations can help estimate coverage and uniformity, while nighttime testing reveals how the design performs in its actual environment.
Planning checklist:
Measure the width and height of each major facade section.
Identify the entrance, windows, columns, textured walls, and other focal points.
Match fixture types and beam angles to each area’s lighting requirements.
Account for overlapping beams, surface reflectance, and possible obstructions.
Test representative fixtures before purchasing and installing the complete set.
A carefully planned arrangement of fewer, well-positioned lights can create a more refined appearance than a larger installation with inconsistent spacing and excessive brightness.
Conclusion
Effective facade lighting is about more than making a building visible after dark. It involves understanding architectural features, selecting appropriate fixtures, controlling light direction, maintaining balanced brightness, and creating a comfortable nighttime environment. When lighting is positioned thoughtfully, it can highlight textures, emphasize columns and entrances, reveal the character of exterior materials, and improve the overall appearance of a property without overwhelming its surroundings.
The most successful designs begin with a clear lighting plan. Identify the architectural elements worth highlighting, consider how the facade looks from different viewing angles, and choose fixtures that suit the building’s scale and surface materials. Pay close attention to beam angles, spacing, mounting heights, color temperature, glare control, and the relationship between illuminated and darker areas. These details help prevent harsh shadows, uneven brightness, and unnecessary light spill.
Before installation, review the plan from both practical and aesthetic perspectives. Confirm that fixtures are weather-resistant, accessible for maintenance, energy-efficient, and suitable for the intended outdoor conditions. Where possible, use dimming controls, timers, or smart lighting systems to adjust brightness according to the time of night and the building’s needs.
Ultimately, good facade lighting should feel intentional rather than excessive. A carefully positioned arrangement can make a building appear more welcoming, sophisticated, and visually balanced while preserving the qualities that make its architecture distinctive. By applying these facade lighting placement principles from the planning stage through final adjustment, homeowners, designers, and property professionals can create exterior lighting that delivers lasting visual appeal, everyday functionality, and a more refined nighttime experience.