
Introduction
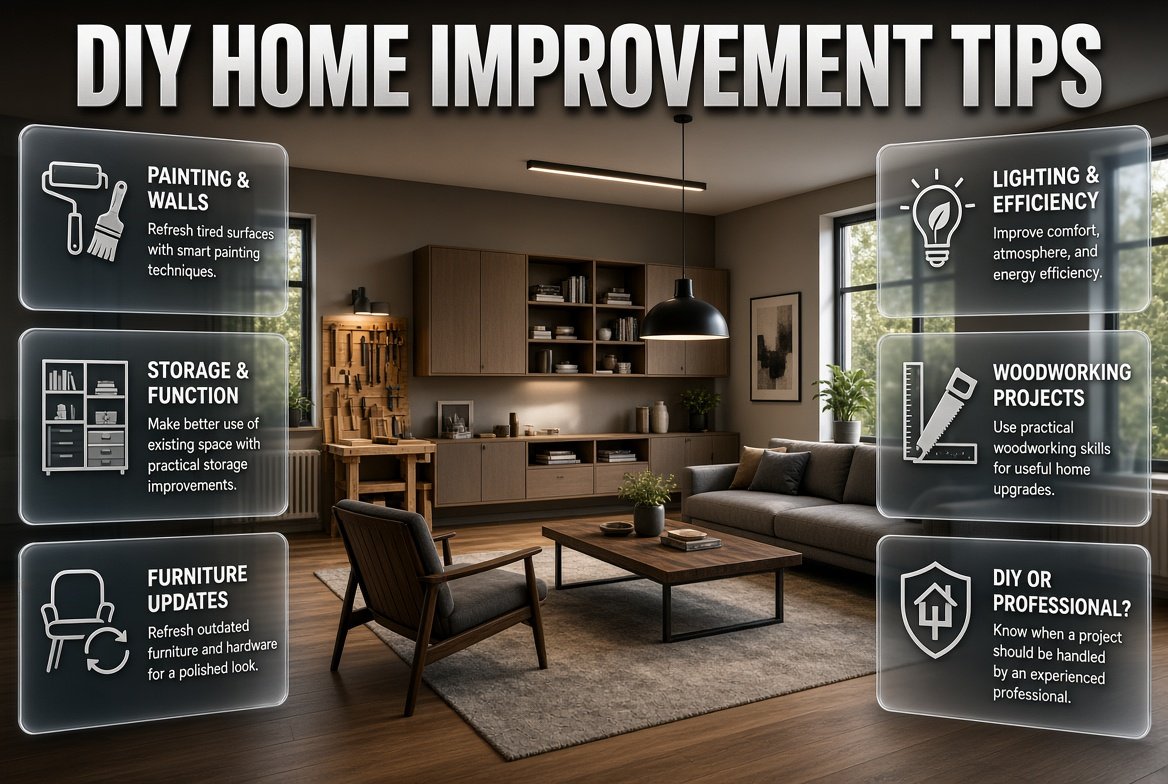
DIY Home Improvement Tips | A home doesn’t need a complete renovation to feel newer, more comfortable, or more functional. Sometimes the biggest difference comes from fixing a tired wall, improving storage, changing outdated hardware, refreshing furniture, or simply making better use of the space you already have. The challenge is knowing which projects are worth your time, which tools you’ll actually need, and where a beginner should draw the line.
That is where practical DIY Home Improvement Tips can make a real difference. Instead of spending money on changes that look impressive for a few weeks but don’t solve a genuine problem, you can focus on improvements that make everyday living easier while giving your home a more polished appearance.
For homeowners looking for practical inspiration, DesignMode24 Interior Design can also be useful when planning improvements around a consistent interior style.
This guide covers everything from simple weekend projects and painting techniques to storage, lighting, furniture updates, energy efficiency, woodworking, common mistakes, budgeting, and knowing when a DIY project should be handed over to a professional.
What Are the Best DIY Home Improvement Tips for Beginners?
The best DIY home improvements for beginners are projects that are relatively low-risk, affordable, and easy to control. Painting, replacing cabinet hardware, improving storage, installing simple shelves, refreshing furniture, updating lighting accessories, and creating decorative features are good starting points. The most important rule is to choose a project that matches your current skills rather than attempting a complicated renovation immediately.
A successful DIY project normally follows a simple pattern:
Identify the problem → plan the solution → measure → gather materials → prepare → complete the work → inspect and clean up.
This sounds obvious, but many DIY problems happen because people skip one of these stages.
For example, if your living room feels cluttered, buying another cabinet may not be the best solution. You might discover that the real issue is poor organization, unused vertical space, or furniture that blocks movement.
Good DIY work starts with the problem, not the product.
Start With Improvements You Can See and Control
If you’re new to DIY, choose projects where mistakes won’t create expensive damage.
Good beginner projects include:
- Painting a bedroom or feature wall
- Replacing cabinet handles
- Installing lightweight decorative shelves
- Organizing closets and storage
- Refreshing an old side table
- Creating simple wall art
- Improving room lighting
- Adding hooks or organizers
- Replacing damaged caulk in suitable areas
- Updating curtains or window treatments
These projects teach valuable skills such as measuring, surface preparation, drilling, sanding, painting, fastening, and finishing.
⭐ Expert Tip: Don’t judge your DIY ability by how quickly someone completes a project in a video. A professional may have years of experience, specialized tools, and a workshop that makes the same task look effortless.
How Do You Plan a DIY Home Improvement Project?
A good project starts with a clear definition of what you want to change. Write down the problem, the desired result, the materials required, and your budget before beginning.
A simple project plan can include:
| Planning Question | What to Consider |
|---|---|
| What needs improvement? | Appearance, storage, comfort, maintenance, or function |
| What is the desired result? | Define the finished look |
| What materials are needed? | Paint, wood, hardware, fasteners, etc. |
| What tools are required? | Drill, level, tape measure, brushes, sanding tools |
| How much will it cost? | Materials + tools + contingency |
| How long will it take? | Include preparation and drying time |
| Is it safe to DIY? | Check electrical, plumbing, structural, and other risks |
This planning stage is especially useful for larger projects. If you’re improving several rooms, organize your work by priority rather than trying to renovate everything simultaneously.
A dedicated Home Improvement section can provide additional inspiration when you’re deciding which areas of your home deserve attention first.
What Should You Fix Before Starting Decorative DIY Projects?
Before adding decoration, deal with obvious maintenance issues. A beautiful wall won’t look impressive if the surface underneath is cracked, damp, peeling, or damaged.
Check for:
- Loose handles
- Cracked caulk
- Peeling paint
- Damaged trim
- Loose cabinet doors
- Minor wall holes
- Sticking doors
- Broken drawer hardware
- Visible clutter
- Poor lighting
Fixing these basic problems creates a cleaner foundation for everything that follows.
Think in the Right Order
A useful sequence is:
Repair → Prepare → Improve → Decorate
For example, don’t install expensive wall décor before repairing a damaged wall. Don’t repaint a cabinet before cleaning and preparing its surface. Don’t install a shelf before checking the wall and choosing the correct mounting method.
This approach saves time because you’re not repeatedly undoing work.
How Can Paint Transform a Home?
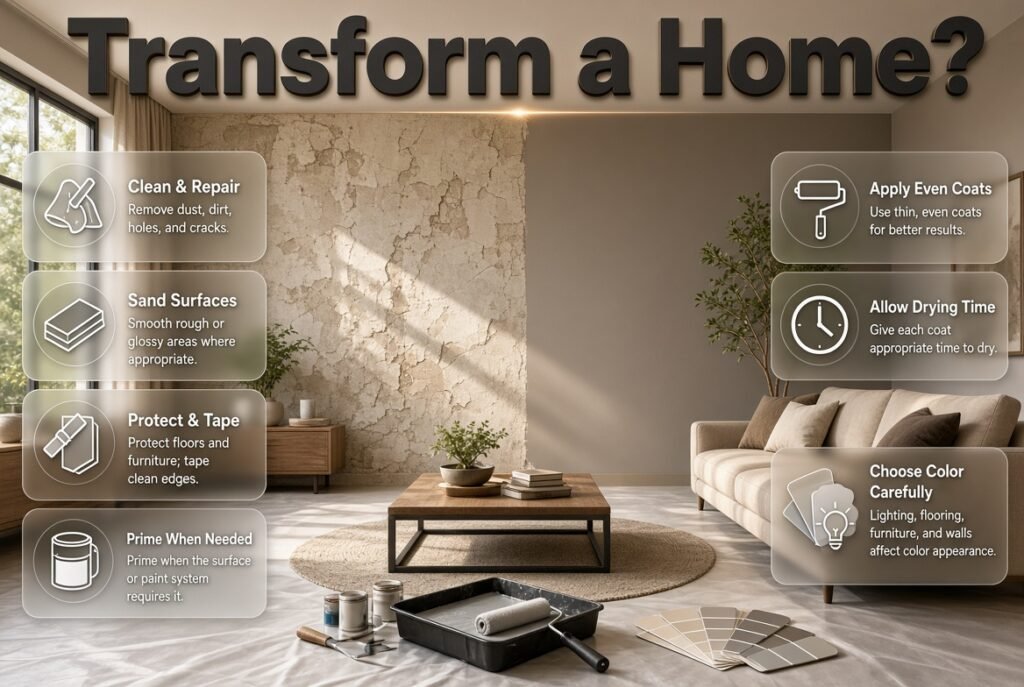
Paint is one of the most effective DIY improvements because it changes a large visual area without requiring major construction. However, good results depend more on preparation than on simply applying paint.
Before painting:
- Remove dust and dirt.
- Repair holes and cracks.
- Sand rough or glossy areas where appropriate.
- Protect floors and furniture.
- Tape areas that need clean edges.
- Prime when the surface or paint system requires it.
- Apply thin, even coats.
- Allow appropriate drying time.
Don’t choose a color only from a small screen image. Lighting, flooring, furniture, and surrounding walls can change how a color looks.
For homeowners exploring different palettes, Paint Color can help with the broader process of choosing colors that fit the room.
Should You Paint an Entire Room or One Wall?
It depends on the goal.
Painting an entire room creates a stronger overall transformation, while a feature wall can introduce color without changing the visual character of every wall.
A feature wall can work particularly well behind:
- A bed
- A sofa
- A dining table
- A fireplace
- A desk
- A media unit
The wall should have a reason to attract attention. Choosing a random empty wall simply because it’s available can make the design feel disconnected.
⚠ Common Mistake: Don’t paint directly over damaged or dirty surfaces just because the old color is still visible. Paint can hide minor imperfections temporarily, but it won’t fix underlying surface problems.
How Can You Improve a Room Without Renovating It?
You can create a noticeable transformation without changing walls, floors, or major furniture. Focus on the five elements people notice most: color, lighting, layout, storage, and visual clutter.
Try changing one or two of these instead of everything at once.
Improve the Layout
Move furniture away from pathways and create clear zones. A living room might need separate areas for conversation, reading, and entertainment.
Improve Lighting
Use a mixture of general, task, and accent lighting where practical.
Reduce Visual Clutter
Remove objects that don’t serve a purpose or contribute to the room’s design.
Add Functional Storage
Use walls, corners, underused cabinets, and vertical areas.
Refresh Existing Furniture
A tired piece may need paint, new hardware, cleaning, or minor repairs rather than replacement.
These improvements often cost less than buying new furniture while giving the room a noticeably different character.
What Are the Best DIY Home Projects for a Weekend?
The best weekend projects are clearly defined and don’t leave your home unusable for several days.
Examples include:
- Painting one feature wall
- Replacing cabinet hardware
- Refinishing a small table
- Installing simple shelves
- Creating wall art
- Organizing a pantry
- Installing hooks
- Refreshing a small entryway
- Updating a home office corner
For more project-based inspiration, DIY Home Projects can help you choose an improvement based on the amount of time and effort you’re prepared to invest.
A Simple Weekend Schedule
Friday evening: Plan, measure, and purchase materials.
Saturday morning: Prepare the space.
Saturday afternoon: Complete the main work.
Sunday morning: Allow finishes to dry or cure where necessary.
Sunday afternoon: Inspect, touch up, clean, and return the room to normal.
This schedule isn’t suitable for every project, but the principle is useful: give preparation and finishing as much respect as the main installation.
How Can You Make a Small Room Feel Bigger?
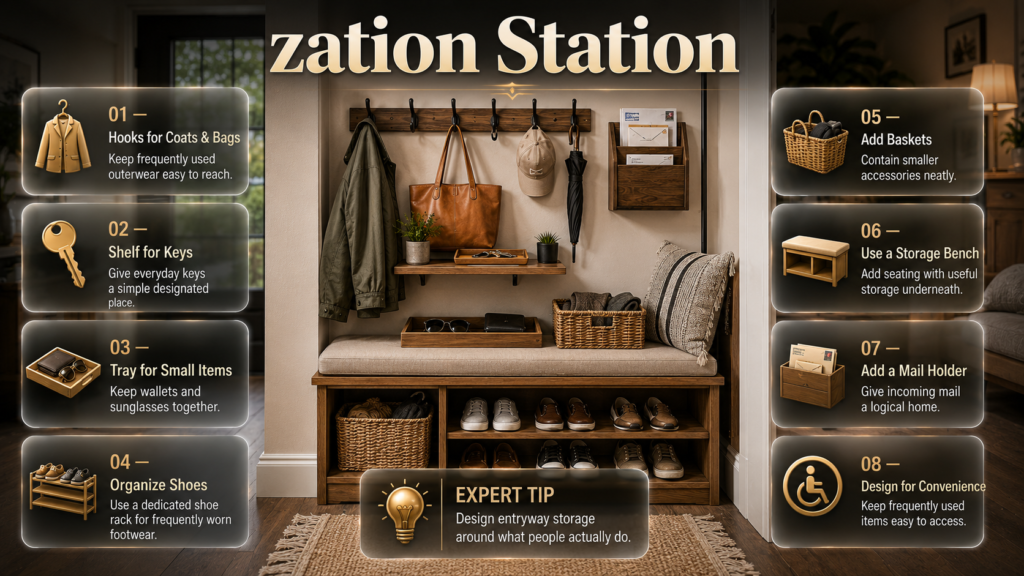
Small rooms benefit from visual simplicity and efficient use of vertical space. You don’t necessarily need miniature furniture. Instead, remove obstacles and make the room easier to navigate.
Consider:
- Floating shelves
- Wall-mounted hooks
- Vertical storage
- Mirrors
- Light-colored surfaces
- Furniture with visible floor space underneath
- Fewer large decorative objects
- Clear walking paths
Avoid filling every empty wall with decoration. Empty space can actually make a room feel larger.
Use Storage That Works Vertically
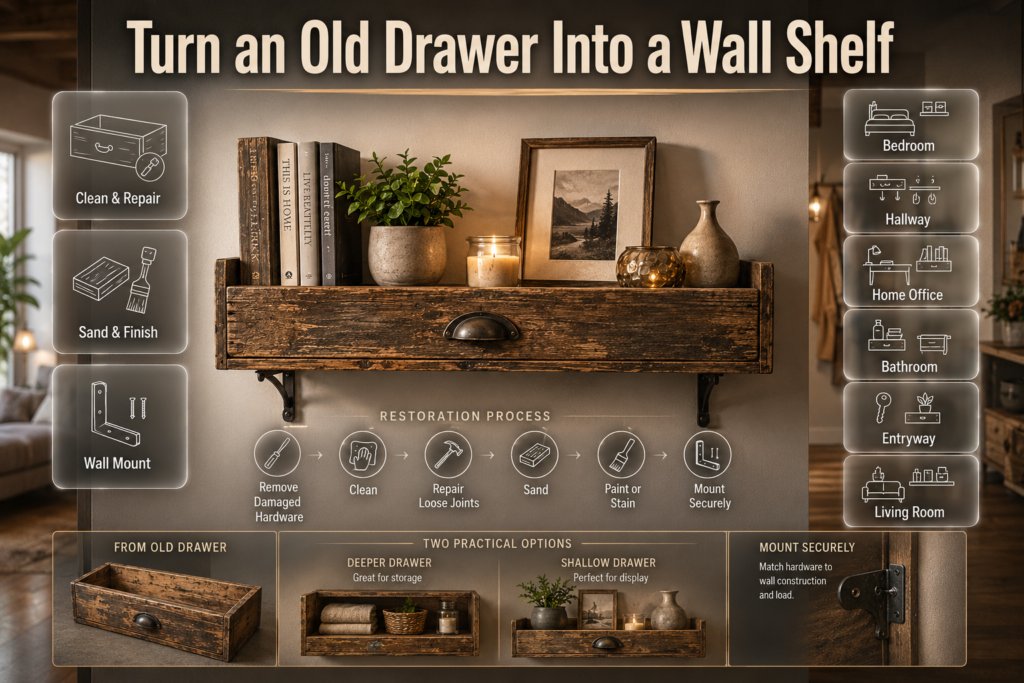
Walls are often underused. A suitable shelf or wall-mounted storage solution can provide useful space without consuming floor area.
For example, a narrow wall near an entrance can hold keys, small baskets, or everyday accessories. A home office can use vertical shelving for books and supplies.
The important issue is mounting. Always consider wall construction and load before attaching anything heavy.
How Do You Install Shelves Safely?
Installing a shelf is simple when you understand the wall and the load it needs to support.
Before drilling:
- Measure the shelf location.
- Check whether the wall contains studs or other suitable structural points.
- Determine the shelf’s expected load.
- Choose fasteners appropriate for the wall material.
- Mark mounting points carefully.
- Check level before final tightening.
- Test stability before placing heavy objects.
A shelf designed for lightweight decoration doesn’t necessarily require the same mounting method as a shelf carrying books or kitchen equipment.
For more inspiration on using walls efficiently, explore Floating Shelf Ideas.
📌 Quick Tip: Don’t judge shelf strength by the thickness of the board alone. The brackets, anchors, wall construction, span, and weight distribution all matter.
How Can You Improve Home Styling With DIY Projects?
DIY improvements become more effective when they support an overall design direction. Instead of completing unrelated projects, choose a style and repeat a few visual characteristics throughout the space.
For example, you might use:
- Natural wood
- Neutral colors
- Simple shapes
- Warm lighting
- Minimal decoration
Or you might prefer:
- Stronger colors
- Decorative patterns
- Vintage furniture
- Layered accessories
- More expressive artwork
The goal isn’t to make every object identical. It’s to create enough consistency that the room feels intentional.
For additional ideas, Home Styling can help when you’re combining practical DIY improvements with decorative decisions.
How Do You Choose an Interior Style Before Starting DIY Work?
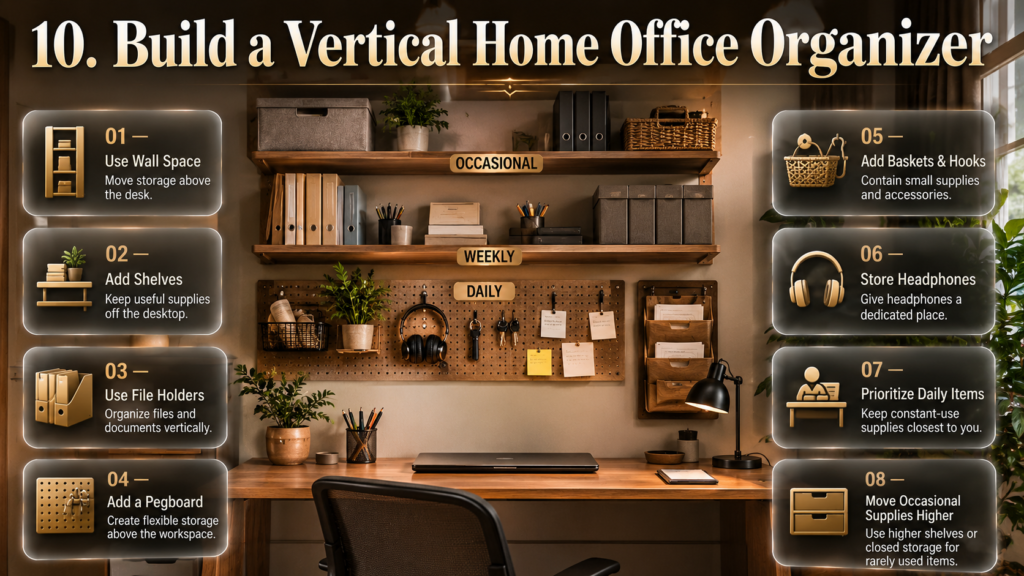
Choosing a broad design direction can prevent expensive mistakes. You don’t need a strict label, but identifying what you like makes shopping and planning easier.
Ask yourself:
- Do I prefer warm or cool colors?
- Do I like clean or decorative spaces?
- Do I prefer natural materials?
- Do I want the room to feel modern, traditional, relaxed, or dramatic?
- Which existing furniture must remain?
- Which elements should become focal points?
Your answers can guide paint, furniture finishes, lighting, textiles, and accessories.
If you’re comparing different approaches, Interior Design Styles can help you understand how different styles use color, materials, proportions, and decoration.
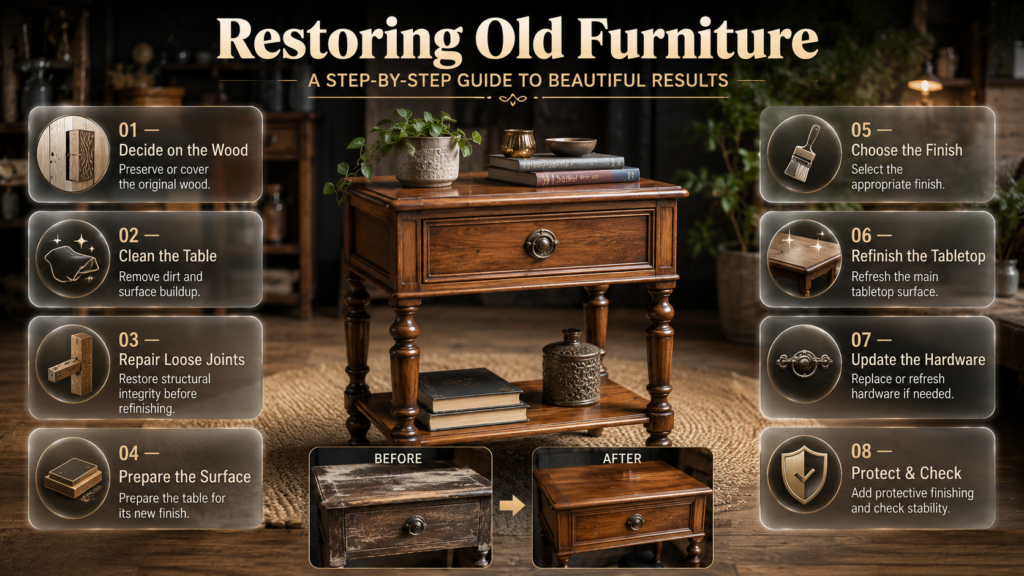
How Can DIY Furniture Makeover Projects Save Money?
Furniture is often worth refreshing before replacing. A solid older table or cabinet may have better construction than a cheap new alternative.
A basic furniture makeover usually involves:
Clean → Repair → Sand or prepare → Prime if required → Paint or finish → Reassemble → Inspect
The exact process depends on the existing finish and material.
Before starting, check for:
- Loose joints
- Water damage
- Structural weakness
- Veneer problems
- Rust
- Old hardware
- Deep scratches
Don’t spend several days refinishing a piece that is structurally unsound.
A furniture makeover can also give you an opportunity to introduce a new color or finish without replacing the entire room.
What Are the Best DIY Woodworking Projects for Beginners?
Simple woodworking can teach valuable DIY skills, particularly measuring, cutting, sanding, drilling, fastening, and finishing. Beginner projects should have straightforward dimensions and limited joints.
Good starting projects include:
- Small shelves
- Simple plant stands
- Basic storage boxes
- Wall organizers
- Small benches
- Simple frames
- Utility racks
For beginners interested in developing these skills, Easy Woodworking Projects provides a useful direction for selecting manageable projects.
Always Make a Cutting Plan
Before cutting a board, mark every required piece and consider how those pieces fit into the available material.
This reduces waste and helps prevent the classic DIY problem of discovering that one critical piece was cut incorrectly.
⭐ Expert Tip: When a project requires several identical pieces, make one accurate piece first and use it as a reference for the others. Don’t assume that repeated measurements will always produce identical results.
How Can DIY Wall Art Improve a Room?
Wall art can fill an empty room without requiring major renovation. The advantage of DIY artwork is that you can control the size, colors, and materials.
Ideas include:
- Abstract painted panels
- Framed fabric
- Simple geometric designs
- Botanical arrangements
- Wood-based artwork
- Photography displays
- Typography
- Handmade canvas pieces
Scale matters. A tiny piece of art on a large empty wall may look lost, while an oversized arrangement can overwhelm a small room.
For creative inspiration, DIY Wall Art offers ideas for creating personalized focal points.
How Can Decorative Finishes Add Character?
Decorative finishes can make an ordinary surface feel more distinctive. Depending on the material and technique, they can introduce texture, depth, contrast, or a handcrafted appearance.
Possible approaches include:
- Limewash-style effects
- Textured paint
- Stenciling
- Decorative molding
- Faux finishes
- Layered color techniques
Use these techniques selectively. A strong finish may work beautifully on one wall but feel excessive if repeated throughout the home.
Before applying any specialized finish, test the technique on a sample board or inconspicuous area.
For more ideas, see Decorative Finishes.
What Is a Minimalist Approach to DIY Home Improvement?
Minimalist DIY isn’t about making a home empty. It’s about removing unnecessary visual and functional complexity.
A minimalist improvement might involve:
- Better concealed storage
- Fewer decorative objects
- Simple shelving
- Neutral surfaces
- Clean lines
- Multi-purpose furniture
- Consistent materials
Before adding something, ask whether it improves function, appearance, or both.
If the answer is no, the item may not deserve space in the room.
For more inspiration, Minimalist Interior Design can help explain how simplicity, proportion, storage, and restraint work together.
How Can Japandi Ideas Influence DIY Improvements?
Japandi-inspired spaces generally combine simplicity, natural materials, restrained decoration, and a comfortable sense of warmth. You don’t need to redesign your entire home to borrow these principles.
You could introduce them through:
- Natural wood shelving
- Simple furniture
- Neutral wall colors
- Soft textiles
- Handmade accessories
- Clean storage solutions
- Warm lighting
The key is not copying a specific room from a photograph. Instead, use the underlying principles to guide your own space.
If this aesthetic appeals to you, Japandi Interior Design can provide additional inspiration.
How Can DIY Home Decor Crafts Personalize a Space?
Decorative DIY projects allow homeowners to create pieces that reflect their personality without relying entirely on mass-produced accessories.
Useful projects include:
- Decorative trays
- Simple framed pieces
- Painted vases
- Handmade organizers
- Fabric-based decoration
- Customized storage labels
- Small seasonal displays
The best decorative crafts are connected to the room’s existing colors and materials.
Don’t create an item simply because it is easy to make. Ask where it will go, what purpose it serves, and whether it improves the room.
For more creative project ideas, explore DIY Home Decor Crafts.
How Can DIY Improvements Make a Home More Energy Efficient?
Energy efficiency doesn’t always require a major renovation. Small improvements can help reduce drafts, improve comfort, and prevent unnecessary energy use.
Start by inspecting:
- Doors
- Windows
- Weatherstripping
- Accessible insulation
- Lighting
- HVAC filters
- Curtains and blinds
- Airflow around vents
Sealing appropriate drafts can improve comfort, while efficient lighting can reduce electricity use. Window coverings can also help manage heat and sunlight.
However, don’t treat every energy problem as a DIY project. Major insulation, HVAC, electrical, or structural work may require specialized knowledge.
For a broader approach, Energy-Efficient Homes provides a useful framework for thinking about efficiency as part of overall home design.
How Much Should You Budget for DIY Home Improvements?
Your budget should include more than the main material.
Consider:
Materials + consumables + tools + delivery + replacement parts + contingency
For example, a shelf project might require:
- Wood
- Brackets
- Anchors
- Screws
- Sandpaper
- Finish
- Paint or stain
- Tools you don’t already own
A project that appears inexpensive can become costly if you repeatedly buy forgotten materials.
Use a Three-Level Budget
Minimum: What you need to complete the project safely.
Comfortable: Better materials or tools that improve durability or ease.
Maximum: The amount you refuse to exceed.
This makes it easier to walk away from unnecessary upgrades when you’re shopping.
What DIY Materials Should You Avoid Buying Cheaply?
Not every item needs to be premium, but certain materials affect safety, durability, or final appearance.
Be cautious about compromising on:
- Structural fasteners
- Appropriate anchors
- Electrical components
- Safety equipment
- Paint tools that leave visible defects
- Materials exposed to moisture
- Hardware carrying significant loads
Saving a small amount on a critical component can create a much larger problem later.
On the other hand, you don’t always need the most expensive decorative product. Choose based on the actual demands of the project.
What Are the Most Common DIY Home Improvement Mistakes?
Starting Without a Complete Plan
People often begin because they’re excited about the finished result.
Why it happens: The project looks easy.
Why it’s harmful: Missing materials or unexpected steps can stop the work halfway through.
Better approach: Write down the sequence before starting.
Measuring Only Once
A single incorrect measurement can ruin an otherwise successful project.
Better approach: Measure twice, record the dimensions, and verify them before cutting or drilling.
Ignoring Surface Preparation
Dirty or unstable surfaces cause paint, adhesive, and finishes to fail prematurely.
Better approach: Clean, repair, sand, and prime where appropriate.
Using the Wrong Fastener
A screw or anchor that works for one wall may not work for another.
Better approach: Identify the wall material and expected load before installation.
Rushing Drying and Curing
Paint can feel dry while still being vulnerable to damage. Adhesives and finishes can also require more time than expected.
Better approach: Follow the product’s recommended drying or curing instructions.
Buying Before Measuring
This is particularly common with shelves, curtains, flooring, trim, and storage.
Better approach: Measure first and shop second.
Copying Online Tutorials Without Understanding Them
A tutorial demonstrates one situation. Your home may have different materials, dimensions, wiring, or construction.
Better approach: Understand the principle behind each step.
Ignoring Safety
Safety glasses, appropriate gloves, ventilation, stable ladders, and correct tool use aren’t optional extras.
Better approach: Treat safety as part of the project plan.
⚠ Common Mistake: The most dangerous DIY habit is continuing after discovering something you don’t understand. Stop, investigate, and get qualified help when necessary.
When Should You Hire a Professional?
DIY is valuable, but knowing your limits is equally valuable.
Professional assistance is strongly worth considering for work involving:
- Structural walls
- Major electrical modifications
- Gas systems
- Significant plumbing changes
- Roof work with substantial fall risk
- Major water damage
- Foundation problems
- Complex HVAC systems
- Serious mold issues
- Work requiring permits or specialized inspections
The question isn’t simply, “Can I technically do this?”
Ask instead:
“Can I do this safely, correctly, legally, and with a result that will last?”
If the answer isn’t clear, professional advice may be the cheaper option in the long run.
How Can You Make DIY Work Look Professional?
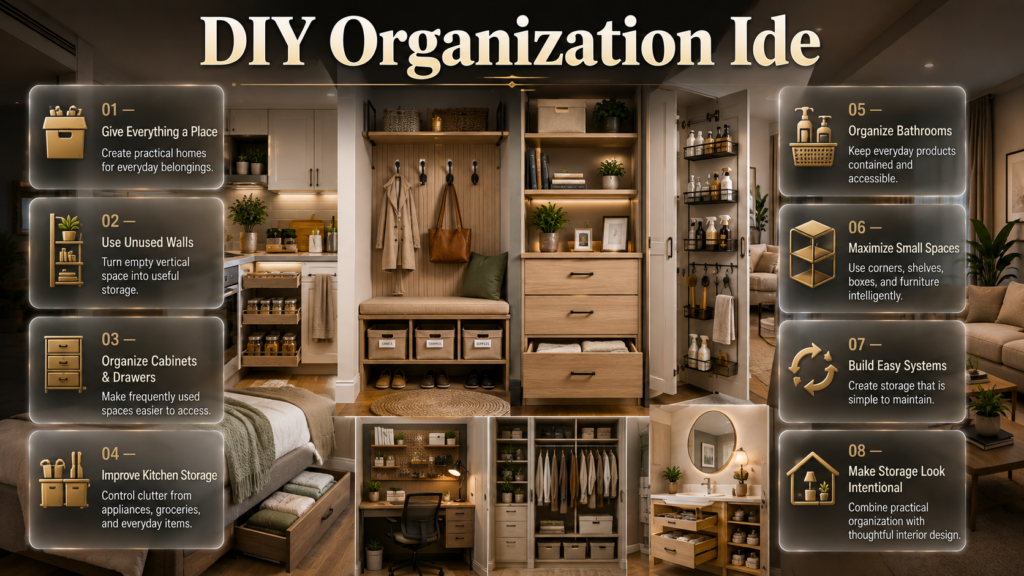
The difference between amateur-looking and professional-looking work often comes down to small details.
Focus on:
- Accurate measurements
- Straight lines
- Consistent spacing
- Clean edges
- Proper surface preparation
- Correct hardware
- Balanced proportions
- Thorough cleanup
- Appropriate drying time
After finishing, don’t immediately declare the project complete.
Walk away for an hour or return the next day if possible. You’ll often notice small issues after seeing the work with fresh eyes.
Look for:
- Uneven paint
- Visible gaps
- Misaligned hardware
- Loose fasteners
- Scratches
- Excess adhesive
- Uneven shelf placement
- Poorly finished edges
A few minutes of correction can dramatically improve the final result.
How Can You Reduce DIY Waste?
Good planning reduces waste before the project even starts.
For wood projects, create a cutting plan. If you need multiple small pieces, determine whether they can be cut from one longer board rather than buying several boards unnecessarily.
Keep useful offcuts, but don’t save every tiny piece. A practical offcut should be large enough to become part of a future project.
You can also design projects around standard material dimensions. Working with standard board lengths or common sheet sizes often reduces unnecessary cutting.
Reuse wherever practical:
- Leftover paint for small touch-ups
- Offcut wood for organizers
- Old hardware for utility projects
- Existing furniture for makeovers
- Packaging materials for temporary protection
The goal isn’t to keep everything. It’s to avoid throwing away useful materials simply because the original project has finished.
How Do You Know Which DIY Project to Start First?
Prioritize projects according to impact, difficulty, cost, and risk.
| Project | Cost | Difficulty | Visual Impact | Risk |
| Paint one wall | Low | Easy | High | Low |
| Replace hardware | Low | Easy | Medium | Low |
| Furniture refresh | Low–Medium | Easy–Medium | High | Low |
| Floating shelves | Medium | Medium | High | Medium |
| Simple woodworking | Medium | Medium | High | Medium |
| Major electrical work | Varies | Advanced | High | High |
| Structural renovation | High | Advanced | Very high | High |
If you’re a beginner, start at the top rather than jumping directly to the most complicated project.
How Can Statement Pieces Improve a DIY Room?
A statement element gives a room a focal point. It could be a strong wall color, an oversized artwork arrangement, an unusual furniture piece, or a distinctive material.
The important principle is restraint.
If everything is designed to attract attention, nothing becomes the focal point.
Choose one primary statement and allow the rest of the room to support it.
For more inspiration on creating strong focal points without overwhelming a space, explore Statement Interiors.
How Can You Combine Different DIY Improvements Without Creating Clutter?
The safest approach is to repeat a few elements.
For example, if your room uses warm wood, repeat that material in a shelf, frame, or small furniture detail. If you’ve chosen a particular metal finish for cabinet hardware, consider using it elsewhere rather than introducing several unrelated finishes.
You can also repeat colors through:
- Artwork
- Cushions
- Curtains
- Small accessories
- Furniture
- Wall features
This creates cohesion without requiring every item to match.
A room should feel collected, not copied.
What Are the Best DIY Home Improvement Tips for Renters?
Renters need projects that are reversible and unlikely to damage the property.
Depending on the lease, suitable options may include:
- Removable organization
- Freestanding storage
- Furniture updates
- Temporary decorative solutions
- Non-permanent lighting
- Artwork using approved hanging methods
- Textiles and accessories
- Rearranging furniture
Always check the rental agreement before painting, drilling, changing fixtures, or making other alterations.
The best renter improvement is one you can remove without leaving expensive repairs behind.
What are the best DIY home improvement projects for beginners?
For beginners, the best DIY home improvement projects are those that create a noticeable improvement without involving complicated structural, electrical, gas, or plumbing work. Painting, changing cabinet hardware, installing suitable shelves, refreshing furniture, improving storage, and creating simple wall features are excellent starting points. These projects help you build practical skills while keeping the cost and consequences of mistakes relatively manageable.
Painting is particularly useful because it can transform a room without requiring major construction. Current homeowner research continues to place interior painting among the most common home improvement activities.
Good beginner projects include:
Painting a room or accent wall
Replacing cabinet and drawer handles
Installing lightweight shelving
Refreshing an old piece of furniture
Adding hooks and storage organizers
Creating simple DIY wall art
Improving room lighting with suitable fixtures or lamps
Reorganizing underused storage areas
The important thing is to start with a project you can realistically finish. Completing a small project successfully teaches you how to measure, prepare surfaces, use tools, manage materials, and deal with unexpected problems. Those skills become valuable when you move on to more ambitious improvements.
Professional tip: Don’t choose a DIY project because it looks impressive on social media. Choose it because it solves a problem in your home and matches your current skill level.
How can I improve my home on a budget with DIY projects?
The smartest way to improve a home on a budget is to focus on high-impact changes rather than doing more projects. A fresh coat of paint, updated hardware, better lighting, improved storage, or a furniture makeover can sometimes change the character of a room without the expense of a complete renovation.
This approach is becoming particularly relevant as homeowners become more selective about renovation spending. Current 2026 research shows that many homeowners are narrowing project scopes and focusing on practical improvements rather than automatically taking on large renovations.
Before spending money, divide your project into three categories:
Must have: Materials required to complete the project properly
Nice to have: Improvements that enhance appearance or convenience
Optional: Extras that can wait until another time
For example, if you’re updating an old cabinet, repairing the surface and replacing worn hardware may be enough. You don’t necessarily need new cabinetry, expensive accessories, and a complete room makeover.
Another effective strategy is to reuse what you already own. An old side table can become a useful accent piece after cleaning, sanding, painting, or refinishing. Existing shelves can sometimes be rearranged instead of replaced.
Budget rule: Spend more on items that affect durability, safety, or daily use. Save money on purely decorative details that can be changed later.
What DIY home improvement trends are popular in 2026?
The strongest DIY trends in 2026 are moving toward practical, personalized, and relatively manageable improvements rather than simply copying fashionable rooms. Painting, wall treatments, storage improvements, furniture updates, energy-efficiency projects, and flexible spaces are particularly relevant.
Current 2026 home-improvement research shows homeowners are increasingly interested in making existing homes work better for their lifestyles, while smaller DIY projects such as painting, shelving, hardware changes, and decorative trim remain accessible ways to create visible improvements.
Some useful trends to consider include:
Bold or thoughtfully selected paint colors instead of automatically using white
Decorative wall treatments such as paneling and molding
Functional storage that uses vertical wall space
Furniture upcycling rather than replacing usable pieces
Energy-efficiency improvements such as draft reduction and better insulation strategies
Personalized interiors designed around how the homeowner actually lives
Multi-purpose rooms that can adapt to work, relaxation, hobbies, or guests
However, there’s an important distinction between following a trend and making a good home improvement decision.
A trend can provide inspiration, but your home’s layout, lighting, budget, climate, maintenance requirements, and personal needs should determine the final choice.
Expert approach: Use trends for ideas, not instructions. If a popular design doesn’t work for your home, don’t force it simply because it’s currently popular.
Which DIY home improvements add the most value to a house?
The most valuable DIY improvements are usually those that improve appearance, functionality, maintenance, comfort, or energy performance without creating quality problems. Fresh paint, better storage, improved lighting, well-maintained surfaces, attractive hardware, and carefully executed minor upgrades can make a home feel more finished and easier to live in.
It’s important, however, not to assume that every DIY project automatically increases property value. Poor workmanship can have the opposite effect. Uneven paint, badly installed shelves, damaged surfaces, incorrect fixtures, or unfinished projects can make a property look less appealing.
Recent homeowner research also indicates that aesthetics and everyday comfort are major renovation motivations, not just resale value.
Projects with strong practical appeal include:
Fresh interior painting
Improved storage
Updating worn hardware
Repairing visible cosmetic damage
Improving lighting
Refreshing outdated furniture
Appropriate energy-efficiency upgrades
Improving the usability of neglected spaces
The key is quality. A simple project completed carefully is generally more valuable than an ambitious renovation completed poorly.
If you’re considering a project specifically for resale, think about what future buyers are likely to see and use. Neutral, well-maintained, functional improvements are usually easier to appreciate than highly personalized DIY work.
Professional tip: Don’t spend $1,000 trying to create a $500 improvement. Before starting, ask whether the change genuinely improves the home or simply adds another decorative feature.
What home improvement projects should you not DIY?
The projects you shouldn’t DIY are generally those where an error could create a serious safety hazard, structural problem, expensive damage, or code-related issue. Major electrical work, gas systems, structural modifications, complex plumbing, significant roofing work, and complicated HVAC projects are examples where qualified professionals are often the safer choice.
The modern approach isn’t necessarily DIY versus professional. Increasingly, homeowners are combining the two. 2026 HIRI research shows a substantial shift toward hybrid projects, where homeowners handle appropriate tasks themselves while professionals take care of technical or specialized work.
For example, a homeowner might:
Paint the room themselves
Remove old decorative elements
Assemble approved furniture
Handle basic organization
Prepare surfaces
while hiring a qualified professional for:
Major electrical modifications
Gas work
Structural changes
Complex plumbing
HVAC installation or major repair
Significant roofing work
This approach can reduce labor costs without turning a complicated project into an unnecessary safety risk.
The most important warning sign is uncertainty. If you open a wall and discover unfamiliar wiring, unexpected plumbing, structural damage, moisture problems, or anything you don’t understand, don’t guess your way through it.
Conclusion
DIY home improvement is not about making the biggest changes or spending the most money. It is about making smart improvements that solve real problems, improve everyday comfort, and make your home feel more functional and personal. A carefully planned paint project, better storage solution, furniture makeover, updated hardware, or improved lighting can create a surprisingly noticeable difference without requiring a complete renovation.
The best approach is to start small, plan carefully, measure accurately, and focus on quality rather than speed. Choose projects that match your experience, use materials that are appropriate for the job, and give enough attention to preparation and finishing. A project may be simple, but rushing it can quickly make the final result look unfinished.
Most importantly, know your limits. Cosmetic and low-risk improvements are excellent opportunities to save money and develop useful skills, while structural, gas, major electrical, and complex plumbing work should be handled by qualified professionals when necessary.
With the right mindset, every successful DIY project becomes more than an improvement to your home—it becomes experience you can use on the next one. Start with one practical project, complete it properly, learn from the process, and gradually turn your home into a space that works better for you.
Leave a Reply